Introduction
Architecture
Design
light-4j
PBKDF2 Upgrade and CRYPT Format Compatibility
This document describes the proposed upgrade path for PBKDF2 usage in
light-4j, with special focus on encrypted configuration values that use the
CRYPT prefix.
The immediate operational issue is compatibility. The new light-encryptor
emits only the four-part AES-GCM format, while existing deployed configuration
may still contain the legacy three-part AES-CBC format. The light-4j
decryptor should read both formats so services can upgrade safely without
requiring every encrypted configuration value to be regenerated at the same
time.
Background
There are two separate PBKDF2 use cases in light-4j:
AESSaltDecryptorderives an AES key from a configured master password for decrypting encrypted configuration values.HashUtilgenerates and validates PBKDF2 password or API-key hashes.
These two paths should not be upgraded in exactly the same way. OWASP password
storage guidance applies directly to password and API-key hashes, where PBKDF2
is the password hashing function. The CRYPT path uses PBKDF2 as a key
derivation function before AES encryption. It has its own compatibility
constraints because the encrypted value format historically did not include an
algorithm version or iteration count.
Current OWASP guidance recommends PBKDF2-HMAC-SHA256 with 600,000 iterations
for password storage. See the OWASP Password Storage Cheat Sheet:
https://cheatsheetseries.owasp.org/cheatsheets/Password_Storage_Cheat_Sheet.html
Current CRYPT Formats
Legacy Three-Part Format
The legacy format is:
CRYPT:<hex-salt>:<hex-ciphertext>
The legacy implementation uses:
PBKDF2WithHmacSHA256- 65,536 iterations
- 256-bit AES key
AES/CBC/PKCS5Padding- a static zero IV
This format is still present in older deployed service configuration and older test fixtures. It should be treated as deprecated but readable.
The main security weakness is the static zero IV in CBC mode. With a fixed IV, the same plaintext encrypted with the same derived key produces the same first ciphertext block. That can reveal equality or common prefixes across encrypted configuration values. For this reason, legacy CBC support must be read-only and the runtime should warn when it decrypts a legacy value.
Current Four-Part Format
The current light-encryptor output format is:
CRYPT:<hex-salt>:<hex-iv>:<hex-ciphertext-and-tag>
The current implementation uses:
PBKDF2WithHmacSHA256- 65,536 iterations
- 256-bit AES key
AES/GCM/NoPadding- random 16-byte salt
- random 12-byte GCM IV
- 128-bit GCM authentication tag
This is the only format that light-encryptor should emit going forward.
Goals
- Allow
light-4jruntime decryptors to read both legacy three-partCRYPTvalues and current four-partCRYPTvalues. - Keep
light-encryptorsimple by generating only the current four-part AES-GCM format. - Avoid breaking existing checked-in or deployed encrypted configuration during framework upgrades.
- Make the future PBKDF2 cost upgrade explicit instead of overloading an unversioned format.
- Preserve clear error messages that identify invalid
CRYPTformatting.
Non-Goals
- Do not make
light-encryptorgenerate legacy three-part values. - Do not silently re-encrypt configuration files at runtime.
- Do not change the meaning of existing four-part
CRYPT:salt:iv:hashvalues without adding a versioned format. - Do not apply OWASP password-storage iteration guidance blindly to every PBKDF2 use without measuring startup and request-time cost.
Design
1. Add Format Dispatch in AESSaltDecryptor
AESSaltDecryptor.decrypt(String input) should parse the token count and route
to the correct decryptor:
parts.length == 3 -> decryptLegacyCbc(parts)
parts.length == 4 -> decryptGcm(parts)
otherwise         -> invalid CRYPT format
Use split(":", -1) so malformed values with empty fields are still detected
as malformed fields instead of being accidentally normalized by String.split.
Suggested method shape:
public String decrypt(String input) {
    if (input == null || !input.startsWith(CRYPT_PREFIX + ":")) {
        throw new RuntimeException("Unable to decrypt, input string does not start with 'CRYPT:'.");
    }

    String[] parts = input.split(":", -1);
    return switch (parts.length) {
        case 3 -> decryptLegacyCbc(parts);
        case 4 -> decryptGcm(parts);
        default -> throw invalidCryptFormat();
    };
}
The error text should mention both accepted formats:
CRYPT:salt:hash
CRYPT:salt:iv:hash
The implementation should validate that required fields are non-empty before hex decoding. A malformed value should fail as a format error, while a bad master password, corrupted ciphertext, or failed GCM authentication tag should fail as a cryptographic error. The public exception message should remain generic enough that it does not disclose secret material, but the internal log message should let an operator distinguish invalid structure from failed decryption.
2. Keep Legacy CBC Decryption Read-Only
The legacy path should preserve the previous behavior exactly:
- parse salt from
parts[1] - parse ciphertext from
parts[2] - derive the AES key with
PBKDF2WithHmacSHA256, 65,536 iterations, 256-bit key - decrypt with
AES/CBC/PKCS5Padding - use the legacy static zero IV
This path exists only to keep existing configuration readable. It should not be
used by light-encryptor for new values.
When this path is used, the decryptor should log a throttled warning, ideally once per JVM or once per unique legacy value:
Legacy three-part CRYPT value decrypted. Regenerate this secret with the current
light-encryptor to migrate to AES-GCM.
The warning must not include the encrypted value, plaintext secret, derived key, master password, salt, or ciphertext.
3. Keep Four-Part GCM as the Default Format
The four-part path should preserve the current behavior:
- parse salt from
parts[1] - parse IV from
parts[2] - parse ciphertext plus tag from
parts[3] - derive the AES key with
PBKDF2WithHmacSHA256, 65,536 iterations, 256-bit key - decrypt with
AES/GCM/NoPadding - use a 128-bit authentication tag
light-encryptor should keep emitting only this format.
4. Cache Derived Keys by KDF Parameters
The existing cache key is based on salt. That is enough while all supported formats use the same PBKDF2 algorithm, iteration count, and key size, but it is not a good foundation for the next upgrade.
Use a cache key that includes the KDF parameters:
<kdf-algorithm>:<iterations>:<key-size>:<salt-hex>
This prevents a future format from accidentally reusing a key derived with old parameters.
The cache key does not need to include the master password as long as the master
password is fixed for the JVM lifetime, which matches the current
AutoAESSaltDecryptor environment-variable model. If a future implementation
allows hot reload of the master password without a JVM restart, the cache must
be cleared on password change or the password identity must become part of the
cache key.
5. Avoid Shared Cipher Instances
Cipher instances are mutable and should not be shared across concurrent
requests. Each decrypt operation should create and initialize a local Cipher.
The cache should store only derived SecretKeySpec values.
6. Keep Error Handling Actionable
The decryptor should separate three categories internally:
- format errors, such as missing fields, empty fields, invalid hex, or an unsupported number of parts
- key derivation errors, such as an unavailable PBKDF2 algorithm
- cryptographic failures, such as an incorrect master password, corrupted ciphertext, or AES-GCM tag failure
All categories should avoid logging sensitive values. GCM tag failures should not be downgraded or ignored; they are the authenticated-encryption signal that the value cannot be trusted.
PBKDF2 Iteration Upgrade
Password and API-Key Hashes
For HashUtil, new hashes should move to a versioned format that records the
algorithm and iteration count. For example:
pbkdf2-sha256:600000:<hex-salt>:<hex-hash>
Validation should support both:
<iterations>:<hex-salt>:<hex-hash>
pbkdf2-sha256:<iterations>:<hex-salt>:<hex-hash>
The legacy three-part password-hash format should continue to validate with its
original algorithm, PBKDF2WithHmacSHA1, because the stored value does not
record the algorithm. New hashes should use PBKDF2WithHmacSHA256 and 600,000
iterations.
Hash comparison should use a constant-time byte-array comparison such as
MessageDigest.isEqual(...). This avoids early-exit comparison behavior when
validating passwords or API keys.
For API keys, request-time cost must be measured before rollout because
ApiKeyHandler can call HashUtil.validatePassword(...) during request
authentication when hashed API keys are enabled.
HashUtil should also expose a helper such as needsRehash(String storedHash)
so callers that can persist credentials can upgrade legacy hashes after a
successful validation.
CRYPT Values
The current four-part CRYPT format does not contain an iteration count. If the
decryptor changes four-part values from 65,536 iterations to 600,000 iterations
without a version marker, existing four-part values will become unreadable.
Therefore, the compatibility fix should keep both three-part CBC and four-part GCM values on the existing 65,536-iteration KDF. A later cost increase for encrypted configuration should introduce a versioned format, for example:
CRYPT2:<kdf-algorithm>:<iterations>:<hex-salt>:<cipher-algorithm>:<hex-iv>:<hex-ciphertext-and-tag>
That future format can use 600,000 iterations, or another measured value, while
the existing CRYPT formats remain readable.
Because configuration decryption usually happens during startup and unique salts can be cached after the first derivation, a higher iteration count is more practical here than it is for per-request API-key validation. A reasonable target for the future versioned format is a measured startup cost, for example 100 ms to 200 ms per unique salt on supported deployment hardware. The exact iteration count should be selected from benchmark data rather than copied directly from password-storage guidance.
Rollout Plan
- Update
light-4jAESSaltDecryptorto read both three-part CBC and four-part GCM formats. - Add regression tests for both formats with known ciphertext fixtures.
- Release the compatible
light-4jdecryptor. - Keep
light-encryptorgenerating only four-part GCM values. - Log a throttled warning whenever the legacy three-part CBC path is used.
- Gradually regenerate old three-part values with the new
light-encryptorwhen configuration files are touched. - Add a scanner or CI check that can report remaining three-part
CRYPTvalues, but do not fail builds until downstream repositories have migrated. - Add a command-line migration utility that can rewrite legacy values after decrypting them with the configured master password.
- Design and implement a separate versioned format before increasing the KDF
iteration count for
CRYPTvalues.
Test Plan
Add focused tests in decryptor:
- decrypts a known legacy
CRYPT:salt:hashvalue to the expected plaintext - decrypts a known current
CRYPT:salt:iv:hashvalue to the expected plaintext - rejects malformed values with fewer than three parts
- rejects malformed values with more than four parts
- rejects empty salt, IV, or ciphertext fields
- verifies
AutoAESSaltDecryptorandManualAESSaltDecryptorinherit the same compatibility behavior
Add config-loading coverage:
- one YAML fixture with a legacy three-part value
- one YAML fixture with a four-part value
- one JSON-style config fixture if the existing config tests cover encrypted values in JSON strings
Add migration checks:
rg -n "CRYPT:[^:[:space:]]+:[^:[:space:]]+(\\s|$)" .
This reports likely legacy three-part values. Each match should be reviewed before replacement because grep is only a locator, not a parser.
Operational Notes
Services should be upgraded to a compatible light-4j decryptor before new
four-part encrypted values are deployed to their configuration. Older runtimes
that only support the three-part CBC format cannot decrypt values generated by
the current light-encryptor.
The compatibility decryptor should log enough detail to identify a format problem, but it must not log plaintext secrets, derived keys, ciphertext bytes, or the master password.
Open Questions
- What package should own the migration utility:
light-encryptor,light-4j, or a small standalone migration artifact? - What benchmark baseline should define the future
CRYPT2KDF cost across container, VM, and local developer environments? - Which
HashUtilcallers can safely persist upgraded hashes afterneedsRehash(...)returns true?
light-genai-4j
Memory and Embedding Design
Overview
This document outlines the design decisions for memory management, embedding models, and storage architecture for the light-genai-4j agent system.
For agent skills and tool execution, see Agent Skill Design.
1. Embedding Model Selection
1.1 Chosen Model: BGE-small-en-v1.5 (Quantized)
Artifact: bge-small-en-v15-q (migrated from langchain4j)
Specifications:
- Dimensions: 384
- Pooling Mode: CLS (uses [CLS] token representation)
- Model Size: ~17MB (quantized version)
- Language: English (primary), supports basic multilingual capability
- Source: BAAI (Beijing Academy of Artificial Intelligence)
1.2 Why BGE-small-en-v1.5?
| Use Case | Requirement | How BGE Fits |
|---|---|---|
| Short-term Memory | Fast retrieval of recent context | Optimized for semantic similarity search |
| Long-term Memory | Finding relevant past conversations | State-of-the-art for asymmetric retrieval (query → document) |
| Knowledge Base | RAG (Retrieval-Augmented Generation) | Best-in-class for information retrieval |
1.3 Comparison with Alternatives
| Model | Dimensions | Best For | Why Not Chosen |
|---|---|---|---|
| all-MiniLM-L6-v2 | 384 | General similarity | Not optimized for retrieval tasks |
| E5-small-v2 | 384 | Asymmetric search | Query/passage prefixes more complex |
| BGE-small-en | 384 | English retrieval | v1.5 has better performance |
| BGE-small-zh-v1.5 | 512 | Chinese | Different dimensions (see Section 4) |
1.4 Usage Pattern
// For queries (retrieving memories/knowledge)
String queryPrefix = "Represent this sentence for searching relevant passages:";
String query = queryPrefix + " " + userMessage;

// For storing (memories, knowledge documents)
String document = conversationText; // No prefix needed
2. Vector Database: PostgreSQL with pgvector
2.1 Schema Design
The schema adopts a scope-based memory model (similar to mem0), organizing memory by lifetime and visibility rather than abstract types.
-- Enable pgvector extension
CREATE EXTENSION IF NOT EXISTS vector;

-- Session Memory (Short-term)
-- Stores in-flight conversation context. Auto-expires via TTL.
CREATE TABLE session_memories (
    id UUID PRIMARY KEY DEFAULT gen_random_uuid(),
    session_id UUID NOT NULL,
    agent_id UUID NOT NULL,
    user_id UUID, -- NULL allowed for anonymous sessions or background system tasks
    content TEXT NOT NULL,
    embedding VECTOR(384),
    importance_score FLOAT DEFAULT 1.0,
    created_at TIMESTAMP DEFAULT NOW(),
    expires_at TIMESTAMP DEFAULT NOW() + INTERVAL '1 hour', -- TTL
    metadata JSONB -- Rich filtering (e.g., {"topic": "debug", "turn": 5})
);

-- User Memory (Long-term)
-- Stores persistent facts/preferences about a user. Manual or inferred.
CREATE TABLE user_memories (
    id UUID PRIMARY KEY DEFAULT gen_random_uuid(),
    agent_id UUID NOT NULL,
    user_id UUID NOT NULL, -- Must be tied to a specific user
    content TEXT NOT NULL, -- e.g., "User prefers Java over Python"
    embedding VECTOR(384),
    memory_type VARCHAR(50), -- 'fact', 'preference', 'summary'
    importance_score FLOAT DEFAULT 1.0,
    access_count INTEGER DEFAULT 0,
    created_at TIMESTAMP DEFAULT NOW(),
    last_accessed TIMESTAMP DEFAULT NOW(),
    metadata JSONB -- e.g., {"confidence": 0.9, "source": "conversation_123"}
);

-- Agent Memory (Private/Operational)
-- Stores agent-specific learning, state, or persistent persona data.
-- Scope: Private to the agent, typically across multiple users or sessions.
CREATE TABLE agent_memories (
    id UUID PRIMARY KEY DEFAULT gen_random_uuid(),
    agent_id UUID NOT NULL,
    -- NO user_id: This is agent-centric knowledge
    content TEXT NOT NULL,
    embedding VECTOR(384),
    memory_type VARCHAR(50), -- 'learning', 'state', 'persona', 'scratchpad'
    created_at TIMESTAMP DEFAULT NOW(),
    metadata JSONB
);

-- Organizational Memory (Knowledge Base)
-- Stores global, shared knowledge available to all agents/users.
CREATE TABLE organizational_memories (
    id UUID PRIMARY KEY DEFAULT gen_random_uuid(),
    agent_id UUID NOT NULL,
    source VARCHAR(255), -- Document source/name
    content TEXT NOT NULL,
    embedding VECTOR(384),
    chunk_index INTEGER, -- For large documents split into chunks
    document_id UUID, -- Reference to parent document
    created_at TIMESTAMP DEFAULT NOW(),
    metadata JSONB -- e.g., {"department": "HR", "version": "1.0"}
);

-- Indexes for similarity search and metadata filtering
CREATE INDEX idx_session_memory_embedding ON session_memories
    USING ivfflat (embedding vector_cosine_ops) WITH (lists = 100);
CREATE INDEX idx_session_metadata ON session_memories USING GIN (metadata);

CREATE INDEX idx_user_memory_embedding ON user_memories
    USING ivfflat (embedding vector_cosine_ops) WITH (lists = 100);
CREATE INDEX idx_user_metadata ON user_memories USING GIN (metadata);

CREATE INDEX idx_agent_memory_embedding ON agent_memories
    USING ivfflat (embedding vector_cosine_ops) WITH (lists = 100);
CREATE INDEX idx_agent_metadata ON agent_memories USING GIN (metadata);

CREATE INDEX idx_org_memory_embedding ON organizational_memories
    USING ivfflat (embedding vector_cosine_ops) WITH (lists = 100);
CREATE INDEX idx_org_metadata ON organizational_memories USING GIN (metadata);
2.2 Memory Lifecycle
The system follows a promotion strategy:
User Input
    │
    ▼
┌─────────────────────────────────────┐
│  Query Embedding (with prefix)      │
└─────────────────────────────────────┘
    │
    ├──► Search Session Memory (Context)
    │     └── Recent turns, immediate task context
    │
    ├──► Search User Memory (Personalization)
    │     └── User preferences, past decisions, facts
    │
    ├──► Search Agent Memory (Self-Knowledge)
    │     └── Agent persona, learned behaviors, operational state
    │
    └──► Search Organizational Memory (Knowledge)
          └── Policies, docs, FAQs
    │
    ▼
Consolidated Context → LLM
    │
    ▼
Store Response ──────► Session Memory
    │                         │
    │                         ▼
    │              (Optional: Extraction/Inference)
    │              Run LLM to extract facts from conversation
    │                         │
    │          ┌──────────────┴──────────────┐
    │          ▼                             ▼
    │   User Memory                   Agent Memory
    │   (User Facts)                  (Agent Learnings)
    │
    ▼
    (Session ends)
    Session Memory Expires
2.3 Memory Retrieval Strategy
public class MemoryService {

    public List<Memory> retrieveRelevantMemories(String query, UUID sessionId, UUID userId, UUID agentId) {
        // 1. Embed the query with prefix
        String prefixedQuery = "Represent this sentence for searching relevant passages: " + query;
        Embedding queryEmbedding = embeddingModel.embed(prefixedQuery);

        // 2. Search Session Memory (Short-term context)
        List<Memory> sessionContext = searchSession(queryEmbedding, sessionId, limit = 10);

        // 3. Search User Memory (Personalization)
        List<Memory> userFacts = searchUser(queryEmbedding, userId, limit = 5);

        // 4. Search Agent Memory (Agent Self-Knowledge)
        List<Memory> agentFacts = searchAgent(queryEmbedding, agentId, limit = 3);

        // 5. Search Organizational Memory (Knowledge Base)
        List<Memory> orgKnowledge = searchOrg(queryEmbedding, agentId, limit = 5);

        // 6. Combine and Rerank
        return combineAndRank(sessionContext, userFacts, agentFacts, orgKnowledge);
    }

    private List<Memory> searchSession(Embedding query, UUID sessionId, int limit) {
        String sql = """
            SELECT id, content, embedding <=> ? AS distance
            FROM session_memories
            WHERE session_id = ? AND expires_at > NOW()
            ORDER BY embedding <=> ?
            LIMIT ?
            """;
        // Execute query...
    }
}
3. Scaling & Advanced Patterns
3.1 HNSW Indexing (Hierarchical Navigable Small World)
As the organizational memory grows (millions of records), standard ivfflat indexes may become too slow or inaccurate. We recommend using HNSW indexes for scalable vector search.
Implementation in pgvector:
-- Replace standard index with HNSW
CREATE INDEX idx_org_memory_hnsw ON organizational_memories
    USING hnsw (embedding vector_cosine_ops)
    WITH (m = 16, ef_construction = 64);
m: Max connections per layer (higher = better recall, larger index).ef_construction: Size of dynamic list during build (higher = better quality, slower build).
3.2 GraphRAG (Future Roadmap)
To support multi-hop reasoning (e.g., “How does Project X relate to Policy Y?”), standard vector search is insufficient. GraphRAG combines vector search with knowledge graph traversal.
Relational Graph Schema (PostgreSQL): Instead of a separate Graph DB, we can model entities and relationships directly in SQL.
-- Extracted Entities (Nodes)
CREATE TABLE entities (
    id UUID PRIMARY KEY,
    name VARCHAR(255),
    type VARCHAR(50), -- 'Person', 'Project', 'Technology'
    description TEXT,
    embedding VECTOR(384) -- For hybrid search
);

-- Relationships (Edges)
CREATE TABLE relationships (
    source_id UUID REFERENCES entities(id),
    target_id UUID REFERENCES entities(id),
    relation_type VARCHAR(50), -- 'CREATED_BY', 'DEPENDS_ON'
    description TEXT,
    weight FLOAT DEFAULT 1.0,
    PRIMARY KEY (source_id, target_id, relation_type)
);

-- Linking Text Chunks to Knowledge Graph
CREATE TABLE memory_entities (
    memory_id UUID REFERENCES organizational_memories(id),
    entity_id UUID REFERENCES entities(id),
    PRIMARY KEY (memory_id, entity_id)
);
3.3 Evaluation of Recursive Language Models (RLM)
We evaluated Recursive Language Models (RLM) as a potential solution for large-scale memory.
Conclusion: NOT ADOPTED as Storage Architecture.
RLM is an inference strategy (processing huge inputs by letting an LLM recursively chunk and summarize text via code execution), not a storage solution.
- Pros: Can “reason” over 10M+ tokens without context rot.
- Cons: Extremely slow (minutes), high cost, and requires complex code execution sandboxing.
Recommendation: Use PostgreSQL/pgvector (with HNSW) as the primary storage. Implement RLM-like logic only as a specific “Deep Research” Skill (e.g., analyze_large_document) if the agent needs to process massive files on-demand, but do not use it for general memory retrieval.
4. Internationalization: Chinese Support
3.1 The Dimension Problem
- BGE-small-en-v1.5: 384 dimensions
- BGE-small-zh-v1.5: 512 dimensions
Cannot mix in same vector column!
3.2 Solutions
Option A: Separate Tables (Recommended)
-- English memories
CREATE TABLE short_term_memories_en (
    -- ... same schema ...
    embedding VECTOR(384)
);

-- Chinese memories
CREATE TABLE short_term_memories_zh (
    -- ... same schema ...
    embedding VECTOR(512)
);

-- Query both and merge results in application layer
Option B: Unified Multilingual Model
When adding Chinese support, switch to a multilingual model:
| Model | Dimensions | Languages | Trade-off |
|---|---|---|---|
| BGE-small-en-v1.5 | 384 | En + basic multilingual | Use for both initially |
| BGE-base-en-v1.5 | 768 | Better multilingual | Higher dimensions |
| Multilingual-E5 | 384 | 100+ languages | May require re-embedding |
Option C: Re-embed Everything
When ready for Chinese:
- Choose new multilingual model
- Re-embed all existing memories
- Single table with new dimensions
3.3 Recommendation
Phase 1 (English only):
- Use
BGE-small-en-v1.5-q(384d) - Single table structure
Phase 2 (Add Chinese):
- Option: Use
BGE-small-en-v1.5for both (decent Chinese support) - Or create separate
_zhtables withBGE-small-zh-v1.5(512d) - Query service merges results from both tables
4. Implementation Guidelines
4.1 Dependencies
<!-- pom.xml -->
<dependency>
    <groupId>com.networknt</groupId>
    <artifactId>bge-small-en-v15-q</artifactId>
    <version>${project.version}</version>
</dependency>

<dependency>
    <groupId>org.postgresql</groupId>
    <artifactId>postgresql</artifactId>
    <version>42.7.1</version>
</dependency>
4.2 Configuration
# application.yml
memory:
  embedding:
    model: bge-small-en-v1.5-q
    dimensions: 384
    query-prefix: "Represent this sentence for searching relevant passages:"

  storage:
    type: postgresql
    url: ${PGVECTOR_URL}
    username: ${PGVECTOR_USER}
    password: ${PGVECTOR_PASSWORD}

  short-term:
    ttl-minutes: 60
    max-memories: 100

  long-term:
    min-importance: 0.5
    max-results: 10

  knowledge:
    chunk-size: 512
    overlap: 50
4.3 Key Design Principles
- Separate Concerns: Vector DB for semantic search, SQL for structured data
- Query Prefixing: Always use BGE’s recommended prefix for queries
- Lifecycle Management: Short-term expires, long-term persists, both consolidate
- Dimension Consistency: Plan for Chinese support from day one
5. References
Agent Skill Tool Design
Overview
This document outlines the design decisions for agent skills, tools, their relationship (Progressive Disclosure), and the execution architecture for the light-genai-4j agent system.
1. Defining Skills vs. Tools
In the light-genai-4j agent architecture, we adhere to the Model Context Protocol (MCP) separation of concerns:
- Skills (The “Expertise”): Sets of instructions, workflows, or domain knowledge that teach the agent how to think and behave. They are declarative and loaded into the LLM’s prompt.
- Tools (The “Hands”): Deterministic, executable functions (like APIs, DB queries, or MCP server calls) that take action in the world.
2. Progressive Disclosure
To optimize LLM context window usage and prevent token bloat, we use the Progressive Disclosure pattern:
- Agent -> Skills: An agent is assigned a set of skills. When the agent starts, it only loads the high-level descriptions of its assigned skills into its system prompt.
- Skill -> Tools: Each skill is mapped to one or more tools. When the LLM decides to use a specific skill based on its description, the system dynamically fetches and registers the associated tool definitions (JSON schemas) into the LLM’s context.
3. Database Schema
3.1 Skills
Skills define the instructions and logic.
CREATE TABLE skill_t (
    host_id             UUID NOT NULL,
    skill_id            UUID NOT NULL,
    parent_skill_id     UUID,
    name                VARCHAR(126) NOT NULL,
    description         VARCHAR(500),          -- High-level description for the initial LLM prompt
    content_markdown    TEXT NOT NULL,         -- The detailed instructions/prompts
    description_embedding VECTOR(384),         -- For semantic lookup/discovery

    version             VARCHAR(20) DEFAULT '1.0.0',
    aggregate_version   BIGINT DEFAULT 1 NOT NULL,
    active              BOOLEAN DEFAULT true,
    update_ts           TIMESTAMP WITH TIME ZONE DEFAULT CURRENT_TIMESTAMP,
    update_user         VARCHAR(126) DEFAULT SESSION_USER,
    PRIMARY KEY(host_id, skill_id),
    FOREIGN KEY(host_id, parent_skill_id) REFERENCES skill_t(host_id, skill_id)
);

CREATE INDEX idx_skill_active ON skill_t(active);
CREATE INDEX idx_skill_name ON skill_t(name);
3.2 Tools
Tools define the technical execution metadata.
CREATE TABLE tool_t (
    host_id             UUID NOT NULL,
    tool_id             UUID NOT NULL,
    name                VARCHAR(126) NOT NULL,
    description         TEXT NOT NULL,         -- Instructions for LLM on when/how to use this tool

    -- Implementation specifics
    implementation_type VARCHAR(50),           -- 'java', 'mcp_server', 'rest', 'python', 'javascript'
    implementation_class VARCHAR(500),         -- FQCN if 'java'
    mcp_server_name      VARCHAR(126),         -- MCP server name if 'mcp_server'
    api_endpoint        VARCHAR(1024),         -- URL if 'rest'
    api_method          VARCHAR(10),           -- HTTP Method if 'rest'
    script_content      TEXT,                  -- Source code if 'python'/'javascript'
    description_embedding VECTOR(384),         -- For semantic lookup/discovery

    version             VARCHAR(20) DEFAULT '1.0.0',
    aggregate_version   BIGINT DEFAULT 1 NOT NULL,
    active              BOOLEAN DEFAULT true,
    update_ts           TIMESTAMP WITH TIME ZONE DEFAULT CURRENT_TIMESTAMP,
    update_user         VARCHAR(126) DEFAULT SESSION_USER,
    PRIMARY KEY(host_id, tool_id)
);

CREATE INDEX idx_tool_active ON tool_t(active);
CREATE INDEX idx_tool_name ON tool_t(name);
3.3 Tool Parameters
Defines the arguments for each tool, mapping directly to JSON Schema used by LangChain4j.
CREATE TABLE tool_param_t (
    host_id             UUID NOT NULL,
    param_id            UUID NOT NULL,
    tool_id             UUID NOT NULL,
    name                VARCHAR(255) NOT NULL,
    param_type          VARCHAR(50) NOT NULL,      -- 'string', 'number', 'boolean', 'object', 'array'
    required            BOOLEAN DEFAULT true,
    default_value       JSONB,
    description         TEXT,                      -- Helps LLM understand what value to extract
    validation_schema   JSONB,                     -- JSON Schema for complex validation
    order_index         INTEGER DEFAULT 0,
    aggregate_version   BIGINT DEFAULT 1 NOT NULL,
    active              BOOLEAN DEFAULT true,
    update_ts           TIMESTAMP WITH TIME ZONE DEFAULT CURRENT_TIMESTAMP,
    update_user         VARCHAR(126) DEFAULT SESSION_USER,
    PRIMARY KEY(host_id, param_id),
    FOREIGN KEY(host_id, tool_id) REFERENCES tool_t(host_id, tool_id) ON DELETE CASCADE
);
3.4 Mappings and Dependencies
Agent to Skill Mapping (agent_skill_t)
Defines an agent’s capabilities (which skills it possesses).
CREATE TABLE agent_skill_t (
    host_id             UUID NOT NULL,
    agent_def_id        UUID NOT NULL,
    skill_id            UUID NOT NULL,

    config              JSONB DEFAULT '{}',
    priority            INTEGER DEFAULT 0,
    sequence_id         INTEGER DEFAULT 0,

    aggregate_version   BIGINT DEFAULT 1 NOT NULL,
    active              BOOLEAN DEFAULT true,
    update_ts           TIMESTAMP WITH TIME ZONE DEFAULT CURRENT_TIMESTAMP,
    update_user         VARCHAR(126) DEFAULT SESSION_USER,
    PRIMARY KEY(host_id, agent_def_id, skill_id),
    FOREIGN KEY(host_id, agent_def_id) REFERENCES agent_definition_t(host_id, agent_def_id) ON DELETE CASCADE,
    FOREIGN KEY(host_id, skill_id) REFERENCES skill_t(host_id, skill_id) ON DELETE CASCADE
);
CREATE INDEX idx_agent_skill_agent ON agent_skill_t(agent_def_id);
Skill to Tool Mapping (skill_tool_t)
Implements the Progressive Disclosure pattern linking tools needed by specific skills.
CREATE TABLE skill_tool_t (
    host_id             UUID NOT NULL,
    skill_id            UUID NOT NULL,
    tool_id             UUID NOT NULL,

    config              JSONB DEFAULT '{}',
    access_level        VARCHAR(20) DEFAULT 'read', -- e.g., 'read', 'write', 'execute'

    aggregate_version   BIGINT DEFAULT 1 NOT NULL,
    active              BOOLEAN DEFAULT true,
    update_ts           TIMESTAMP WITH TIME ZONE DEFAULT CURRENT_TIMESTAMP,
    update_user         VARCHAR(126) DEFAULT SESSION_USER,
    PRIMARY KEY(host_id, skill_id, tool_id),
    FOREIGN KEY(host_id, skill_id) REFERENCES skill_t(host_id, skill_id) ON DELETE CASCADE,
    FOREIGN KEY(host_id, tool_id) REFERENCES tool_t(host_id, tool_id) ON DELETE CASCADE
);
CREATE INDEX idx_skill_tool_skill ON skill_tool_t(skill_id);
Skill Dependencies (skill_dependency_t)
Manages hierarchies where one skill requires another.
CREATE TABLE skill_dependency_t (
    host_id             UUID NOT NULL,
    skill_id            UUID NOT NULL,
    depends_on_skill_id UUID NOT NULL,
    required            BOOLEAN DEFAULT true,

    aggregate_version   BIGINT DEFAULT 1 NOT NULL,
    active              BOOLEAN DEFAULT true,
    update_ts           TIMESTAMP WITH TIME ZONE DEFAULT CURRENT_TIMESTAMP,
    update_user         VARCHAR(126) DEFAULT SESSION_USER,
    PRIMARY KEY (host_id, skill_id, depends_on_skill_id),
    FOREIGN KEY(host_id, skill_id) REFERENCES skill_t(host_id, skill_id),
    FOREIGN KEY(host_id, depends_on_skill_id) REFERENCES skill_t(host_id, skill_id)
);
4. Implementation Types
The tool_t table supports various implementation_type values to determine how a tool is physically executed:
java: Local Java class execution mapping to@Toolmethods (Fastest, Primary).mcp_server: Connect to an external Model Context Protocol server (Standard for 3rd party tools).rest: Direct HTTP/REST API calls.python/javascript: Dynamic script execution.
Event-Driven Agent Architecture
Overview
This document details the Event-Driven Architecture (EDA) for the light-genai-4j agent system. This architecture decouples agent invocation from execution, enabling high scalability, resilience, and asynchronous processing suitable for enterprise workloads.
1. Core Architecture
While SQL defines what a skill is (see Agent Skill Design), the implementation for enterprise usage leverages an Event-Driven Architecture (EDA). This decouples the agent requesting the skill (the “invoker”) from the agent or service executing the skill (the “worker”).
1.1 Core Components
- Invoker Agent: The agent that decides to call a tool/skill.
- A2A Service (
genai-agentic-kafka): The bridge between the synchronousAgentExecutorand the asynchronous message bus. - Topic Topology:
agent-commands: Topics where agents publish intent/skill execution requests.agent-events: Topics where agents/workers publish completion events.
1.2 Execution Flow
- LLM Decision: The LLM outputs a
ToolExecutionRequest. - Interception: The
AgentExecutor’sA2AServiceimplementation intercepts this request. - Command Emission:
- Instead of executing a Java method directly, it constructs a
SkillInvocationEventcontaining:correlationId: Unique ID for this interaction.skillName: Name of the skill to execute.arguments: JSON payload of arguments.replyTo: Topic to send the result to.
- This event is published to the
agent-commandstopic.
- Instead of executing a Java method directly, it constructs a
- Async Wait: The
AgentExecutorreturns anAsyncResponse(aCompletableFuture) and suspends the agent’s execution thread (virtually, if using Virtual Threads). - Worker Execution:
- A subscribed “Skill Worker” (which could be another Generic Agent or a dedicated microservice) picks up the event.
- It executes the logic (DB query, API call, calculation).
- Response Emission:
- The worker publishes a
SkillCompletionEventto thereplyTotopic. - Payload includes
correlationIdand the result/error.
- The worker publishes a
- Resumption:
- The original
A2AServiceconsumes the completion event. - It matches the
correlationIdand completes the pendingCompletableFuture. - The Agent resumes generation with the tool output.
- The original
1.3 Benefits
- Scalability: Heavy skills (e.g., “Generate Report”) don’t block the lightweight Agent Commander.
- Resilience: If the Worker is down, the command persists in Kafka.
- Decoupling: Agents don’t need to know the network location of skills.
2. Relationship with MCP (Model Context Protocol)
With this design, the agent system does not require an MCP server architecture. The skills table allows direct invocation of any capability (Java code, REST APIs, GraphQL, scripts) without the overhead or complexity of the MCP protocol.
2.1 Comparison
| Feature | Light GenAI 4j Design | MCP Server Architecture |
|---|---|---|
| Execution | In-process (Java) or Event-Driven | Networked JSON-RPC |
| Latency | Near-zero (local) / Async (EDA) | HTTP/Network round-trip |
| Control | Full SQL schema & validation | Remote server definition |
| Complexity | Low (Unified DB/Kafka) | High (Separate servers/processes) |
| Ecosystem | Custom integrations | Community-maintained tools |
3. Implementation Guidelines
3.1 Dependencies
<!-- pom.xml -->
<dependency>
    <groupId>com.networknt</groupId>
    <artifactId>genai-agentic-kafka</artifactId> <!-- Future Module -->
    <version>${project.version}</version>
</dependency>
3.2 Design Principles
- Asynchrony: Default to async/event-driven for any I/O heavy skill.
- Correlation: Use
correlationIdrigorously to track request/response pairs across the bus. - Idempotency: Workers should handle duplicate events gracefully.
light-hybrid-4j
JSON-RPC 2.0 Migration for light-hybrid-4j
1. Introduction
The light-hybrid-4j framework is the backbone of the light-portal, acting as a highly efficient, modularized monolithic architecture. Currently, it relies on a bespoke JSON structure containing a 4-tuple (host, service, action, version) alongside the domain data.
With the introduction of the Model Context Protocol (MCP) as a first-class citizen in the light-gateway ecosystem, the need for a standardized RPC format has become critical. MCP relies entirely on JSON-RPC 2.0.
This document outlines the architectural design and migration strategy for adapting light-hybrid-4j to natively support the JSON-RPC 2.0 standard.
2. Benefits and Motivations
2.1 Native MCP Integration
By standardizing light-hybrid-4j to JSON-RPC 2.0, every single command and query service instantly becomes a native MCP tool. The light-gateway can route traffic without requiring any expensive payload translation layer. AI Agents can directly call our backend microservices out-of-the-box.
2.2 Immediate Ecosystem Compatibility
The custom payload format forces third-party developers (and internal UI components) to format their requests manually. JSON-RPC 2.0 is an industry staple with massive ecosystem support (SDKs, Postman, test runners).
2.3 Batch Processing
JSON-RPC 2.0 native batch capabilities allow the portal-view UI to aggregate multiple independent queries into a single HTTP request packet, vastly reducing network overhead and HTTP/2 connection pooling complexity.
2.4 Separation of Concerns
The current payload mixes routing topology (host, service, action, version) and UI metadata (success, failure, title) with actual domain data (data). JSON-RPC forces a clean boundary: routing is handled entirely by the method, while domain data is strictly isolated to the params object.
3. Architecture Design
3.1 Mapping to JSON-RPC 2.0
The legacy light-hybrid-4j request looks like this:
{
  "host": "lightapi.net",
  "service": "service",
  "action": "createApiVersion",
  "version": "0.1.0",
  "title": "Create Api Version",
  "success": "/app/success",
  "failure": "/app/failure",
  "data": {
    "apiId": "MCP0001",
    "hostId": "01964b05-552a-7c4b-9184-6857e7f3dc5f"
  }
}
This will be mapped to the standard JSON-RPC 2.0 format:
{
  "jsonrpc": "2.0",
  "method": "lightapi.net/service/createApiVersion/0.1.0",
  "params": {
    "apiId": "MCP0001",
    "hostId": "01964b05-552a-7c4b-9184-6857e7f3dc5f"
  },
  "id": 1
}
jsonrpc: Must be exactly"2.0".method: A string constructed by joining the legacy 4-tuple with forward slashes:{host}/{service}/{action}/{version}. This perfectly maps to the internal handler ID used byRpcStartupHookProvider.params: The exact contents of the legacydatablock.id: A unique identifier for the request, enabling accurate matching of asynchronous responses and batch processing.
3.2 Server-Side Changes (light-hybrid-4j)
-
Dual-Protocol Router (
SchemaHandler&JsonHandler): The router must gracefully support both legacy and JSON-RPC payloads during the transition.- Detection: Inspect the root keys of the incoming JSON. If
"jsonrpc": "2.0"is present, invoke the new JSON-RPC 2.0 parser route. Otherwise, fall back to the legacy parser. - Extraction:
- Legacy: Extract
host,service,action,versionto resolve the Handler. - JSON-RPC: Split the string in the
methodparameterhost/service/action/versionto resolve the Handler.
- Legacy: Extract
- Detection: Inspect the root keys of the incoming JSON. If
-
Response Construction: If the request included an
"id"parameter, the response must also be formatted as a JSON-RPC 2.0 response:- Success:
{ "jsonrpc": "2.0", "result": { ... handler payload ... }, "id": 1 } - Error:
{
  "jsonrpc": "2.0",
  "error": {
    "code": -32600,
    "message": "Invalid Request",
    "data": { ... custom light-4j status object ... }
  },
  "id": 1
}
- Success:
-
Batch Request Handling: If the incoming request body is a JSON Array instead of a JSON Object, the gateway must process it as a batch request, iterating over each JSON-RPC object, executing them, and returning a JSON Array of responses.
4. Client-Side Changes (portal-view SPA)
The portal-view currently utilizes a fetchClient utility built around the legacy structure.
- Update
fetchClient: Modify the core fetch utility to optionally format outbound requests as JSON-RPC 2.0 when an opt-in toggle is set, or permanently switch the underlying transport format. - Schema Forms: Update
react-schema-formcomponents (or the server-side definitions inForms.json) to stop injecting UI routing metadata (success,failure,title) into the network payload. These should remain strictly client-side configuration properties.
5. Migration Strategy
-
Phase 1: Backend Dual-Support
- Update
light-hybrid-4jrouter components (SchemaHandler,JsonHandler) to detect and accept BOTH legacy and JSON-RPC 2.0 formats simultaneously. - Deploy the updated framework across all
light-portalmicroservices (Command and Query nodes). - Result: Backend is ready, no client changes required yet.
- Update
-
Phase 2: Gateway MCP Routing
- Implement MCP HTTP transport logic on the
light-gatewayto expose the backend tools list. - When an MCP client lists tools, the gateway reads the hybrid service schemas and publishes them.
- When an MCP client invokes a tool, the gateway proxies the JSON-RPC request transparently to the backend.
- Implement MCP HTTP transport logic on the
-
Phase 3: Frontend Migration
- Update the
portal-viewUI to use the new JSON-RPC 2.0 wrapper infetchClient. - Refactor legacy components sending hardcoded
host/service/actionstructures.
- Update the
-
Phase 4: Deprecation (Long Term)
- Add warnings to the logs when legacy payloads are received.
- Eventually phase out the legacy parser code in
light-hybrid-4jand rely solely on the JSON-RPC 2.0 standard.
light-bot
Sync GitHub Repositories
Introduction
When collaborating with external customers or partners to enhance and customize GitHub repositories, standard branching strategies can break down. Customers often have their own internal private Git servers (like GitHub Enterprise or Bitbucket).
Previously, light-bot utilized a two-branch model (master and sync) that attempted to automatically merge changes between the two environments. This led to frequent and severe merge conflicts when multiple teams attempted to update the same repository simultaneously, as bots cannot intelligently resolve textual conflicts.
To solve this, light-bot has adopted a Hub and Spoke (Fork and Pull) model that strictly separates mirroring from contribution, entirely relying on Pull Requests for code integration.
Architecture and Flow
The new workflow ensures that the customer’s internal Git server acts as a “Spoke” while GitHub remains the “Hub” (Source of Truth).
The SyncGitRepoTask executes hourly and follows this precise flow:
- Mirror Master: The bot replicates the
masterbranch from GitHub to the internal Gitmasterbranch. The internalmasterbranch is treated as read-only for customer developers. - Customer Development: Customer teams create standard feature branches (e.g.,
feature/custom-login) on their internal Git server. - Internal Approval: Customers open a Pull Request on their internal Git system to go through their own internal approvals and security checks.
- Handoff (Rename to Sync): Once approved internally, the developer renames their feature branch from
feature/custom-logintosync. This acts as a handoff signal forlight-bot. - Replicate to GitHub: During the next hourly job, the bot detects the
syncbranch and pushes it to GitHub. - GitHub PR Creation: GitHub utilizes a workflow action to automatically create a Pull Request from
synctomaster. - Merge and Cleanup: The core internal team reviews and merges the PR on GitHub.
- Automated Pruning: On the subsequent bot run,
light-botchecks if thesyncbranch exists internally and verifies if its commits are fully merged intomaster. If they are, the bot automatically drops thesyncbranch from the internal server, clearing the queue for the next feature.
Edge Cases and Rules
To ensure this workflow operates smoothly, two strict rules must be observed:
1. Merge Commits Only (No Squash/Rebase)
To safely detect if a sync branch can be pruned from the customer’s server, the bot executes git merge-base --is-ancestor sync origin/master.
Critical Rule: The core team merging the PR on GitHub MUST use the “Create a Merge Commit” option.
If the team uses “Squash and Merge” or “Rebase and Merge”, GitHub generates entirely new commit hashes. As a result, the ancestor check will fail, the bot will think the branch is unmerged, and it will fail to clean up the sync branch on the customer’s server.
2. Concurrency and Queuing
Because the bot only looks for a single sync branch as the handoff mechanism, customer teams cannot push multiple features simultaneously.
If Team A renames their branch to sync, Team B must wait until Team A’s PR is merged on GitHub and the bot deletes the sync branch before Team B can rename their feature to sync. This queuing mechanism is intentional; it serializes contributions and prevents massive, difficult-to-resolve merge conflicts across distributed systems.
MCP Router
Implementing an MCP (Model Context Protocol) Router inside light-4j gateway is a visionary and highly strategic idea.
The industry is currently struggling with “Tool Sprawl”—where every microservice needs to be manually taught to an LLM. By placing an MCP Router at the gateway level, we effectively turn our entire microservice ecosystem into a single, searchable library of capabilities for AI agents.
Here is a breakdown of why this is a good idea and how to design it for the light-4j ecosystem.
1. Why it is a Strategic Win
- Discovery at Scale: Instead of configuring 50 tools for an agent, the agent connects to our gateway via MCP. The gateway then “advertises” the available tools based on the services it already knows.
- Protocol Translation: Our backend services don’t need to know what MCP is. The gateway handles the conversion from MCP (JSON-RPC over SSE/HTTP) to REST (OpenAPI) or GraphQL.
- Security & Governance: We can apply light-4j’s existing JWT validation, rate limiting, and audit logging to AI interactions. We control which agents have access to which “tools” (APIs).
- Schema Re-use: We already have OpenAPI specs or GraphQL schemas in light-4j. We can dynamically generate the MCP “Tool Definitions” from these existing schemas.
2. Design Considerations
A. The Transport Layer
MCP supports two primary transports: Stdio (for local scripts) and HTTP with SSE (Server-Sent Events) (for remote services).
- Decision: For a gateway, we must use the HTTP + SSE transport.
- Implementation: Light-4j is built on Undertow, which has excellent support for SSE. We will need to implement an MCP endpoint (e.g.,
/mcp/message) and an SSE endpoint (e.g.,/mcp/sse).
B. Tool Discovery & Dynamic Mapping
How does the Gateway decide which APIs to expose as MCP Tools?
- Metadata Driven: Use light-4j configuration or annotations in the OpenAPI files to mark specific endpoints as “AI-enabled.”
- The Mapper: Create a component that converts an OpenAPI Operation into an MCP Tool Definition.
descriptionin OpenAPI becomes the tool’sdescription(crucial for LLM reasoning).requestBodyschema becomes the tool’sinputSchema.
C. Authentication & Context Pass-through
This is the hardest part.
- The Problem: The LLM agent connects to the Gateway, but the Backend Microservice needs a user-specific JWT.
- The Solution: The MCP Router must be able to take the identity from the MCP connection (initial handshake) and either pass it through or exchange it for a backend token (OAuth2 Token Exchange).
D. Statefulness vs. Statelessness
MCP is often stateful (sessions).
- Implementation: Since light-4j is designed for high performance and statelessness, we may need light-session-4j a small Session Manager (potentially backed by Redis or PostgresQL) to keep track of which MCP Client is mapped to which internal context during the SSE connection.
3. Implementation Plan for light-4j
Step 1: Create the McpHandler
Create a new middleware handler in light-4j that intercepts calls to /mcp.
- This handler must implement the MCP lifecycle:
initialize->list_tools->call_tool.
Step 2: Tool Registry
Implement a registry that scans our gateway’s internal routing table.
- REST: For every path (e.g.,
GET /customers/{id}), generate an MCP tool namedget_customers_by_id. - GraphQL: For every Query/Mutation, generate a corresponding MCP tool.
Step 3: JSON-RPC over SSE
MCP uses JSON-RPC 2.0. We will need a simple parser that:
- Receives an MCP
call_toolrequest. - Identifies the internal REST/GraphQL route.
- Executes a local dispatch (internal call) to the existing light-4j handler for that service.
- Wraps the response in an MCP
contentobject and sends it back via SSE.
Step 4: Governance (The “Agentic” Layer)
Add a “Critique” or “Guardrail” check. Since this is at the gateway, we can inspect the tool output. If the LLM requested sensitive data, the Gateway can mask it before the agent sees it.
Step 5: MCP Proxy Support
The MCP Router supports acting as a proxy for backend MCP servers.
- Configuration: Tools can be configured with a
protocolfield (httpormcp). - Behavior:
http(default): Transforming MCP tool calls to REST requests (JSON translation).mcp: Forwarding JSON-RPC requests directly to a backend MCP server via HTTP POST.
- Use Case: This allows integrating existing MCP servers (e.g., Node.js, Python) into the light-4j gateway without rewriting them implementation.
4. Potential Challenges to Watch
- Context Window Overload: If our gateway has 500 APIs, sending 500 tool definitions to the LLM will crash its context window.
- Solution: Implement Categorization. When an agent connects, it should specify a “Scope” (e.g.,
mcp?scope=accounting), and the gateway only returns tools relevant to that scope.
- Solution: Implement Categorization. When an agent connects, it should specify a “Scope” (e.g.,
- Latency: Adding a protocol translation layer at the gateway adds milliseconds.
- Solution: Light-4j’s native performance is our advantage here. Minimize JSON serialization/deserialization by using direct buffer access where possible.
- Complex Schemas: Some API payloads are too complex for an LLM to understand.
- Solution: Provide a “Summary” view. Allow our MCP router to transform a complex 100-field JSON response into a 5-field summary that the LLM can actually use.
Conclusion
Building an MCP Router for light-4j transforms our API Gateway from a “Traffic Cop” into an “AI Brain Center.” It allows our Java-based enterprise services to be “Agent-Ready” without touching the underlying microservice code.
SSE Support
This document describes how light-4j should support Server-Sent Events (SSE)
for gateway and sidecar deployments where a client sends an HTTP request to an
agent or downstream API and the downstream response is streamed back as
text/event-stream.
Background
SSE is a response-side streaming protocol. The client sends a normal HTTP
request and keeps the response connection open while the server writes events in
the text/event-stream format.
For chatbot and agent use cases, the common flow is:
chatbot client -> light-gateway or sidecar -> agent service
                                      <- text/event-stream response
This is different from the existing sse-handler module. SseHandler opens and
owns a local SSE endpoint. When a request path matches sse.path or
sse.pathPrefixes, it creates an Undertow ServerSentEventHandler, registers
the connection in SseConnectionRegistry, and does not forward that exchange to
the next handler. It is useful when the light-4j service itself owns the SSE
connection, but it is not a downstream SSE proxy.
For downstream agent responses, the proxy and router handlers are the right place to support SSE passthrough.
Current Proxy Behavior
ProxyHandler already has the core behavior needed for SSE passthrough:
- It forwards the request to the downstream service with Undertow client APIs.
- If the incoming request body is still available, it transfers the request body from the client request channel to the downstream request channel.
- When the downstream response arrives, it copies the downstream status and headers to the client exchange.
- It transfers the downstream response channel directly to the client response
channel with
Transfer.initiateTransfer(...).
Because the response body is transferred channel-to-channel, the proxy does not need to know the full body before it starts sending data to the client. This is the correct foundation for SSE.
Current Gaps
Request Timeout
router.maxRequestTime and proxy.maxRequestTime default to 1000
milliseconds. ProxyHandler schedules this timeout against the entire exchange
and removes it only when the exchange completes.
An SSE response is intentionally long-lived, so a normal one-second request timeout will close the stream. A gateway that proxies SSE must either disable the whole-exchange timeout for that route or use a timeout long enough for the expected stream lifetime.
There is also a current implementation risk in pathPrefixMaxRequestTime.
ProxyHandler mutates the handler field maxRequestTime when a prefix matches
and schedules the timeout with that value. This is unsafe in a singleton handler
because concurrent requests can affect each other. It also means a per-prefix
value of 0 is not a reliable way to disable the timeout for one path.
Response Header Overwrite
ProxyHandler.copyHeaders(...) intentionally does not overwrite a response
header that is already present on the exchange.
That creates a problem when ContentHandler or another upstream middleware has
already set Content-Type to application/json. If the downstream agent returns
Content-Type: text/event-stream, the proxy may not replace the existing header.
The client then receives the wrong content type and may not treat the response
as SSE.
Body-Consuming Middleware
BodyHandler reads the request body into an attachment and does not restore it
to the request channel for the proxy. For POST-based agent calls this can leave
the downstream service without the original request body.
For an SSE proxy route, middleware that consumes the request or response body must be excluded unless it restores the stream for downstream transfer.
Response Buffering and Transformation
ResponseInterceptorInjectionHandler can install a ModifiableContentSinkConduit
when response interceptors require content. That conduit buffers the response
until termination so interceptors can inspect or modify the body. This is
incompatible with long-lived SSE responses because the stream may not terminate
for a long time.
DumpHandler can also store the whole response when response dumping is enabled.
ResponseEncodeHandler can add compression wrappers. Both are poor defaults for
SSE passthrough.
Design Goals
- Allow
RouterHandlerandLightProxyHandlerto proxy downstreamtext/event-streamresponses without buffering. - Preserve normal proxy timeout behavior for non-streaming APIs.
- Allow per-path streaming timeout behavior without mutating shared handler state.
- Preserve downstream SSE headers even if upstream middleware has already set a default response header.
- Make safe handler-chain recommendations explicit for gateway operators.
- Keep the current
SseHandlersemantics unchanged.
ProxyHandler Enhancements
1. Use Request-Local Timeout Values
Replace the mutable timeout logic with request-local variables:
int effectiveMaxRequestTime = this.maxRequestTime;
long timeout = effectiveMaxRequestTime > 0
        ? System.currentTimeMillis() + effectiveMaxRequestTime
        : 0;

if (pathPrefixMaxRequestTime != null) {
    for (Map.Entry<String, Integer> entry : pathPrefixMaxRequestTime.entrySet()) {
        if (reqPath.startsWith(entry.getKey())) {
            effectiveMaxRequestTime = entry.getValue();
            timeout = effectiveMaxRequestTime > 0
                    ? System.currentTimeMillis() + effectiveMaxRequestTime
                    : 0;
            break;
        }
    }
}
The timeout task should be scheduled only when timeout > 0, and the scheduled
delay should use effectiveMaxRequestTime, not the mutable field.
This change makes per-path 0 mean “no whole-exchange timeout” and avoids
cross-request contamination.
2. Add Explicit Streaming Route Configuration
Add streaming configuration to both direct proxy and router deployments. The
fields should be exposed through ProxyConfig/LightProxyHandler and through
RouterConfig/RouterHandler, with RouterHandler passing the resolved values
into the shared ProxyHandler builder.
Suggested fields:
streamResponseContentTypes:
  - text/event-stream

streamRequestAcceptTypes:
  - text/event-stream

streamPathPrefixes:
  - /chat
  - /agent

streamMaxRequestTime: 0
streamIdleTimeout: 0

streamResponseHeaderOverwrite:
  - Content-Type
  - Cache-Control
  - Connection
  - Transfer-Encoding
The path-prefix list should mark requests as streaming before the downstream
response arrives. The response content type should also be checked after
downstream headers arrive so a service can opt into streaming by returning
text/event-stream. Both detection modes are required: path-based detection
lets the gateway apply streaming timeout behavior before the downstream response
exists, and response-header detection handles services that declare streaming
only through Content-Type.
3. Cancel Whole-Exchange Timeout for Streaming Responses
If a timeout task has already been scheduled and the downstream response is classified as streaming, cancel the whole-exchange timeout when the response headers arrive.
The existing timeout attachment can be reused. A small helper can make the behavior explicit:
private static void cancelRequestTimeout(HttpServerExchange exchange) {
    XnioExecutor.Key key = exchange.getAttachment(TIMEOUT_KEY);
    if (key != null) {
        key.remove();
        exchange.removeAttachment(TIMEOUT_KEY);
    }
}
For streaming routes, the gateway should rely on TCP close, client disconnect,
downstream close, or a dedicated optional streaming idle timeout rather than the
normal whole-exchange request timeout. streamIdleTimeout should represent the
maximum silent period between downstream bytes or events. A value of 0 should
disable idle timeout enforcement.
4. Preserve SSE Response Headers
When the downstream response content type starts with text/event-stream, the
proxy should overwrite conflicting response headers that were set before proxy
response handling.
At minimum, overwrite:
Content-TypeCache-ControlConnectionTransfer-EncodingContent-EncodingContent-Length
Content-Length should usually be removed for SSE because the response length is
not known up front. Content-Encoding should be removed unless compression is
explicitly supported and tested for streaming clients.
This can be implemented as a streaming-aware response header copy path rather
than changing the existing copyHeaders(...) behavior globally.
5. Keep Streaming Routes in a Dedicated Chain
SSE routes should avoid response buffering and transformation through handler
chain configuration. The design does not require DumpHandler,
ResponseInterceptorInjectionHandler, response transformers, response cache, or
response body interceptors to inspect a shared streaming attachment. Operators
should configure SSE paths with a narrow chain that excludes body-consuming and
response-buffering handlers.
6. Add Streaming Tests
Add focused tests in proxy-handler and egress-router:
- downstream returns
text/event-stream; client receives the first event before the downstream stream completes. - default non-streaming timeout behavior still works.
- per-prefix
0disables timeout for the matched streaming route and does not mutatemaxRequestTimefor other requests. - downstream
Content-Type: text/event-streamoverwrites an earlierContent-Type: application/json. - POST request body reaches the downstream agent when body-consuming middleware is not in the chain.
RouterHandler Enhancements
RouterHandler wraps ProxyHandler and builds it from RouterConfig.
Enhancing router support means exposing the streaming proxy settings through
router.yml and passing them into the proxy builder.
Suggested router configuration:
streamResponseContentTypes: ${router.streamResponseContentTypes:["text/event-stream"]}
streamRequestAcceptTypes: ${router.streamRequestAcceptTypes:["text/event-stream"]}
streamPathPrefixes: ${router.streamPathPrefixes:}
streamMaxRequestTime: ${router.streamMaxRequestTime:0}
streamIdleTimeout: ${router.streamIdleTimeout:0}
streamResponseHeaderOverwrite: ${router.streamResponseHeaderOverwrite:["Content-Type","Cache-Control","Connection","Transfer-Encoding","Content-Encoding","Content-Length"]}
RouterConfig should parse these fields and RouterHandler.buildProxy() should
set them on ProxyHandler.builder().
The same fields should be added to ProxyConfig and passed by
LightProxyHandler so both router-based and direct proxy deployments have the
same behavior.
Handler Chain Recommendation
For an SSE proxy route, keep the chain narrow and avoid body or response buffering handlers.
Recommended chain:
handlers:
  - com.networknt.correlation.CorrelationHandler@correlation
  - com.networknt.cors.CorsHttpHandler@cors
  - com.networknt.whitelist.WhitelistHandler@whitelist
  - com.networknt.security.UnifiedSecurityHandler@security
  - com.networknt.header.HeaderHandler@header
  - com.networknt.router.RouterHandler@router

paths:
  - path: '/agent/chat'
    method: 'post'
    exec:
      - correlation
      - cors
      - whitelist
      - security
      - header
      - router
Use LightProxyHandler instead of RouterHandler for a simple sidecar or
single-target reverse proxy.
Safe or conditionally safe handlers:
CorrelationHandler: safe.CorsHttpHandler: safe and normally required for browser clients.WhitelistHandler: safe.LimitHandler: usable, but size limits and concurrency semantics must account for long-lived requests.UnifiedSecurityHandler,ApiKeyHandler,BasicAuthHandler,DerefMiddlewareHandler: safe if configured for the route.HeaderHandler: safe only if it does not overwrite SSE response headers with non-streaming values.
Avoid these handlers on SSE proxy routes:
SseHandler: owns a local SSE endpoint and does not proxy matched requests.BodyHandler: consumes POST/PUT/PATCH bodies before the proxy can forward them.ContentHandler: can pre-setContent-Typeand prevent downstreamtext/event-streamfrom being copied.SanitizerHandler: depends on parsed request bodies.DumpHandler: can buffer/store the response body.ResponseEncodeHandler: can compress a stream that clients expect to receive as plain event-stream frames.ResponseInterceptorInjectionHandlerwith content-required response interceptors: buffers the response until termination.- Response transformer, response cache, response filter, and response body interceptors when they require response content.
- Request transformer/body interceptors that read or replace the body unless they restore it correctly for the proxy.
MetricsHandler: avoid in the dedicated SSE chain. Long-lived streams produce long request durations and do not provide useful per-event visibility through normal request metrics.
Browser and Client Notes
The browser EventSource API only supports GET. If the chatbot client must send
a POST body to the agent and receive an SSE response, it should use fetch() or
a client library that can read the response stream incrementally.
The gateway should pass through:
Accept: text/event-stream- authorization headers
- correlation and traceability headers
- request body for POST-based agent calls
The downstream agent should return:
Content-Type: text/event-stream
Cache-Control: no-cache
It should periodically write comments or events as keep-alives if long pauses are possible.
Implementation Plan
- Fix
ProxyHandlertimeout calculation to use request-local values and allow per-prefix0to disable the whole-exchange timeout. - Add streaming classification configuration to both
ProxyConfigandRouterConfig. - Extend
ProxyHandler.Builderto accept streaming content types, accept headers, path prefixes, timeout behavior, idle timeout behavior, and header overwrite names. - Detect streaming requests before scheduling the normal timeout when possible.
- Detect downstream
text/event-streamresponses inResponseCallback. - Cancel the normal timeout and overwrite conflicting response headers for streaming responses.
- Keep SSE paths on dedicated chains that avoid body-consuming, response-buffering, and metrics handlers.
- Add targeted proxy and router tests for streaming, timeout, idle timeout, header overwrite, and POST body passthrough.
- Update the
proxy-handler,router-handler, andsse-handlerdocumentation pages after implementation.
Resolved Questions
- Streaming route configuration must be available in both
ProxyHandlerandRouterHandlerpaths. - Streaming detection must use both request/path configuration and downstream response headers.
- The gateway should provide an optional streaming idle timeout separate from
whole-exchange
maxRequestTime. - SSE routes should avoid response-buffering handlers through dedicated chain configuration instead of requiring those handlers to honor a shared streaming attachment.
- Metrics should be avoided in the dedicated SSE chain.
Decision
Use ProxyHandler and its wrappers for downstream SSE passthrough. Keep
SseHandler as a local server-owned SSE endpoint. Enhance proxy and router
configuration to make streaming routes explicit, disable whole-exchange timeout
for those routes, add an optional streaming idle timeout, preserve downstream
SSE headers, and keep SSE routes on dedicated chains that avoid body-consuming,
response-buffering, and metrics handlers.
Configuration Hot Reload Design
Introduction
In the light-4j framework, minimizing downtime is crucial for microservices. The Configuration Hot Reload feature allows services to update their configuration at runtime without restarting the server. This design document outlines the centralized caching architecture used to achieve consistent and efficient hot reloads.
Architecture Evolution
Previous Approach (Decentralized)
Initially, configuration reload was handled in a decentralized manner:
- Each handler maintained its own static configuration object.
- A
reload()method was required on every handler to manually refresh this object. - The
ConfigReloadHandlerused reflection to search for and invoke thesereload()methods.
Drawbacks:
- Inconsistency: Different parts of the application could hold different versions of the configuration.
- Complexity: Every handler needed boilerplate code for reloading.
- State Management: Singleton classes (like
ClientConfig) often held stale references that were difficult to update.
Current Approach (Centralized Cache)
The new architecture centralizes the “source of truth” within the Config class itself.
- Centralized Cache: The
Configclass maintains aConcurrentHashMapof all loaded configurations. - Cache Invalidation: Instead of notifying components to reload, we simply invalidate the specific entry in the central cache.
- Lazy Loading: Consumers (Handlers, Managers) fetch the configuration from the
Configclass at the moment of use. If the cache is empty (cleared),Configreloads it from the source files.
Detailed Design
1. The Config Core (Config.java)
The Config class is enhanced to support targeted cache invalidation.
public abstract class Config {
    // ... existing methods

    // New method to remove a specific config from memory
    public abstract void clearConfigCache(String configName);
}
When clearConfigCache("my-config") is called:
- The entry for “my-config” is removed from the internal
configCache. - The next time
getJsonMapConfig("my-config")orgetJsonObjectConfig(...)is called, theConfigclass detects the miss and reloads the file from the filesystem or external config server.
2. The Admin Endpoint (ConfigReloadHandler)
The ConfigReloadHandler exposes the /adm/config-reload endpoint. Its responsibility has been simplified:
- Receive Request: Accepts a list of modules/plugins to reload.
- Resolve Config Names: Looks up the configuration file names associated with the requested classes using the
ModuleRegistry. - Invalidate Cache: Calls
Config.getInstance().clearConfigCache(configName)for each identified module.
It no longer relies on reflection to call methods on the handlers.
3. Configuration Consumers
Handlers and other components must follow a stateless pattern regarding configuration.
Anti-Pattern (Old Way):
public class MyHandler {
    static MyConfig config = MyConfig.load(); // Static load at startup

    public void handleRequest(...) {
        // Use static config - will remain stale even if file changes
        if (config.isEnabled()) ...
    }
}
Recommended Pattern (New Way):
public class MyHandler {
    // No static config field

    public void handleRequest(...) {
        // Fetch fresh config from central cache every time
        // This is fast due to HashMap lookup
        MyConfig config = MyConfig.load();

        if (config.isEnabled()) ...
    }
}
Implementation in Config Classes:
The load() method in configuration classes (e.g., CorrelationConfig) simply delegates to the cached Config methods:
private CorrelationConfig(String configName) {
    // Always ask Config class for the Map.
    // If cache was cleared, this call triggers a file reload.
    mappedConfig = Config.getInstance().getJsonMapConfig(configName);
}
4. Handling Singletons (e.g., ClientConfig)
For Singleton classes that parse configuration into complex objects, they must check if the underlying configuration has changed.
public static ClientConfig get() {
    // Check if the Map instance in Config.java is different from what we typically hold
    Map<String, Object> currentMap = Config.getInstance().getJsonMapConfig(CONFIG_NAME);
    if (instance == null || instance.mappedConfig != currentMap) {
        synchronized (ClientConfig.class) {
            if (instance == null || instance.mappedConfig != currentMap) {
                instance = new ClientConfig(); // Re-parse and create new instance
            }
        }
    }
    return instance;
}
}
return instance;
}
5. Lazy Rebuild on Config Change
Some handlers (like LightProxyHandler) maintain expensive internal objects that depend on the configuration (e.g., LoadBalancingProxyClient, ProxyHandler). Recreating these on every request is not feasible due to performance. However, they must still react to configuration changes.
For these cases, we use a Lazy Rebuild pattern:
- Volatile Config Reference: The handler maintains a
volatilereference to its configuration object. - Check on Request: At the start of
handleRequest, it checks if the cached config object is the same as the one returned byConfig.load(). - Rebuild if Changed: If the reference has changed (identity check), it synchronizes and rebuilds the internal components.
Example Implementation (LightProxyHandler):
public class LightProxyHandler implements HttpHandler {
    private volatile ProxyConfig config;
    private volatile ProxyHandler proxyHandler;

    public LightProxyHandler() {
        this.config = ProxyConfig.load();
        buildProxy(); // Initial build
    }

    private void buildProxy() {
        // Expensive object creation based on config
        this.proxyHandler = ProxyHandler.builder()
                .setProxyClient(new LoadBalancingProxyClient()...)
                .build();
    }

    @Override
    public void handleRequest(HttpServerExchange exchange) throws Exception {
        ProxyConfig newConfig = ProxyConfig.load();
        // Identity check: ultra-fast
        if (newConfig != config) {
            synchronized (this) {
                newConfig = ProxyConfig.load(); // Double-check
                if (newConfig != config) {
                    config = newConfig;
                    buildProxy(); // Rebuild internal components
                }
            }
        }
        // Use the (potentially new) proxyHandler
        proxyHandler.handleRequest(exchange);
    }
}
This pattern ensures safe updates without the overhead of rebuilding on every request, and without requiring a manual reload() method.
6. Config Class Implementation Pattern (Singleton with Caching)
For configuration classes that are frequently accessed (per request), instantiating a new object each time can be expensive. We recommend implementing a Singleton pattern that caches the configuration object and only invalidates it when the underlying configuration map changes.
Example Implementation (ApiKeyConfig):
public class ApiKeyConfig {
    private static final String CONFIG_NAME = "apikey";
    // Cache the instance
    private static ApiKeyConfig instance;
    private final Map<String, Object> mappedConfig;

    // Private constructor to force use of load()
    private ApiKeyConfig(String configName) {
        mappedConfig = Config.getInstance().getJsonMapConfig(configName);
        setConfigData();
    }

    public static ApiKeyConfig load() {
        return load(CONFIG_NAME);
    }

    public static ApiKeyConfig load(String configName) {
        // optimistically check if we have a valid cached instance
        Map<String, Object> mappedConfig = Config.getInstance().getJsonMapConfig(configName);
        if (instance != null && instance.getMappedConfig() == mappedConfig) {
            return instance;
        }

        // Double-checked locking for thread safety
        synchronized (ApiKeyConfig.class) {
            mappedConfig = Config.getInstance().getJsonMapConfig(configName);
            if (instance != null && instance.getMappedConfig() == mappedConfig) {
                return instance;
            }
            instance = new ApiKeyConfig(configName);
            // Register the module with the configuration. masking the apiKey property.
            // As apiKeys are in the config file, we need to mask them.
            List<String> masks = new ArrayList<>();
            // if hashEnabled, there is no need to mask in the first place.
            if(!instance.hashEnabled) {
                masks.add("apiKey");
            }
            ModuleRegistry.registerModule(configName, ApiKeyConfig.class.getName(), Config.getNoneDecryptedInstance().getJsonMapConfigNoCache(configName), masks);

            return instance;
        }
    }

    public Map<String, Object> getMappedConfig() {
        return mappedConfig;
    }
}
This pattern ensures that:
- Performance: Applications use the cached
instancefor the majority of requests (fast reference check). - Freshness: If
Config.getInstance().getJsonMapConfig(name)returns a new Map object (due to a reload), the equality check fails, and a newApiKeyConfigis created. - Consistency: The
handleRequestmethod still callsApiKeyConfig.load(), but receives the singleton instance transparently.
6. Thread Safety
The Config class handles concurrent access using the Double-Checked Locking pattern to ensure that the configuration file is loaded exactly once, even if multiple threads request it simultaneously immediately after the cache is cleared.
Scenario:
- Thread A and Thread B both handle a request for
MyHandler. - Both call
MyConfig.load(), which callsConfig.getJsonMapConfig("my-config"). - Both see that the cache is empty (returning
null) because it was just cleared by the reload handler. - Thread A acquires the lock (
synchronized). Thread B waits. - Thread A checks the cache again (still null), loads the file from disk, puts it in the
configCache, and releases the lock. - Thread B acquires the lock.
- Thread B checks the cache again. This time it finds the config loaded by Thread A.
- Thread B uses the existing config without loading from disk.
This ensures no race conditions or redundant file I/O operations occur in high-concurrency environments.
Workflow Summary
- Update: User updates
values.ymlor a config file on the server/filesystem. - Trigger: User calls
POST https://host:port/adm/config-reloadwith the module name. - Clear:
ConfigReloadHandlertellsConfig.javatoclearConfigCachefor that module. - Processing:
- Step 4a: Request A arrives at
MyHandler. - Step 4b:
MyHandlercallsMyConfig.load(). - Step 4c:
MyConfigcallsConfig.getJsonMapConfig(). - Step 4d:
Configsees cache miss, reads file from disk, parses it, puts it in cache, and returns it. - Step 4e:
MyHandlerprocesses request with NEW configuration.
- Step 4a: Request A arrives at
- Subsequent Requests: Step 4d is skipped; data is served instantly from memory.
Configuration Consistency During Request Processing
Can Config Objects Change During a Request?
A common question arises: Can the config object created in handleRequest be changed during the request/response exchange?
Short Answer: Theoretically possible but extremely unlikely, and the design handles this correctly.
Understanding the Behavior
When a handler processes a request using the recommended pattern:
public void handleRequest(HttpServerExchange exchange) {
    MyConfig config = MyConfig.load(); // Creates local reference

    // Use config throughout request processing
    if (config.isEnabled()) {
        // ... process request
    }
}
The config variable is a local reference to a configuration object. Here’s what happens:
- Cache Hit:
MyConfig.load()callsConfig.getJsonMapConfig(configName)which returns a reference to the cachedMap<String, Object>. - Object Construction: A new
MyConfigobject is created, wrapping this Map reference. - Local Scope: The
configvariable holds this reference for the duration of the request.
Scenario: Reload During Request Processing
Consider this timeline:
- T1: Request A starts, calls
MyConfig.load(), gets reference to Config Object v1 - T2: Admin calls
/adm/config-reload, cache is cleared - T3: Request B starts, calls
MyConfig.load(), triggers reload, gets reference to Config Object v2 - T4: Request A continues processing with Config Object v1
- T5: Request A completes successfully with Config Object v1
Key Points:
- Request A maintains its reference to the original config object throughout its lifecycle
- Request B gets a new config object with reloaded values
- Both requests process correctly with consistent configuration for their entire duration
- No race conditions or inconsistent state within a single request
Why This Design is Safe
1. Immutable Config Objects
Configuration objects are effectively immutable once constructed:
private MyConfig(String configName) {
    mappedConfig = Config.getInstance().getJsonMapConfig(configName);
    setConfigData(); // Parses and sets final fields
}
Fields are set during construction and never modified afterward.
2. Local Variable Isolation
Each request has its own local config variable:
- The reference is stored on the thread’s stack
- Even if the cache is cleared, the reference remains valid
- The underlying Map object continues to exist until no references remain (garbage collection)
3. Per-Request Consistency
This design ensures that each request has a consistent view of configuration from start to finish:
- No mid-request configuration changes
- Predictable behavior throughout request processing
- Easier debugging and reasoning about request flow
4. Graceful Transition
The architecture enables zero-downtime config updates:
- In-flight requests: Complete with the config they started with
- New requests: Use the updated configuration
- No interruption: No requests fail due to config reload
Edge Cases and Considerations
Long-Running Requests
For requests that take significant time to process (e.g., minutes):
- The request will complete with the configuration it started with
- If config is reloaded during processing, the request continues with “old” config
- This is correct behavior - we want consistent config per request
High-Concurrency Scenarios
During a config reload under heavy load:
- Multiple threads may simultaneously detect cache miss
- Double-checked locking ensures only one thread loads from disk
- All threads eventually get the same new config instance
- No duplicate file I/O or parsing overhead
Memory Implications
Question: If old config objects are still referenced by in-flight requests, do we have memory leaks?
Answer: No, this is handled by Java’s garbage collection:
- Request A holds reference to Config Object v1
- Cache is cleared and reloaded with Config Object v2
- Request A completes and goes out of scope
- Config Object v1 has no more references
- Garbage collector reclaims Config Object v1
The memory overhead is minimal and temporary, lasting only as long as the longest in-flight request.
Best Practices
To ensure optimal behavior with hot reload:
-
Always Load Fresh: Call
MyConfig.load()at the start ofhandleRequest, not in constructor// ✅ GOOD public void handleRequest(...) { MyConfig config = MyConfig.load(); } // ❌ BAD private static MyConfig config = MyConfig.load(); -
Use Local Variables: Store config in local variables, not instance fields
// ✅ GOOD MyConfig config = MyConfig.load(); // ❌ BAD this.config = MyConfig.load(); -
Don’t Cache in Handlers: Let the
Configclass handle caching// ✅ GOOD - Load on each request public void handleRequest(...) { MyConfig config = MyConfig.load(); } // ❌ BAD - Caching in handler private MyConfig cachedConfig; public void handleRequest(...) { if (cachedConfig == null) cachedConfig = MyConfig.load(); }
Summary
The centralized cache design ensures:
- Thread Safety: Multiple threads can safely reload and access config
- Request Consistency: Each request has a stable config view from start to finish
- Zero Downtime: Config updates don’t interrupt in-flight requests
- Performance: HashMap lookups are extremely fast (O(1))
- Simplicity: No complex synchronization needed in handlers
Benefits
- Performance: Only one disk read per reload cycle. Subsequent accesses are Hash Map lookups.
- Reliability: Config state is consistent. No chance of “half-reloaded” application state.
- Simplicity: drastic reduction in boilerplate code across the framework.
Module Registry Design
Introduction
The Module Registry is a core component in the light-4j framework that tracks all active modules (middleware handlers, plugins, utilities) and their current configurations. This info is primarily exposed via the /server/info admin endpoint, allowing operators to verify the runtime state of the service.
With the introduction of Centralized Configuration Management and Hot Reload, the Module Registry design has been updated to ensure consistency updates without manual intervention from handlers.
Architecture
Centralized Registration
Previously, each Handler was responsible for registering its configuration in its constructor or reload() method. This led to decentralized logic and potential inconsistencies during hot reloads.
In the new design, Configuration Classes (*Config.java) are responsible for registering themselves with the ModuleRegistry immediately upon instantiation.
Workflow:
Handlerrequests config:MyConfig.load().Configclass loads data from the central cache.MyConfigconstructor initializes fields.MyConfigconstructor callsModuleRegistry.registerModule(...).
Caching and Optimization
Since MyConfig objects are instantiated per-request (to ensure fresh config is used), the registration call happens frequently. To prevent performance degradation, ModuleRegistry implements an Identity Cache.
// Key: configName + ":" + moduleClass
private static final Map<String, Object> registryCache = new HashMap<>();

public static void registerModule(String configName, String moduleClass, Map<String, Object> config, List<String> masks) {
    String key = configName + ":" + moduleClass;

    // Optimization: Identity Check
    if (config != null && registryCache.get(key) == config) {
        return; // Exact same object already registered, skip overhead
    }
    // ... proceed with registration
}
This ensures that while the registration intent is declared on every request, the heavy lifting (deep copying, masking) only happens when the configuration object actually changes (i.e., after a reload).
Security and Masking
Configurations often contain sensitive secrets (passwords, API keys). The ModuleRegistry must never store or expose these in plain text.
1. Non-Decrypted Config
The Config framework supports auto-decryption of CRYPT:... values. However, server/info should show the original encrypted value (or a mask), not the decrypted secret.
Config classes register the Non-Decrypted version of the config map:
// Inside MyConfig constructor
ModuleRegistry.registerModule(
    CONFIG_NAME,
    MyConfig.class.getName(),
    Config.getNoneDecryptedInstance().getJsonMapConfigNoCache(CONFIG_NAME),
    List.of("secretKey", "password")
);
2. Deep Copy & Masking
To prevent the ModuleRegistry from accidentally modifying the active configuration object (or vice versa), and to safely apply masks without affecting the runtime application:
ModuleRegistrycreates a Deep Copy of the configuration map.- Masks (e.g., replacing values with
*) are applied to the copy. - The masked copy is stored in the registry for display.
Best Practices for Module Developers
When creating a new module with a configuration file:
- Self-Register in Config Constructor: Call
ModuleRegistry.registerModuleinside yourConfigclass constructor. - Use Non-Decrypted Instance: Always fetch the config for registration using
Config.getNoneDecryptedInstance(). - Define Masks: specific attributes that should be masked (e.g., passwords, tokens) in the registration call.
- Remove Handler Registration: Do not call register in your
Handler, static blocks, orreload()methods.
Example
public class MyConfig {
    private MyConfig(String configName) {
        // 1. Load runtime config
        config = Config.getInstance();
        mappedConfig = config.getJsonMapConfig(configName);
        setConfigData();

        // 2. Register with ModuleRegistry
        ModuleRegistry.registerModule(
            configName,
            MyConfig.class.getName(),
            Config.getNoneDecryptedInstance().getJsonMapConfigNoCache(configName),
            List.of("clientSecret") // Mask sensitive fields
        );
    }
}
HttpClient Retry
Since the JDK HttpClient supports proxy configuration, we use it to connect to external services through NetSkope or McAfee gateways within an enterprise environment. When comparing it with the light-4j Http2Client, we identified several important behavioral differences and usage considerations.
Unresolved InetSocketAddress
When configuring a proxy for the JDK HttpClient, it is important to use an unresolved socket address for the proxy host.
        if (config.getProxyHost() != null && !config.getProxyHost().isEmpty()) {
            clientBuilder.proxy(ProxySelector.of(
                    InetSocketAddress.createUnresolved(
                            config.getProxyHost(),
                            config.getProxyPort() == 0 ? 443 : config.getProxyPort()
                    )
            ));
        }
Using InetSocketAddress.createUnresolved() ensures that DNS resolution occurs when a new connection is established, rather than at client creation time. This allows DNS lookups to respect TTL values and return updated IP addresses when DNS records change.
Retry with Temporary HttpClient
The JDK HttpClient is a heavyweight, long-lived object and should not be created frequently. It also does not expose APIs to directly manage connections (for example, closing an existing connection and retrying with a fresh one).
A naive retry strategy is to create a new HttpClient instance for retries. Below is an implementation we used for testing purposes:
                    /*
                    A new client is created from the second attempt onwards as there is no way we can create new connections. Since this handler
                    is a singleton, it would be a bad idea to repeatedly abandon HttpClient instances in a singleton handler. It will cause leak
                    of resource. We need a clean connection without abandoning the shared resource. The solution is to create a temporary fresh
                    client from the second attempt and discard it immediately to minimize resource footprint.
                    */
                    int maxRetries = config.getMaxConnectionRetries();
                    HttpResponse<byte[]> response = null;

                    for (int attempt = 0; attempt < maxRetries; attempt++) {

                        try {
                            if (attempt == 0) {
                                // First attempt: Use the long-lived, shared client
                                response = this.client.send(request, HttpResponse.BodyHandlers.ofByteArray());
                            } else {
                                // Subsequent attempts: Create a fresh, temporary client inside a try-with-resources
                                logger.info("Attempt {} failed. Creating fresh client for retry.", attempt);

                                try (HttpClient temporaryClient = createJavaHttpClient()) {
                                    response = temporaryClient.send(request, HttpResponse.BodyHandlers.ofByteArray());
                                } // temporaryClient.close() called here if inner block exits normally/exceptionally
                            }
                            break; // Success! Exit the loop.
                        } catch (IOException | InterruptedException e) {
                            // Note: The exception could be from .send() OR from createJavaHttpClient() (if attempt > 0)
                            if (attempt >= maxRetries - 1) {
                                throw e; // Rethrow exception on final attempt failure
                            }
                            logger.warn("Attempt {} failed ({}). Retrying...", attempt + 1, e.getMessage());
                            // Loop continues to next attempt
                        }
                    }
Load Test Findings
We created a test project under light-example-4j/instance-variable consisting of a caller service and a callee service. The caller created a new HttpClient per request.
During load testing, we observed:
-
Extremely high thread and memory utilization
-
Very poor throughput
-
Sustained 100% CPU usage for several minutes after traffic stopped, as the JVM attempted to clean up HttpClient resources
This behavior exposes several serious problems.
Identified Problems
The following is the problems:
-
Resource Exhaustion (Threads & Native Memory) The
java.net.http.HttpClientis designed to be a long-lived, heavy object. When you create an instance, it spins up a background thread pool (specifically aSelectorManagerthread) to handle async I/O. If you create a new client for every HTTP request, you are spawning thousands of threads. Even though theclientreference is overwritten and eventually Garbage Collected, the background threads may not shut down immediately, leading toOutOfMemoryError: unable to create new native threador high CPU usage. -
Loss of Connection Pooling (Performance Killer) The
HttpClientmaintains an internal connection pool to reuse TCP connections (Keep-Alive) to the downstream service (localhost:7002). By recreating the client every time, you force a new TCP handshake (and SSL handshake if using HTTPS) for every single request. This drastically increases latency. -
Thread Safety (Race Condition) Your handler is a singleton, meaning one instance of
DataGetHandlerserves all requests. You have definedprivate HttpClient client;as an instance variable.- Scenario: Request A comes in, creates a client, and assigns it to
this.client. Immediately after, Request B comes in and overwritesthis.clientwith a new client. - Because
handleRequestis called concurrently by multiple Undertow worker threads, having a mutable instance variable shared across requests is unsafe. While it might not crash immediately, it is poor design to share state this way without synchronization (though in this specific logic, you don’t actually need to share the state, which makes it even worse).
- Scenario: Request A comes in, creates a client, and assigns it to
Connection: close Header
Given the above findings, creating temporary HttpClient instances for retries is too risky. Further investigation revealed a safer and more efficient approach: forcing a new connection using the Connection: close header.
By disabling persistent connections for a retry request, the existing HttpClient can be reused while ensuring the next request establishes a fresh TCP connection.
Why this is better than creating a new HttpClient
-
Lower Resource Overhead: Recreating HttpClient creates a new SelectorManager thread and internal infrastructure, which is a heavy operation.
-
Prevents Thread Leaks: Repeatedly creating and discarding clients can lead to “SelectorManager” thread buildup if not closed properly.
-
Clean Socket Management: The Connection: close header handles the lifecycle at the protocol level, allowing the existing client’s thread pool to remain stable.
How does the header work
The Connection: close header instructs both the client and the server (or load balancer) to terminate the TCP connection immediately after the current request/response exchange is finished. When you use this header on a retry, the following happens:
-
Current Request: The client established a connection (or reused one) to send the request.
-
After Response: Once the response is received (or the request fails), the client’s internal pool will not return that connection to the pool; it will close the socket.
-
Next Attempt: Any subsequent request made by that same HttpClient instance will be forced to open a brand-new connection. This fresh connection will hit your load balancer again, which can then route it to a different, healthy node.
Recommended Retry Strategy (Three Attempts)
In most high-availability scenarios, retrying a third time (or using a “3-strikes” policy) is recommended. Here is the optimal sequence:
-
1st Attempt (Normal): Use the default persistent connection. This is fast and efficient.
-
2nd Attempt (The “Fresh Connection” Retry): Use the Connection: close header. This forces the load balancer to re-evaluate the target node if the first one was dead or hanging.
-
3rd Attempt (Final Safeguard): If the second attempt fails, it is often worth one final try with a small exponential backoff (e.g., 500ms–1s). This helps in cases of transient network congestion or when the load balancer hasn’t yet updated its health checks to exclude the failing node.
                    /*
                     * 1st Attempt (Normal): Use the default persistent connection. This is fast and efficient.

                     * 2nd Attempt (The "Fresh Connection" Retry): Use the Connection: close header. This forces
                     *  the load balancer to re-evaluate the target node if the first one was dead or hanging.

                     * 3rd Attempt (Final Safeguard): It will use a new connection to send the request.
                     */
                    int maxRetries = config.getMaxConnectionRetries();
                    HttpResponse<byte[]> response = null;

                    for (int attempt = 0; attempt < maxRetries; attempt++) {
                        try {
                            HttpRequest finalRequest;

                            if (attempt == 0) {
                                // First attempt: Use original request (Keep-Alive enabled by default)
                                finalRequest = request;
                            } else {
                                // Subsequent attempts: Force a fresh connection by adding the 'Connection: close' header.
                                // This ensures the load balancer sees a new TCP handshake and can route to a new node.
                                logger.info("Attempt {} failed. Retrying with 'Connection: close' to force fresh connection.", attempt);

                                finalRequest = HttpRequest.newBuilder(request, (name, value) -> true)
                                        .header("Connection", "close")
                                        .build();
                            }

                            // Always use the same shared, long-lived client
                            response = this.client.send(finalRequest, HttpResponse.BodyHandlers.ofByteArray());
                            break; // Success! Exit the loop.

                        } catch (IOException | InterruptedException e) {
                            if (attempt >= maxRetries - 1) {
                                throw e; // Rethrow on final attempt
                            }
                            logger.warn("Attempt {} failed ({}). Retrying...", attempt + 1, e.getMessage());

                            // Optional: Add a small sleep/backoff here to allow LB health checks to update
                        }
                    }
Header Restriction
Header Restriction: Ensure your JVM is started with -Djdk.httpclient.allowRestrictedHeaders=connection to allow the HttpClient to modify the Connection header.
This must be configured at JVM startup, for example:
-Djdk.httpclient.allowRestrictedHeaders=connection,host
or in the JDK conf/net.properties file.
Do not rely on calling System.setProperty("jdk.httpclient.allowRestrictedHeaders", ...) inside application code. The JDK does not guarantee that this property will be honored when set programmatically after startup, and in practice the request builder can still fail with:
java.lang.IllegalArgumentException: restricted header name: "Connection"
This behavior was observed in light-4j issue #2740 when the retry logic attempted to add Connection: close dynamically.
Safe Fallback Behavior
Because the runtime property may be missing or ignored, the retry implementation should degrade safely:
- First attempt: use the original request
- Retry attempts: try to add
Connection: close - If the JDK rejects the restricted header, log a warning and fall back to a normal retry request instead of throwing a runtime exception
Example:
static HttpRequest buildRetryRequest(HttpRequest request, int attempt) {
    try {
        logger.info("Attempt {} failed. Retrying with 'Connection: close' to force fresh connection.", attempt);
        return HttpRequest.newBuilder(request, (name, value) -> true)
                .header("Connection", "close")
                .build();
    } catch (IllegalArgumentException e) {
        logger.warn("Attempt {} retry could not set restricted header 'Connection: close'. Falling back to a normal retry. Configure -Djdk.httpclient.allowRestrictedHeaders=connection,host at JVM startup to enable fresh-connection retries.", attempt, e);
        return request;
    }
}
This ensures the retry logic still works even when the environment is not configured for restricted headers. The only feature that is lost in that case is the explicit forced-connection-close hint.
Light GenAI Client Design
Introduction
The light-genai-4j library provides a standardized way for Light-4j applications to interact with various Generative AI (GenAI) providers. By abstracting the underlying client implementations behind a common interface, applications can support dynamic model switching and simplified integration for different environments (e.g., local development vs. production).
Architecture
The project is structured into a core module and provider-specific implementation modules.
Modules
- genai-core: Defines the common interfaces and shared utilities.
- genai-ollama: Implementation for the Ollama API, suitable for local LLM inference.
- genai-bedrock: Implementation for AWS Bedrock, suitable for enterprise-grade managed LLMs.
Interface Design
The core interaction is defined by the GenAiClient interface in the genai-core module.
package com.networknt.genai;

import java.util.List;

public interface GenAiClient {
    /**
     * Generates a text completion for the given list of chat messages.
     *
     * @param messages The list of chat messages (history).
     * @return The generated text response from the model.
     */
    String chat(List<ChatMessage> messages);

    /**
     * Generates a text completion stream for the given list of chat messages.
     *
     * @param messages The list of chat messages (history).
     * @param callback The callback to receive chunks, completion, and errors.
     */
    void chatStream(List<ChatMessage> messages, StreamCallback callback);
}
The StreamCallback interface:
public interface StreamCallback {
    void onEvent(String content);
    void onComplete();
    void onError(Throwable t);
}
This simple interface allows for “drop-in” replacements of the backend model without changing the application logic.
ChatMessage
A simple POJO to represent a message in the conversation.
public class ChatMessage {
    private String role; // "user", "assistant", "system"
    private String content;
    // constructors, getters, setters
}
Implementations
Ollama (genai-ollama)
Connects to a local or remote Ollama instance.
- Configuration:
ollama.ymlollamaUrl: URL of the Ollama server (e.g.,http://localhost:11434).model: The model name to use (e.g.,llama3.1,mistral).
- Protocol: Uses the
/api/generateendpoint via HTTP/2.
AWS Bedrock (genai-bedrock)
Connects to Amazon Bedrock using the AWS SDK for Java v2.
- Configuration:
bedrock.ymlregion: AWS Region (e.g.,us-east-1).modelId: The specific model ID (e.g.,anthropic.claude-v2,amazon.titan-text-express-v1).
- Authentication: Uses the standard AWS Default Credentials Provider Chain (Environment variables, Profile, IAM Roles).
OpenAI (genai-openai)
Connects to the OpenAI Chat Completions API.
- Configuration:
openai.ymlurl: API endpoint (e.g.,https://api.openai.com/v1/chat/completions).model: The model to use (e.g.,gpt-3.5-turbo,gpt-4).apiKey: Your OpenAI API key.
- Protocol: Uses standard HTTP/2 (or HTTP/1.1) to send JSON payloads.
Gemini (genai-gemini)
Connects to Google’s Gemini models (via Vertex AI or AI Studio).
- Configuration:
gemini.ymlurl: API endpoint structure.model: The model identifier (e.g.,gemini-pro).apiKey: Your Google API key.
- Protocol: REST API with JSON payloads.
Code Example
The following example demonstrates how to use the interface to interact with a model, regardless of the underlying implementation.
// Logic to instantiate the correct client based on external configuration (e.g. from service.yml or reflection)
GenAiClient client;
if (useBedrock) {
    client = new BedrockClient();
} else if (useOpenAi) {
    client = new OpenAiClient();
} else if (useGemini) {
    client = new GeminiClient();
} else {
    client = new OllamaClient();
}

// Application logic remains agnostic
List<ChatMessage> messages = new ArrayList<>();
messages.add(new ChatMessage("user", "Explain quantum computing in 50 words."));
String response = client.chat(messages);
System.out.println(response);

// For subsequent turns:
messages.add(new ChatMessage("assistant", response));
messages.add(new ChatMessage("user", "What about entanglement?"));
String response2 = client.chat(messages);
Future Enhancements
- Streaming Support: Add
generateStreamto support token streaming. - Chat Models: Add support for structured chat history (System, User, Assistant messages).
- Tool Use: Support for function calling and tool use with models that support it.
- More Providers: Integrations for OpenAI (ChatGPT), Google Vertex AI (Gemini), and others.
Technical Decisions
Use of Http2Client over JDK HttpClient
The implementation uses the light-4j Http2Client (wrapping Undertow) instead of the standard JDK HttpClient for the following reasons:
- Framework Consistency:
Http2Clientis the standard client within the light-4j ecosystem. Using it ensures consistent configuration, management, and behavior across all modules of the framework. - Performance: It leverages the non-blocking I/O capabilities of the underlying Undertow server, sharing the same XNIO worker threads as the server components. This minimizes context switching and optimizes resource usage in a microservices environment.
- Callback Pattern: The
ClientCallbackandChannelListenerpatterns are idiomatic to light-4j/Undertow. While they differ from theCompletableFuturestyle of the JDK client, using them maintains architectural uniformity for developers familiar with the framework’s internals. - Integration: Utilizing the framework’s client allows for seamless integration with other light-4j features such as centralized SSL context management, connection pooling, and client-side observability.
For implementations that require vendor-specific logic (like AWS signing), we utilize the official vendor SDKs (e.g., AWS SDK for Java v2 for Bedrock) to handle complex authentication and protocol details efficiently.
Client Credentials to Authorization Code Token Exchange
Introduction
This document outlines the design for exchanging an external Client Credentials (CC) token (e.g., from Okta) for an internal Authorization Code (AC) style token (containing user/function identity) within the light-4j ecosystem.
Use Case
External partners or applications integrate with light-portal using their own Identity Provider (e.g., Okta) via the Client Credentials flow.
- External Token: A JWT issued by Okta representing the External App.
- Internal Requirement:
light-portalservices require a JWT containing internaluserId,roles, andcustom_claimsto perform business logic (Event Sourcing/CQRS). - Goal: Bridge the external identity to the internal identity transparently at the ingress/handler layer.
Architecture
The solution uses RFC 8693 OAuth 2.0 Token Exchange.
High-Level Flow
- External Request: The external app calls
light-portalwithAuthorization: Bearer <Okta-CC-Token>. - Interception: A
TokenExchangeHandlerinlight-portalintercepts the request. - Validation: The handler validates the Okta token (signature, expiration) using
JwtVerifierand Okta’s JWK. - Exchange:
- The handler requests a token exchange from the internal
light-oauth2service. - Grant Type:
urn:ietf:params:oauth:grant-type:token-exchange - Subject Token: The verified Okta token.
- Subject Token Type:
urn:ietf:params:oauth:token-type:jwt
- The handler requests a token exchange from the internal
- Minting:
light-oauth2validates the request.- It identifies the “Shadow Project” mapped to the external client ID.
- It issues a new internal JWT containing the mapped internal
userIdand roles.
- Injection: The handler replaces the
Authorizationheader with the new internal token. - Processing: Downstream services processing the request see a standard internal user token.
Configuration
The TokenExchangeHandler configures the exchange parameters via client.yml or values.yml using OAuthTokenExchangeConfig.
client:
  tokenExUri: "https://light-oauth2/oauth2/token"
  tokenExClientId: "${portal.client_id}"
  tokenExClientSecret: "${portal.client_secret}"
  tokenExScope:
    - "portal.w"
    - "portal.r"
Client Identity Mapping
A critical component is mapping the External Client ID (from Okta) to an Internal Function ID.
Recommended Approach: Database (Shadow Client)
Maintain a “Shadow Client” record in the light-oauth2 database for each external partner.
- Registration: Create a client in
light-oauth2whereclient_idmatches the Okta Client ID. - Mapping: Populate the
custom_claimscolumn for this client with the internal identity:{ "functionId": "acme-integration-user", "internalRole": "partner" } - Execution: When
light-oauth2performs the exchange, it looks up this client record and automatically injects these custom claims into the new token.
Pros:
- Scalable: Manage thousands of partners via Portal UI/Database without restarts.
- Standard: Uses existing
light-oauth2features. - Decoupled: The handler code remains generic.
Alternative Approach: Configuration
Map IDs locally in the handler configuration.
tokenExchangeMapping:
  "okta-client-id-1": "internal-id-1"
Pros: Simple for MVP. Cons: Requires restart to add partners; hard to manage at scale.
Security Considerations
- Trust: The internal
light-oauth2must trust the Portal Client to perform exchanges. - Validation: The
TokenExchangeHandlermust validate the external token before attempting exchange to prevent garbage requests from reaching the OAuth server. - Scope: The exchanged token should have scopes limited to what the external partner is allowed to do.
Client SimplePool Design
Overview
The SimplePool is a lightweight HTTP connection pooling implementation in the light-4j client module. It was contributed by a customer to address connection management issues in high-throughput scenarios. The implementation provides a robust connection pooling mechanism with support for both HTTP/1.1 and HTTP/2 connections.
Architecture
The SimplePool follows a layered architecture with clear separation of concerns:
graph TB
    subgraph "Public API"
        SCP[SimpleConnectionPool]
    end

    subgraph "URI-Level Pool"
        SUCP[SimpleURIConnectionPool]
    end

    subgraph "Connection Management"
        SCS[SimpleConnectionState]
        CT[ConnectionToken]
    end

    subgraph "Abstraction Layer"
        SC[SimpleConnection Interface]
        SCM[SimpleConnectionMaker Interface]
    end

    subgraph "Undertow Implementation"
        SUC[SimpleUndertowConnection]
        SUCM[SimpleUndertowConnectionMaker]
    end

    SCP --> SUCP
    SUCP --> SCS
    SCS --> CT
    SCS --> SC
    SCS --> SCM
    SC --> SUC
    SCM --> SUCM
Core Components
SimpleConnection (Interface)
A protocol-agnostic interface that wraps raw connections:
isOpen()- Check if connection is still opengetRawConnection()- Access the underlying connection objectisMultiplexingSupported()- Detect HTTP/2 capabilitygetLocalAddress()- Get client-side addresssafeClose()- Safely close the connection
SimpleConnectionState
The central state management component that wraps a SimpleConnection and tracks its lifecycle:
Connection States:
NOT_BORROWED_VALID- Available for borrowingBORROWED_VALID- Currently in useNOT_BORROWED_EXPIRED- Expired, ready for cleanupBORROWED_EXPIRED- Expired but still in useCLOSED- Connection terminated
State Machine:
                    |
                   \/
         [ NOT_BORROWED_VALID ] --(borrow)-->   [ BORROWED_VALID ]
                   |            <-(restore)--           |
                   |                                    |
                (expire)                             (expire)
                   |                                    |
                  \/                                   \/
         [ NOT_BORROWED_EXPIRED ] <-(restore)-- [ BORROWED_EXPIRED ]
                  |
               (close)
                 |
                \/
             [ CLOSED ]
Key Features:
- Connection Tokens: Track borrows with
ConnectionTokenobjects - Time-Freezing: All state checks use a consistent “now” timestamp to prevent race conditions
- Thread-Safe: All state transitions are
synchronized - HTTP/2 Multiplexing: HTTP/2 connections support unlimited borrows; HTTP/1.1 limited to 1
SimpleURIConnectionPool
Manages connections for a single URI with multiple tracking sets:
allCreatedConnections- All connections created by connection makersallKnownConnections- All connections tracked by the poolborrowable- Connections available for borrowingborrowed- Connections with outstanding tokensnotBorrowedExpired- Connections ready for cleanup
Key Features:
- Random selection from borrowable connections for load distribution
- Automatic cleanup of expired connections during borrow/restore operations
- Leaked connection detection and cleanup
SimpleConnectionPool
Top-level pool that manages SimpleURIConnectionPool instances per URI:
- Thread-safe map of URI to connection pools
- Lazy initialization of per-URI pools
- Delegates borrow/restore to appropriate URI pool
SimpleConnectionMaker (Interface)
Factory interface for creating connections with two creation modes:
- Simplified mode using
isHttp2boolean - Full control mode with XnioWorker, SSL, ByteBufferPool, and OptionMap
Undertow Implementation
- SimpleUndertowConnection: Wraps Undertow’s
ClientConnection - SimpleUndertowConnectionMaker: Creates connections using
UndertowClientorHttp2Client
Integration with Http2Client
The Http2Client class integrates SimplePool via:
borrow(URI, XnioWorker, ByteBufferPool, ...)methods - Get connection tokenrestore(ConnectionToken)method - Return connection to pool
// Usage pattern
ConnectionToken token = http2Client.borrow(uri, worker, bufferPool, isHttp2);
try {
    ClientConnection connection = (ClientConnection) token.getRawConnection();
    // Use connection...
} finally {
    http2Client.restore(token);
}
Configuration
The pool behavior is controlled via ClientConfig:
connectionExpireTime- How long connections remain valid (default from config)connectionPoolSize- Maximum connections per URI (default from config)request.connectTimeout- Connection creation timeout
Code Review Findings
Strengths
-
Well-Documented State Machine: The connection state transitions are clearly documented with diagrams in code comments.
-
Thread Safety: Proper synchronization with
synchronizedmethods andConcurrentHashMapusage. -
Time-Freezing Pattern: Excellent approach to prevent time-of-check-time-of-use (TOCTOU) race conditions by passing a consistent
nowvalue. -
Leak Detection: The
findAndCloseLeakedConnections()method handles edge cases where connections are created but not properly tracked. -
HTTP/2 Multiplexing Support: Proper differentiation between HTTP/1.1 (single borrow) and HTTP/2 (unlimited borrows).
-
Random Connection Selection: Uses
ThreadLocalRandomfor efficient, fair distribution of connections. -
Comprehensive Logging: Detailed debug logging with connection port and state information.
Resolved Issues
The following issues were identified during code review and have been fixed:
1. Race Condition in SimpleConnectionPool.borrow() ✅ Fixed
Location: SimpleConnectionPool.java
Issue: Double-checked locking had a subtle race condition.
Fix: Replaced with atomic computeIfAbsent():
SimpleURIConnectionPool pool = pools.computeIfAbsent(uri,
    u -> new SimpleURIConnectionPool(u, expireTime, poolSize, connectionMaker));
return pool.borrow(createConnectionTimeout);
2. Unused isHttp2 Parameter ✅ Fixed
Location: SimpleConnectionPool.java
Fix: Removed the unused isHttp2 parameter from the borrow() method signature.
3. NPE Risk in Http2Client.restore() ✅ Fixed
Location: Http2Client.java
Fix: Added null check before calling restore:
SimpleURIConnectionPool pool = pools.get(token.uri());
if(pool != null) pool.restore(token);
4. Singleton Pattern Thread Safety ✅ Fixed
Location: SimpleUndertowConnectionMaker.java
Fix: Implemented thread-safe singleton using the Holder pattern:
private static class Holder {
    static final SimpleUndertowConnectionMaker INSTANCE = new SimpleUndertowConnectionMaker();
}
public static SimpleConnectionMaker instance() {
    return Holder.INSTANCE;
}
5. Missing Null Check in SimpleConnectionPool.restore() ✅ Fixed
Location: SimpleConnectionPool.java
Fix: Added null checks for both the connection token and the pool:
if(connectionToken == null) return;
SimpleURIConnectionPool pool = pools.get(connectionToken.uri());
if(pool != null) pool.restore(connectionToken);
6. Hardcoded Worker Configuration ✅ Improved
Location: SimpleUndertowConnectionMaker.java
Fix: Extracted hardcoded value to a named constant for clarity:
private static final int DEFAULT_WORKER_IO_THREADS = 8;
Note
The Static Worker and SSL Reuse concern (TODO comments about reusing WORKER and SSL) remains as a documented consideration for future enhancement if configuration reloading becomes a requirement.
Best Practices Observed
-
Functional Interface with Lambda: The
RemoveFromAllKnownConnectionsinterface provides flexibility for Iterator-based or direct removal. -
Explicit State Assertions: Using
IllegalStateExceptionfor invalid state transitions aids debugging. -
Comprehensive Javadoc: Methods include detailed documentation about thread safety and usage patterns.
-
Connection Token Pattern: Ensures connections can be tracked and returned correctly, preventing leaks when used properly.
Summary
The SimplePool implementation is a well-designed, production-quality connection pool with excellent documentation and careful attention to thread safety. All identified issues have been resolved. The implementation successfully handles:
- Connection lifecycle management
- HTTP/1.1 and HTTP/2 protocol differences
- Connection expiration and cleanup
- Leak detection and prevention
- Thread-safe concurrent access
New Features
Pool Metrics
Connection pool metrics can be enabled via configuration to track:
- Total borrows and restores per URI
- Connection creation and closure counts
- Borrow failures
- Current active connection count
client:
  request:
    poolMetricsEnabled: true
Metrics Usage Examples
Basic metrics access:
Http2Client client = Http2Client.getInstance();
SimplePoolMetrics metrics = client.getPoolMetrics();
if (metrics != null) {
    // Get summary for logging
    logger.info(metrics.getSummary());

    // Access per-URI metrics
    for (Map.Entry<URI, SimplePoolMetrics.UriMetrics> entry : metrics.getAllMetrics().entrySet()) {
        URI uri = entry.getKey();
        SimplePoolMetrics.UriMetrics uriMetrics = entry.getValue();

        logger.info("Pool {} - active: {}, borrows: {}, restores: {}, created: {}, closed: {}, failures: {}",
            uri,
            uriMetrics.getActiveConnections(),
            uriMetrics.getTotalBorrows(),
            uriMetrics.getTotalRestores(),
            uriMetrics.getTotalCreated(),
            uriMetrics.getTotalClosed(),
            uriMetrics.getBorrowFailures());
    }
}
Periodic metrics logging (e.g., every 5 minutes):
ScheduledExecutorService scheduler = Executors.newSingleThreadScheduledExecutor();
scheduler.scheduleAtFixedRate(() -> {
    SimplePoolMetrics metrics = Http2Client.getInstance().getPoolMetrics();
    if (metrics != null) {
        logger.info(metrics.getSummary());
    }
}, 5, 5, TimeUnit.MINUTES);
Exposing metrics via REST endpoint:
@GET
@Path("/pool/metrics")
public Response getPoolMetrics() {
    SimplePoolMetrics metrics = Http2Client.getInstance().getPoolMetrics();
    if (metrics == null) {
        return Response.status(503).entity("Metrics not enabled").build();
    }

    Map<String, Object> result = new HashMap<>();
    for (Map.Entry<URI, SimplePoolMetrics.UriMetrics> entry : metrics.getAllMetrics().entrySet()) {
        SimplePoolMetrics.UriMetrics m = entry.getValue();
        result.put(entry.getKey().toString(), Map.of(
            "active", m.getActiveConnections(),
            "borrows", m.getTotalBorrows(),
            "restores", m.getTotalRestores(),
            "created", m.getTotalCreated(),
            "closed", m.getTotalClosed(),
            "failures", m.getBorrowFailures()
        ));
    }
    return Response.ok(result).build();
}
Pool Warm-Up
Pre-establish connections to reduce latency on first request:
client:
  request:
    poolWarmUpEnabled: true
    poolWarmUpSize: 2
Programmatic warm-up:
Http2Client client = Http2Client.getInstance();
client.warmUpPool(URI.create("https://api.example.com:8443"));
Connection Health Checks
Background thread validates idle connections and removes stale ones:
client:
  request:
    healthCheckEnabled: true
    healthCheckIntervalMs: 30000
Health Check Usage Examples
Graceful shutdown:
// In your application shutdown hook
Runtime.getRuntime().addShutdownHook(new Thread(() -> {
    Http2Client.getInstance().shutdown();
    logger.info("Http2Client shutdown complete");
}));
With Server module shutdown listener:
public class ClientShutdownListener implements ShutdownHookProvider {
    @Override
    public void onShutdown() {
        Http2Client.getInstance().shutdown();
    }
}
Monitoring pool health programmatically:
Http2Client client = Http2Client.getInstance();
Map<URI, SimpleURIConnectionPool> pools = client.getPools();

for (Map.Entry<URI, SimpleURIConnectionPool> entry : pools.entrySet()) {
    SimpleURIConnectionPool pool = entry.getValue();
    logger.info("Pool {} - active: {}, borrowable: {}, borrowed: {}",
        entry.getKey(),
        pool.getActiveConnectionCount(),
        pool.getBorrowableCount(),
        pool.getBorrowedCount());
}
Complete configuration example:
client:
  request:
    # Connection timeouts
    connectTimeout: 10000
    timeout: 3000

    # Pool sizing
    connectionPoolSize: 10
    connectionExpireTime: 1800000

    # Metrics (disabled by default)
    poolMetricsEnabled: true

    # Warm-up (disabled by default)
    poolWarmUpEnabled: true
    poolWarmUpSize: 2

    # Health checks (enabled by default)
    healthCheckEnabled: true
    healthCheckIntervalMs: 30000
Consolidating AbstractJwtVerifyHandler and AbstractSimpleJwtVerifyHandler
Introduction
The light-4j framework previously had two abstract base classes for JWT verification: AbstractJwtVerifyHandler and AbstractSimpleJwtVerifyHandler.
AbstractJwtVerifyHandler: Used byJwtVerifyHandler(inlight-rest-4j) andHybridJwtVerifyHandler(inlight-hybrid-4j). It included logic for verifying OAuth 2.0 scopes against an OpenAPI specification.AbstractSimpleJwtVerifyHandler: Used bySimpleJwtVerifyHandler(inlight-rest-4j). It provided basic JWT verification (signature, expiration) but skipped all scope verification logic.
This design document outlines the consolidation of these two classes into a single AbstractJwtVerifyHandler to reduce code duplication and simplify maintenance.
Motivation
The two abstract classes shared approximately 85% of their code, including token extraction, JWT signature verification using JwtVerifier, and audit info population. The primary difference was the presence of scope verification logic in AbstractJwtVerifyHandler.
Maintaining two separate hierarchies for largely identical logic increased the risk of inconsistencies (e.g., bug fixes applied to one but missed in the other) and added unnecessary complexity.
Changes
1. AbstractJwtVerifyHandler Updates
The AbstractJwtVerifyHandler in light-4j/unified-security has been updated to support scopeless verification, effectively merging the behavior of AbstractSimpleJwtVerifyHandler.
getSpecScopes()is no longer abstract: It now has a default implementation that returnsnull.public List<String> getSpecScopes(HttpServerExchange exchange, Map<String, Object> auditInfo) throws Exception { return null; // Default: no scope verification (simple JWT behavior) }- Conditional Scope Verification: The
handleJwtmethod now checks ifgetSpecScopes()returnsnull. If it does, the scope verification logic (checking secondary scopes and matching against spec scopes) is skipped. - Enriched Audit Info:
AbstractJwtVerifyHandlerextracts additional claims likeemail,host, androleinto the audit info map. By using this class for simple JWT verification, these claims are now populated forSimpleJwtVerifyHandleras well, improving audit capabilities.
2. Removal of AbstractSimpleJwtVerifyHandler
The AbstractSimpleJwtVerifyHandler class in light-4j/unified-security has been deleted.
3. SimpleJwtVerifyHandler Update
The SimpleJwtVerifyHandler in light-rest-4j/openapi-security has been updated to extend AbstractJwtVerifyHandler directly.
- It inherits the default
getSpecScopes()implementation (returningnull), which triggers the scopeless verification path in the base class. - It implements the required
isSkipAuth()method, same as before.
4. UnifiedSecurityHandler Update
The UnifiedSecurityHandler in light-4j/unified-security has been updated to cast the “sjwt” (Simple JWT) handler to AbstractJwtVerifyHandler instead of the removed AbstractSimpleJwtVerifyHandler.
Impact
Simplified Hierarchy
There is now a single abstract base class (AbstractJwtVerifyHandler) for all JWT verification handlers in the framework.
Backward Compatibility
- Functionality: Existing handlers (
JwtVerifyHandler,SimpleJwtVerifyHandler,HybridJwtVerifyHandler) continue to work as before. - Configuration: No changes to
security.ymloropenapi-security.ymlare required. - Behavior:
SimpleJwtVerifyHandlernow extracts more comprehensive audit information (e.g., user email, host, role) if present in the token, which is a beneficial side effect.
Conclusion
This refactoring simplifies the codebase, removes duplication, and ensures consistent JWT handling across different modules while maintaining full backward compatibility.
Fine-Grained Authorization (FGA) Design
In the Light framework ecosystems (light-rest-4j, light-hybrid-4j, and light-graphql-4j), Coarse-Grained Authorization revolves around OAuth 2.0 JWT token scopes, primarily ensuring that users possess top-level access to broad endpoints.
However, Fine-Grained Authorization (FGA) applies dynamic, rule-based business logic to requests—operating at the row or column level—to selectively filter attributes, enforce ownership constraints, or permit conditionally authorized actions based on arbitrary token claims or request payloads.
This document outlines the architecture, components, and the integration flows supporting FGA.
Core Components
The FGA system relies on the interplay of several core components structured to provide high performance (via local caching) while maintaining centralized policy definitions natively managed within the light-portal.
1. RuleEngine
The RuleEngine (housed in yaml-rule) evaluates incoming contextual payloads against a predefined set of YAML rules. The rules contain conditions structured around the business domain, granting binary (pass/fail) results or mutating payload structures.
2. RuleLoaderStartupHook
To prevent introducing network latency during live authorization checks, FGA operates completely in-memory.
The RuleLoaderStartupHook (in light-4j) runs when a framework server starts up. It connects to the light-portal (acting as the control plane) to download all applicable YAML rules and API permissions specific to the host, API ID, and API version.
- It caches all endpoint mapped rules natively inside
RuleLoaderStartupHook.endpointRules. - It caches the YAML schemas dynamically parsed as
Ruleobjects insideRuleLoaderStartupHook.rules. - It initializes the
RuleEngineSingleton.
3. AccessControlHandler
The AccessControlHandler operates as a crucial middleware in both light-rest-4j and light-hybrid-4j architectures. As a middleware handler injected after authentication mechanisms (like JwtVerifyHandler), it builds a contextual Request Payload encapsulating headers, query parameters, method types, and the deserialized JWT claims (found in auditInfo).
It behaves iteratively:
- Lookup: Resolves the exact endpoint being requested.
- Match: Fetches the associated rules from the
RuleLoaderStartupHookmappings for that endpoint. - Execute: Pipes the contextual payload through the
RuleEngine. - Enforce: Depending on the server configuration (
accessRuleLogic:allvs.any), the handler will either advance the HTTP Exchange to the next middleware or abort the request, dumping anERR10067orERR10069Status code indicating an access control failure or missing rule fallback.
Refactoring and Integration Gaps
Historically, the RuleLoaderStartupHook depended on the market ecosystem to retrieve API endpoint rules. However, to modernize the control plane and decouple rule queries from the legacy marketplace components, Rule/Permission persistence has been shifted to specialized domain queries.
API Migration Map
The market actions were deprecated and substituted with distinct domain boundaries:
getServiceRule: Migrated out ofmarketand is now natively handled byGetServiceRule.javawithin theservice-querymodule mapped to theservicetarget endpoint.getApiPermission: Migrated out ofmarketand natively handled byGetApiPermission.javawithin theservice-querymodule. (Note:GetRuleByApiId.javainsiderule-queryserves simple rule mappings, whereas the startup hook specifically requires the enriched unified schema containingruleBodiesprovided by the structuredGetServiceRule).
Updates Required
Framework integrations must ensure their startup loops target the updated schema formats. Specifically, the RuleLoaderStartupHook payloads strictly hit the modernized endpoints:
{
  "host": "lightapi.net",
  "service": "service",
  "action": "getServiceRule",   // or getApiPermission
  "version": "0.1.0",
  "data": { ... }
}
Testing Strategy
Validating FGA logic avoids reliance on complex networked setups by supplying the RuleLoaderStartupHook instances with mock configurations at test-time.
For unit tests targeting AccessControlHandler:
- Initialization Bypass: Tests artificially seed
RuleLoaderStartupHook.rulesandRuleLoaderStartupHook.endpointRuleswith predictable mapping behaviors before rule engine execution. - Path Skip Asserts:
AccessControlHandlerallows endpoints strictly matching theskipPathPrefixesconfig variable to bypass FGA (e.g., standard/healthendpoints). - Failure Overrides: If rules are omitted, the explicit verification of
config.isDefaultDeny()governs whether missing policies act as permit-all traps or deny-all blocks. Tests must assert that HTTP 403s are accurately rendered when rule configurations lack explicit definition.
Cross-Cutting-Concerns
Light-4j
Http Handler
Path Resource Handler
The PathResourceHandler is a middleware handler in light-4j that provides an easy way to serve static content from a specific filesystem path. It wraps Undertow’s PathHandler and ResourceHandler, allowing you to expose local directories via HTTP with simple configuration.
Features
- External Configuration: Define path mapping and base directory in a YAML file.
- Path Matching: Supports both exact path matching and prefix-based matching.
- Directory Listing: Optional support for listing directory contents.
- Performance: Integrated with Undertow’s
PathResourceManagerfor efficient file serving. - Auto-Registration: Automatically registers with
ModuleRegistryfor runtime visibility.
Configuration (path-resource.yml)
The behavior of the handler is controlled by path-resource.yml.
# Path Resource Configuration
---
# The URL path at which the static content will be exposed (e.g., /static)
path: ${path-resource.path:/}

# The absolute filesystem path to the directory containing the static files
base: ${path-resource.base:/var/www/html}

# If true, the handler matches all requests starting with the 'path'.
# If false, it only matches exact hits on the 'path'.
prefix: ${path-resource.prefix:true}

# The minimum file size for transfer optimization (in bytes).
transferMinSize: ${path-resource.transferMinSize:1024}

# Whether to allow users to see a listing of files if they access a directory.
directoryListingEnabled: ${path-resource.directoryListingEnabled:false}
Setup
1. Add Dependency
Include the resource module in your pom.xml:
<dependency>
    <groupId>com.networknt</groupId>
    <artifactId>resource</artifactId>
    <version>${version.light-4j}</version>
</dependency>
2. Register Handler
In your handler.yml, register the PathResourceHandler and add it to your handler chain or path mappings.
handlers:
  - com.networknt.resource.PathResourceHandler@pathResource

chains:
  default:
    - ...
    - pathResource
    - ...
Or, if you want it on a specific path:
paths:
  - path: '/static'
    method: 'GET'
    exec:
      - pathResource
Operational Visibility
The path-resource module integrates with the ModuleRegistry. You can verify the active path and base directory mapping at runtime via the Server Info endpoint.
Virtual Host Handler
The VirtualHostHandler is a middleware handler in light-4j that enables name-based virtual hosting. It allows a single server instance to serve different content or applications based on the Host header in the incoming HTTP request. This is a wrapper around Undertow’s NameVirtualHostHandler.
Features
- Domain-Based Routing: Route requests to different resource sets based on the domain name.
- Flexible Mappings: Each virtual host can define its own path, base directory, and performance settings.
- Centralized Configuration: All virtual hosts are defined in a single
virtual-host.ymlfile. - Auto-Registration: Automatically registers with
ModuleRegistryfor administrative oversight.
Configuration (virtual-host.yml)
The configuration contains a list of host definitions.
# Virtual Host Configuration
---
hosts:
  - domain: dev.example.com
    path: /
    base: /var/www/dev
    transferMinSize: 1024
    directoryListingEnabled: true
  - domain: prod.example.com
    path: /app
    base: /var/www/prod/dist
    transferMinSize: 1024
    directoryListingEnabled: false
Host Parameters:
domain: The domain name to match (exact match against theHostheader).path: The URL prefix path within that domain to serve resources from.base: The absolute filesystem path to the directory containing the static content.transferMinSize: Minimum file size for transfer optimization (in bytes).directoryListingEnabled: Whether to allow directory browsing for this specific host.
Setup
1. Add Dependency
Include the resource module in your pom.xml:
<dependency>
    <groupId>com.networknt</groupId>
    <artifactId>resource</artifactId>
    <version>${version.light-4j}</version>
</dependency>
2. Register Handler
In your handler.yml, register the VirtualHostHandler.
handlers:
  - com.networknt.resource.VirtualHostHandler@virtualHost

chains:
  default:
    - ...
    - virtualHost
    - ...
How it Works
When a request arrives, the VirtualHostHandler:
- Inspects the
Hostheader of the request. - Matches it against the
domainentries in the configuration. - If a match is found, it delegates the request to a subdomain-specific
PathHandlerandResourceHandlerconfigured with the correspondingbaseandpath. - If no match is found, the request typically proceeds down the chain or returns a 404 depending on the rest of the handler configuration.
Operational Visibility
The virtual-host module registers itself with the ModuleRegistry during initialization. The full list of configured virtual hosts and their mapping settings can be inspected via the Server Info endpoint.
Router Handler
The RouterHandler is a key component in the Light-Router and http-sidecar services. It acts as a reverse proxy request handler, forwarding incoming requests to downstream services based on service discovery and routing rules.
Introduction
In a microservices architecture, a gateway or sidecar often needs to route requests to various backend services. The RouterHandler fulfills this role by:
- Proxying: It uses a
LoadBalancingRouterProxyClientto forward requests. - Protocol Support: It supports HTTP/1.1 and HTTP/2, with optional TLS (HTTPS) for downstream connections.
- ** rewriting**: It offers powerful capabilities to rewrite URLs, methods, headers, and query parameters before forwarding the request.
- Resilience: It handles connection pooling, retries, and timeouts (both global and path-specific).
Configuration
The handler is configured via the router.yml file. This configuration file allows you to fine-tune the connection behavior and define rewrite rules.
Key Configuration Options
| Config Field | Description | Default |
|---|---|---|
http2Enabled | Use HTTP/2 for downstream connections. | true |
httpsEnabled | Use TLS (HTTPS) for downstream connections. | true |
maxRequestTime | Global timeout (in ms) for downstream requests. | 1000 |
rewriteHostHeader | Rewrite the Host header to match the target service. | true |
connectionsPerThread | Number of cached connections per thread in the pool. | 10 |
maxConnectionRetries | Number of times to retry a failed connection. | 3 |
hostWhitelist | List of allowed target hosts (supports regex). | [] |
Path-Specific Timeouts
You can override the global maxRequestTime for specific paths using pathPrefixMaxRequestTime.
pathPrefixMaxRequestTime:
  /v1/heavy-processing: 5000
  /v2/report: 10000
Rewrite Rules
The router supports extensive rewrite rules to adapt legacy clients or unify API surfaces.
URL Rewrite Rewrite specific paths using Regex.
urlRewriteRules:
  # Regex Pattern -> Replacement
  - /listings/(.*)$ /listing.html?listing=$1
Method Rewrite Convert methods (e.g., for clients that don’t support DELETE/PUT).
methodRewriteRules:
  # Endpoint Pattern -> Source Method -> Target Method
  - /v1/pets/{petId} GET DELETE
Header & Query Param Rewrite Rename keys or replace values for headers and query parameters.
headerRewriteRules:
  /v1/old-api:
    - oldK: X-Old-Header
      newK: X-New-Header

queryParamRewriteRules:
  /v1/search:
    - oldK: q
      newK: query
Example router.yml
# Router Configuration
http2Enabled: true
httpsEnabled: true
maxRequestTime: 2000
rewriteHostHeader: true
reuseXForwarded: false
maxConnectionRetries: 3
connectionsPerThread: 20

# Host Whitelist (Regex)
hostWhitelist:
  - 192\.168\..*
  - networknt\.com

# Metrics
metricsInjection: true
metricsName: router-response
Usage
The RouterHandler is typically used as the terminal handler in a gateway or sidecar chain. It effectively “exits” the Light-4j processing chain and hands the request over to the external service.
handler.yml
handlers:
  - com.networknt.router.RouterHandler@router
  # ... other handlers

chains:
  default:
    - correlation
    - limit
    - router # The request is forwarded here
Metrics Injection
If metricsInjection is enabled, the router can inject response time metrics into the configured Metrics Handler. This helps in tracking the latency introduced by downstream services separately from the gateway’s own processing time.
OAuth Server Handler
The OAuthServerHandler is a specialized handler designed to simulate an OAuth 2.0 provider endpoint (e.g., /oauth/token). Its primary purpose is to facilitate the migration of legacy applications that expect to exchange client credentials for a token, without requiring immediate code changes in those applications.
Introduction
In a typical migration scenario, you might have legacy clients that are hardcoded to call a specific token endpoint to get an access token before calling an API. The OAuthServerHandler intercepts these requests at the gateway.
It supports the client_credentials grant type and can operate in two modes:
- Dummy Mode: Returns a generated dummy token. This is useful when the gateway itself handles authentication/authorization using a different mechanism (e.g., Mutual TLS or a centralized token) and the client just needs some token to proceed.
- Pass-Through Mode: Validates the credentials locally and then fetches a real JWT from a backend OAuth 2.0 provider (using
TokenServiceconfiguration) and returns it to the client.
Configuration
The handler is configured via the oauthServer.yml file.
| Config Field | Description | Default |
|---|---|---|
enabled | Enable or disable the handler. | true |
getMethodEnabled | Allow token requests via HTTP GET (for legacy support). Insecure. | false |
client_credentials | A list of valid clientId:clientSecret pairs for validation. | [] |
passThrough | If true, fetches a real token from a downstream provider. If false, returns a dummy token. | false |
tokenServiceId | The Service ID (in client.yml) of the real OAuth provider. Used only if passThrough is true. | light-proxy-client |
Example oauthServer.yml
# OAuth Server Configuration
enabled: true
getMethodEnabled: false
passThrough: true
tokenServiceId: aad-token-service

# List of valid credentials (clientId:clientSecret)
client_credentials:
  - 3848203948:2881938882
  - client_App1:pass1234
Handlers
OAuthServerHandler
- Path: Typically mapped to
/oauth2/tokenor similar. - Method:
POST - Content-Type:
application/json,application/x-www-form-urlencoded,multipart/form-data. - Logic:
- Extracts
client_idandclient_secretfrom the request body ORAuthorization: Basicheader. - Validates them against the
client_credentialslist. - If valid, returns a JSON response with
access_token,token_type, andexpires_in.
- Extracts
OAuthServerGetHandler
- Path: Configurable (e.g.,
/oauth2/token). - Method:
GET - Logic:
- Extracts credentials from Query Parameters (
client_id,client_secret). - Warning: This is highly insecure as secrets are exposed in the URL. Use only for legacy migration where absolutely necessary.
- Requires
getMethodEnabled: truein config.
- Extracts credentials from Query Parameters (
Usage
To use these handlers, register them in handler.yml.
handler.yml
paths:
  - path: '/oauth2/token'
    method: 'POST'
    exec:
      - com.networknt.router.OAuthServerHandler
  - path: '/oauth2/token'
    method: 'GET'
    exec:
      - com.networknt.router.OAuthServerGetHandler
Proxy Handler
The Proxy Handler (LightProxyHandler) is a core component of the Light-Gateway and Sidecar patterns. It acts as a reverse proxy, forwarding incoming requests to backend services (downstream APIs) and returning the responses to the client.
Introduction
In a microservices architecture, a reverse proxy is often needed to route traffic from the internet to internal services, or to act as a sidecar handling cross-cutting concerns (security, metrics, etc.) for a specific service instance. The LightProxyHandler is built on top of Undertow’s ProxyHandler and provides features like load balancing, connection pooling, and protocol translation (HTTP/1.1 to HTTP/2).
Configuration
The handler is configured via proxy.yml.
| Config Field | Description | Default |
|---|---|---|
enabled | Enable or disable the proxy handler. | true |
hosts | Comma-separated list of downstream target URIs (e.g., http://localhost:8080,https://api.example.com). | http://localhost:8080 |
http2Enabled | Use HTTP/2 to connect to the backend. Requires all targets to support HTTPS and HTTP/2. | false |
connectionsPerThread | Number of connections per IO thread to the target server. | 20 |
maxRequestTime | Timeout in milliseconds for the proxy request. | 1000 |
rewriteHostHeader | Rewrite the Host header to the target’s host. | true |
forwardJwtClaims | If true, decodes the JWT and injects claims as a JSON string header jwtClaims to the backend. | false |
metricsInjection | If true, injects proxy response time metrics into the MetricsHandler. | false |
proxy.yml Example
enabled: true
http2Enabled: false
hosts: http://localhost:8081,http://localhost:8082
connectionsPerThread: 20
maxRequestTime: 5000
rewriteHostHeader: true
reuseXForwarded: false
maxConnectionRetries: 3
maxQueueSize: 0
forwardJwtClaims: true
metricsInjection: true
metricsName: proxy-response
Features
Load Balancing
The handler supports client-side load balancing if multiple URLs are provided in hosts. It uses a round-robin strategy by default via LoadBalancingProxyClient.
Protocol Support
- HTTP/1.1: Default behavior.
- HTTP/2: Enable
http2Enabledto communicate with backends via HTTP/2 (requires HTTPS). - HTTPS: Supports invalid certificate verification (for internal self-signed certs) if configured in
client.yml(TLS verification disabled).
JWT Claims Forwarding
If forwardJwtClaims is enabled, the handler extracts the JWT from the Authorization header, decodes the claims (without signature verification, assuming it was verified by SecurityHandler previously), and injects them as a JSON header jwtClaims to the downstream service. This is useful for backend services that need user context but don’t want to re-verify or parse JWTs.
Metrics Injection
The handler can measure the time taken for the downstream call (including network latency) and inject this data into the MetricsHandler. This allows distinguishing between the gateway’s overhead and the backend’s processing time.
Usage
In handler.yml, register the LightProxyHandler.
handlers:
  - com.networknt.proxy.LightProxyHandler@proxy
Then use it in paths, typically as the terminal handler.
paths:
  - path: '/v1/pets'
    method: 'get'
    exec:
      - security
      - metrics
      - proxy
Middleware Handler
APM Metrics Handler
The APM Metrics Handler (APMMetricsHandler) is a specialized metrics handler designed to integrate with Broadcom APM (formerly CA APM). It collects application metrics and sends them to the APM EPAgent (Enterprise Performance Agent) via its RESTful interface.
Introduction
Many enterprise customers use Broadcom APM for monitoring and performance management. This handler allows light-4j services (microsrevices, gateways, sidecars) to push metrics directly to an EPAgent deployed as a sidecar or a common service in the Kubernetes cluster or on the VM host.
It extends the AbstractMetricsHandler and shares the same core logic for collecting request/response metrics, but implements a specific sender for the APM protocol.
Configuration
The handler uses the metrics.yml configuration file, which is shared by all push-based metrics handlers.
| Config Field | Description | Default |
|---|---|---|
enabled | Enable or disable the metrics handler. | true |
enableJVMMonitor | Enable JVM metrics collection (CPU, Memory). | false |
serverProtocol | Protocol for the EPAgent (http or https). | http |
serverHost | Hostname of the EPAgent. | localhost |
serverPort | Port of the EPAgent. | 8086 |
serverPath | REST path for the EPAgent metric feed. | /apm/metricFeed |
productName | The product/service name used as a category in APM. | http-sidecar |
reportInMinutes | Interval in minutes to report metrics. | 1 |
metrics.yml Example
enabled: true
enableJVMMonitor: true
serverProtocol: http
# Hostname of the Broadcom APM EPAgent service
serverHost: opentracing.ccaapm.svc.cluster.local
serverPort: 8888
# Default path for EPAgent REST interface
serverPath: /apm/metricFeed
# Name of your service/component in APM
productName: my-service-name
reportInMinutes: 1
Usage
1. Register the Handler
In handler.yml, you must register the APMMetricsHandler specifically. Since there can only be one metrics handler active in the chain usually, you should use the alias metrics.
handlers:
  - com.networknt.metrics.APMMetricsHandler@metrics
2. Configure the Chain
Add the metrics alias to your default chain. It should be placed early in the chain to capture the full duration of requests.
chains:
  default:
    - exception
    - metrics
    - header
    # ... other handlers
3. Update values.yml
In your deployment’s values.yml, override the default metrics.yml values to point to your actual EPAgent.
metrics.serverHost: epagent.monitoring.svc
metrics.serverPort: 8080
metrics.productName: payment-service
Metrics Collected
The handler collects the following metrics:
- Response Time: Duration of the request.
- Success Count: Number of successful requests (2xx).
- Error Counts: 4xx (request errors) and 5xx (server errors).
- JVM Metrics: (Optional) Heap usage, Thread count, CPU usage.
Tags
Common tags injected into metrics:
api: Service ID.env: Environment (dev, test, prod).host: Hostname / Container ID.clientId: Calling client ID (if available).endpoint: The API endpoint being accessed.
API Key Handler
For some legacy applications to migrate from a monolithic gateway to the light-gateway without changing any code on the consumer application, we need to support the API Key authentication on the light-gateway (LG) or client-proxy (LCP). The consumer application sends the API key in a header to authenticate itself on the light-gateway. Then the light-gateway will retrieve a JWT token to access the downstream API.
Only specific paths will have API Key set up, and the header name for each application might be different. To support all use cases, we add a list of maps to the configuration apikey.yml to pathPrefixAuths property.
Each config item will have pathPrefix, headerName, and apiKey. The handler will try to match the path prefix first and then get the input API Key from the header. After comparing with the configured API Key, the handler will return either ERR10075 API_KEY_MISMATCH or pass the control to the next handler in the chain.
Configuration
The configuration is managed by ApiKeyConfig and corresponds to apikey.yml (or apikey.json/apikey.properties).
Configuration Properties
| Property | Type | Default | Description |
|---|---|---|---|
enabled | boolean | false | Enable ApiKey Authentication Handler. |
hashEnabled | boolean | false | If API key hash is enabled. The API key will be hashed with PBKDF2WithHmacSHA1 before it is stored in the config file. It is more secure than putting the clear text key into the config file. |
pathPrefixAuths | list | null | A list of mappings between path prefix and the api key parameters. |
Configuration Example (apikey.yml)
# ApiKey Authentication Security Configuration for light-4j
# Enable ApiKey Authentication Handler, default is false.
enabled: ${apikey.enabled:false}

# If API key hash is enabled. The API key will be hashed with PBKDF2WithHmacSHA1 before it is
# stored in the config file. It is more secure than put the encrypted key into the config file.
# The default value is false. If you want to enable it, you need to use the light-hash command line tool.
hashEnabled: ${apikey.hashEnabled:false}

# path prefix to the api key mapping. It is a list of map between the path prefix and the api key
# for apikey authentication. In the handler, it loops through the list and find the matching path
# prefix. Once found, it will check if the apikey is equal to allow the access or return an error.
pathPrefixAuths: ${apikey.pathPrefixAuths:}
Values Example (values.yml)
To enable the handler and configure paths, add the following to your values.yml:
# apikey.yml
apikey.enabled: true
apikey.pathPrefixAuths:
  - pathPrefix: /test1
    headerName: x-gateway-apikey
    apiKey: abcdefg
  - pathPrefix: /test2
    headerName: x-apikey
    apiKey: mykey
JSON format example for pathPrefixAuths (useful for config server):
[{"pathPrefix":"/test1","headerName":"x-gateway-apikey","apiKey":"abcdefg"},{"pathPrefix":"/test2","headerName":"x-apikey","apiKey":"mykey"}]
Multiple Consumers for Same Path
Most services will have multiple consumers, and each consumer might have its own API key for authentication. You can define multiple entries for the same path prefix:
apikey.pathPrefixAuths:
  - pathPrefix: /test1
    headerName: x-gateway-apikey
    apiKey: abcdefg
  # The same prefix has another apikey header and value.
  - pathPrefix: /test1
    headerName: authorization
    apiKey: xyz
Security with Hash
Storing API keys in clear text is only recommended for testing. For production, enable hashing:
- Enable hash in
values.yml:apikey.hashEnabled: true - Generate the hash of your API key using the light-hash utility.
- Use the generated hash string as the
apiKeyvalue in your configuration.
Error Response
If the request path matches a configured prefix but the API key verification fails, the handler returns error ERR10075.
Status Code: 401 Code: ERR10075 Message: API_KEY_MISMATCH Description: APIKEY from header %s is not matched for request path prefix %s.
To prevent leaking sensitive information, the expected apiKey from the config file is not revealed in the error message.
Usage
Register the ApiKeyHandler in your handler.yml chain.
handler.handlers:
  .
  - com.networknt.apikey.ApiKeyHandler@apikey

handler.chains.default:
  .
  - apikey
  .
If you are using the Unified Security Handler, you can integrate the API Key handler there as well to support multiple authentication methods (ApiKey, Basic, OAuth2, SWT) simultaneously.
Audit Handler
The AuditHandler is a middleware component responsible for logging request and response details for auditing purposes. It captures important information such as headers, execution time, status codes, and even request/response bodies if configured.
The audit logs are typically written to a separate log file (e.g., audit.log) via slf4j/logback, allowing them to be ingested by centralized logging systems like ELK or Splunk.
Configuration
The configuration is managed by AuditConfig and corresponds to audit.yml (or audit.json/audit.properties).
Configuration Properties
| Property | Type | Default | Description |
|---|---|---|---|
enabled | boolean | true | Enable or disable the Audit Handler. |
mask | boolean | true | Enable masking of sensitive data in headers and audit fields. |
statusCode | boolean | true | Include response status code in the audit log. |
responseTime | boolean | true | Include response time (latency) in milliseconds. |
auditOnError | boolean | false | If true, only log when the response status code is >= 400. If false, log every request. |
logLevelIsError | boolean | false | If true, logs at ERROR level. If false, logs at INFO level. |
timestampFormat | string | null | Custom format for the timestamp (e.g., yyyy-MM-dd'T'HH:mm:ss.SSSZ). If null, uses epoch timestamp. |
headers | list | [...] | List of request headers to include in the log. Default: X-Correlation-Id, X-Traceability-Id, caller_id. |
audit | list | [...] | List of specific audit fields to include. Default: client_id, user_id, scope_client_id, endpoint, serviceId. |
requestBodyMaxSize | int | 4096 | Max size of request body to log (if requestBody is in audit list). Truncated if larger. |
responseBodyMaxSize | int | 4096 | Max size of response body to log (if responseBody is in audit list). Truncated if larger. |
Configuration Example (audit.yml)
# Enable Audit Logging
enabled: ${audit.enabled:true}

# Enable mask in the audit log
mask: ${audit.mask:true}

# Output response status code
statusCode: ${audit.statusCode:true}

# Output response time
responseTime: ${audit.responseTime:true}

# when auditOnError is true:
#  - it will only log when status code >= 400
# when auditOnError is false:
#  - it will log on every request
auditOnError: ${audit.auditOnError:false}

# log level; by default it is set to info. If you want to change it to error, set to true.
logLevelIsError: ${audit.logLevelIsError:false}

# timestamp format
timestampFormat: ${audit.timestampFormat:}

# headers to audit
headers: ${audit.headers:X-Correlation-Id, X-Traceability-Id,caller_id}

# audit fields. Add requestBody or responseBody here to enable payload logging.
audit: ${audit.audit:client_id, user_id, scope_client_id, endpoint, serviceId}
Values Example (values.yml)
You can customize the audit behavior per environment using values.yml. For example, to enable full body logging in a dev environment:
# audit.yml
audit.audit:
  - client_id
  - user_id
  - endpoint
  - requestBody
  - responseBody
  - queryParameters
  - pathParameters
Logging Body and Parameters
The AuditHandler supports logging additional details if they are added to the audit list in the configuration:
requestBody: Logs the request body.responseBody: Logs the response body.queryParameters: Logs query parameters.pathParameters: Logs path parameters.requestCookies: Logs request cookies.
Note: Enabling body logging (requestBody or responseBody) can significantly impact performance and is generally not recommended for production unless auditOnError is enabled or for specific debugging purposes.
Usage
Register the AuditHandler in your handler.yml chain. It is usually placed near the beginning of the chain to capture the start time and ensure it runs even if downstream handlers fail.
handler.handlers:
  .
  - com.networknt.audit.AuditHandler@audit

handler.chains.default:
  - exception
  - traceability
  - correlation
  - audit
  .
Logback Configuration
The AuditHandler writes to a logger named audit. You should configure a specific appender in your logback.xml to route these logs to a separate file or system.
Example logback.xml snippet:
<appender name="audit" class="ch.qos.logback.core.rolling.RollingFileAppender">
    <file>log/audit.log</file>
    <encoder>
        <pattern>%msg%n</pattern>
    </encoder>
    <rollingPolicy class="ch.qos.logback.core.rolling.FixedWindowRollingPolicy">
        <fileNamePattern>log/audit.log.%i.zip</fileNamePattern>
        <minIndex>1</minIndex>
        <maxIndex>10</maxIndex>
    </rollingPolicy>
    <triggeringPolicy class="ch.qos.logback.core.rolling.SizeBasedTriggeringPolicy">
        <maxFileSize>10MB</maxFileSize>
    </triggeringPolicy>
</appender>

<logger name="audit" level="INFO" additivity="false">
    <appender-ref ref="audit"/>
</logger>
Log Format
The audit log is written as a JSON object.
Example output:
{
  "timestamp": "2023-10-27T10:00:00.123-0400",
  "serviceId": "com.networknt.petstore-1.0.0",
  "X-Correlation-Id": "12345",
  "endpoint": "/v1/pets@get",
  "statusCode": 200,
  "responseTime": 45
}
Basic Auth
The Basic Authentication middleware provides a mechanism to authenticate users using the standard HTTP Basic Authentication scheme (Authorization header with Basic base64(username:password)).
While OAuth 2.0 (JWT) is the recommended security standard for microservices, Basic Auth is useful for:
- IoT devices that do not support OAuth flows.
- Integrating legacy systems.
- Simple authentication requirements where a full OAuth provider is overkill.
Configuration
The configuration is managed by BasicAuthConfig and corresponds to basic-auth.yml (or basic-auth.json/basic-auth.properties).
The settings are injected under the basic key in values.yml.
Configuration Properties
| Property | Type | Default | Description |
|---|---|---|---|
enabled | boolean | false | Enable or disable the Basic Auth Handler. |
enableAD | boolean | true | Enable LDAP (Active Directory) authentication if the password in config is empty. |
allowAnonymous | boolean | false | Allow requests without Authorization header if the path matches the anonymous user’s paths. |
allowBearerToken | boolean | false | Allow requests with Bearer token to pass through if the path matches the bearer user’s paths. Useful for proxying mixed auth traffic. |
users | list/map | null | A list of user definitions containing username, password, and allowed paths. |
User Definition
Each user object in the users list/map contains:
username: The login username.password: The password (clear text or encrypted).paths: A list of URL path prefixes this user is allowed to access.
Special usernames:
anonymous: Used whenallowAnonymousis true. Defines paths accessible without authentication.bearer: Used whenallowBearerTokenis true. Defines paths accessible with a Bearer token (verification delegated to downstream or another handler).
Configuration Example (basic-auth.yml)
# Basic Authentication Security Configuration for light-4j
enabled: ${basic.enabled:false}
enableAD: ${basic.enableAD:true}
allowAnonymous: ${basic.allowAnonymous:false}
allowBearerToken: ${basic.allowBearerToken:false}
users: ${basic.users:}
Values Example (values.yml)
You typically configure users in values.yml:
basic.enabled: true
basic.users:
  - username: user1
    password: user1pass
    paths:
      - /v1/address
  - username: user2
    # Encrypted password
    password: CRYPT:0754fbc37347c136be7725cbf62b6942:71756e13c2400985d0402ed6f49613d0
    paths:
      - /v2/pet
      - /v2/address
  # Paths allowed for anonymous access (if allowAnonymous: true)
  - username: anonymous
    paths:
      - /v1/party
      - /info
Features
Static User Authentication
Verify username and password against the configured list. If matched, checks if the request path matches one of the user’s allowed paths.
LDAP Authentication
If enableAD is true and a configured user has an empty password, the handler attempts to authenticate against the configured LDAP server (using LdapUtil). Context:
- User
user1is defined inbasic.userswithpassword: ""(empty). - Incoming request has
Basic base64(user1:secret). - Handler skips local password check and calls
LdapUtil.authenticate("user1", "secret"). - If LDAP auth succeeds, it checks the allowed
pathsforuser1in the config.
Anonymous Access
If allowAnonymous is true, requests without an Authorization header are checked against the paths defined for the special anonymous user.
- If path matches
anonymous.paths, request proceeds. - If path does not match, returns
ERR10071(NOT_AUTHORIZED_REQUEST_PATH) orERR10002(MISSING_AUTH_TOKEN).
Bearer Token Pass-through
If allowBearerToken is true, requests with Authorization: Bearer <token> are checked against the paths defined for the special bearer user.
- If path matches
bearer.paths, request proceeds (skipping Basic Auth check). - This is useful in a gateway/proxy where some endpoints use Basic Auth and others use OAuth2, and you want to route them through the same chain conditionally.
Usage
Register the BasicAuthHandler in your handler.yml chain.
handler.handlers:
  .
  - com.networknt.basicauth.BasicAuthHandler@basic

handler.chains.default:
  .
  - basic
  .
Error Codes
ERR10002: MISSING_AUTH_TOKEN - The basic authentication header is missing (and anonymous not allowed).ERR10046: INVALID_BASIC_HEADER - The format of the basic authentication header is not valid.ERR10047: INVALID_USERNAME_OR_PASSWORD - Invalid username or password.ERR10071: NOT_AUTHORIZED_REQUEST_PATH - Authenticated user is not authorized for the requested path.ERR10072: BEARER_USER_NOT_FOUND - Bearer token allowed butbeareruser configuration missing.
Body Handler
The BodyHandler is a middleware component designed primarily for light-rest-4j services. It automatically parses the incoming request body for methods like POST, PUT, and PATCH, and attaches the parsed object to the exchange for subsequent handlers to consume.
Note: This handler is not suitable for light-gateway or http-sidecar as those services typically stream the request body directly to downstream services without consuming it. For gateway scenarios, use RequestBodyInterceptor and ResponseBodyInterceptor if inspection is required.
Functionality
The handler inspects the Content-Type header and parses the body accordingly:
-
application/json:
- Parsed into a
Map(if starts with{) orList(if starts with[). - Attached to exchange with key
BodyHandler.REQUEST_BODY. - Optionally caches the raw string body to
BodyHandler.REQUEST_BODY_STRINGifcacheRequestBodyis enabled (useful for auditing).
- Parsed into a
-
text/plain:
- Parsed into a
String. - Attached to exchange with key
BodyHandler.REQUEST_BODY.
- Parsed into a
-
multipart/form-data / application/x-www-form-urlencoded:
- Parsed into
FormData. - Attached to exchange with key
BodyHandler.REQUEST_BODY.
- Parsed into
-
Other / Missing Content-Type:
- Attached as an
InputStream. - Attached to exchange with key
BodyHandler.REQUEST_BODY.
- Attached as an
Configuration
The configuration is managed by BodyConfig and corresponds to body.yml (or body.json/body.properties).
Configuration Properties
| Property | Type | Default | Description |
|---|---|---|---|
enabled | boolean | true | Enable or disable the Body Handler. |
cacheRequestBody | boolean | false | Cache the request body as a string. Required if you want to audit the request body. |
cacheResponseBody | boolean | false | Cache the response body as a string. Required if you want to audit the response body. |
logFullRequestBody | boolean | false | If true, logs the full request body (debug only, not for production). |
logFullResponseBody | boolean | false | If true, logs the full response body (debug only, not for production). |
Configuration Example (body.yml)
# Enable body parse flag
enabled: ${body.enabled:true}

# Cache request body as a string along with JSON object.
# Required for audit logging of request body.
cacheRequestBody: ${body.cacheRequestBody:false}

# Cache response body as a string.
# Required for audit logging of response body.
cacheResponseBody: ${body.cacheResponseBody:false}

# Log full bodies for debugging (use carefully)
logFullRequestBody: ${body.logFullRequestBody:false}
logFullResponseBody: ${body.logFullResponseBody:false}
Usage
Register the BodyHandler in your handler.yml chain. It should be placed early in the chain, before any validation or business logic handlers that need access to the body.
handler.handlers:
  .
  - com.networknt.body.BodyHandler@body

handler.chains.default:
  .
  - exception
  - correlation
  - body
  .
Retrieving the Body
In your business handler or subsequent middleware:
import com.networknt.body.BodyHandler;

// ...

// Get the parsed body (Map, List, String, FormData, or InputStream)
Object body = exchange.getAttachment(BodyHandler.REQUEST_BODY);

if (body instanceof List) {
    // Handle JSON List
} else if (body instanceof Map) {
    // Handle JSON Map
} else {
    // Handle other types
}
Retrieving the Cached String
If cacheRequestBody is enabled:
// Get the raw JSON string
String bodyString = exchange.getAttachment(BodyHandler.REQUEST_BODY_STRING);
Content Handler
The ContentHandler is a middleware handler designed to manage the Content-Type header in HTTP responses. It ensures that a valid content type is always set, either by reflecting the request’s Content-Type or by applying a configured default.
Introduction
In some scenarios, backend services or handlers might not explicitly set the Content-Type header in their responses. This can lead to clients misinterpreting the response body. The ContentHandler solves this by:
- Checking if the request has a
Content-Typeheader. If so, it uses that same value for the responseContent-Type. - If the request does not have a
Content-Type, it sets the responseContent-Typeto a configured default value (usuallyapplication/json).
This is particularly useful when working with clients that expect specific content types or when enforcing a default format for your API.
Configuration
The handler is configured via the content.yml file.
| Config Field | Description | Default |
|---|---|---|
enabled | Indicates if the content middleware is enabled. | true |
contentType | The default content type to be used if the request doesn’t specify one. | application/json |
Example content.yml
# Content middleware configuration
enabled: true
# The default content type to be used in the response if request content type is missing
contentType: application/json
Usage
To use the ContentHandler, you need to register it in your handler.yml configuration file and add it to the middleware chain.
handler.yml
handlers:
  - com.networknt.content.ContentHandler@content
  # ... other handlers

chains:
  default:
    - content
    # ... other handlers
Logic
The handleRequest method performs the following logic:
- Check Request Header: It checks if the
Content-Typeheader exists in the incoming request. - Reflect Context Type: If the request has a
Content-Type, the handler sets the responseContent-Typeto match the request’sContent-Type. - Apply Default: If the request header is missing, the handler sets the response
Content-Typeto the value specified incontentTypefrom the configuration (defaulting toapplication/json). - Next Handler: Finally, it passes control to the next handler in the chain.
if (exchange.getRequestHeaders().contains(Headers.CONTENT_TYPE)) {
    exchange.getResponseHeaders().put(Headers.CONTENT_TYPE, exchange.getRequestHeaders().get(Headers.CONTENT_TYPE).element());
} else {
    exchange.getResponseHeaders().put(Headers.CONTENT_TYPE, config.getContentType());
}
Handler.next(exchange, next);
Correlation Handler
The CorrelationHandler is a middleware handler designed to ensure that every request contains a unique correlation ID (X-Correlation-Id). This ID is propagated across service-to-service calls, allowing for centralized logging and traceability in a microservices architecture.
Introduction
In a distributed system, a single user request often triggers a chain of calls across multiple services. To debug issues or trace the flow of execution, it is critical to have a unique identifier that ties all these logs together. The CorrelationHandler ensures this mechanism by:
- Checking: Looking for an existing
X-Correlation-Idheader in the incoming request. - Generating: If the header is missing and configuration allows, generating a new UUID for the request.
- Logging: Injecting the Correlation ID (and optional Traceability ID) into the SLF4J MDC (Mapped Diagnostic Context) so it appears in specific log patterns.
Configuration
The handler is configured via the correlation.yml file.
| Config Field | Description | Default |
|---|---|---|
enabled | Indicates if the correlation middleware is enabled. | true |
autogenCorrelationID | If true, the handler generates a new Correlation ID if missing in the request. | true |
correlationMdcField | The key used in the MDC context for the Correlation ID. | cId |
traceabilityMdcField | The key used in the MDC context for the Traceability ID. | tId |
Example correlation.yml
# Correlation Id Handler Configuration
enabled: true
# If set to true, it will auto-generate the correlationID if it is not provided in the request
autogenCorrelationID: true
# MDC context keys usually match your logback.xml pattern
correlationMdcField: cId
traceabilityMdcField: tId
Usage
To use the CorrelationHandler, register it in handler.yml and add it to the middleware chain. It should be placed early in the chain so that subsequent handlers can benefit from the MDC context.
handler.yml
handlers:
  - com.networknt.correlation.CorrelationHandler@correlation
  # ... other handlers

chains:
  default:
    - correlation
    # ... derived handlers
Logging Integration
The handler puts the Correlation ID into the logging context (MDC) using the key defined in correlationMdcField (default cId). To see this in your logs, your logback.xml must utilize this key in its pattern.
logback.xml Example
<appender name="STDOUT" class="ch.qos.logback.core.ConsoleAppender">
    <encoder>
        <!-- The %X{cId} pattern pulls the value from the MDC -->
        <pattern>%d{HH:mm:ss.SSS} [%thread] %X{cId} %-5level %logger{36} - %msg%n</pattern>
    </encoder>
</appender>
When properly configured, your logs will include the Correlation ID, making it easy to filter logs in tools like Splunk or ELK (Elasticsearch, Logstash, Kibana).
Interaction with Traceability
The handler also acknowledges the X-Traceability-Id header.
- If
X-Traceability-Idis present, it is added to the MDC under thetraceabilityMdcField(defaulttId). - If a new Correlation ID is generated and a Traceability ID exists, the handler logs an info message associating the two IDs:
Associate traceability Id {tId} with correlation Id {cId}.
Client Propagation
When making downstream calls using light-4j Client modules (like Http2Client), it is best practice to propagate the Correlation ID. The Client module provides helper methods (e.g., propagateHeaders) to automatically copy the X-Correlation-Id from the current request to the downstream client request.
CORS Handler
The CorsHttpHandler is a middleware handler that manages Cross-Origin Resource Sharing (CORS) headers. It handles both pre-flight OPTIONS requests and actual HTTP requests, ensuring that browsers can securely interact with your API from different origins.
Introduction
Single Page Applications (SPAs) often run on a different domain or port than the API server they consume. Browsers enforce the Same-Origin Policy, which restricts resources from being loaded from a different origin. To allow this, the API server must implement the CORS protocol.
The CorsHttpHandler simplifies this by:
- Handling Pre-flight Requests: Automatically responding to
OPTIONSrequests with the correctAccess-Control-Allow-*headers. - Handling Actual Requests: Injecting the necessary CORS headers into standard responses so the browser accepts the result.
- Path-Specific Configuration: allowing different CORS rules for different API paths (useful in gateway scenarios).
Configuration
The handler is configured via the cors.yml file.
| Config Field | Description | Default |
|---|---|---|
enabled | Indicates if the CORS middleware is enabled. | true |
allowedOrigins | A list of allowed origins (e.g., http://localhost:3000). Wildcards are not supported for security reasons. | [] |
allowedMethods | A list of allowed HTTP methods (e.g., GET, POST, PUT, DELETE). | [] |
pathPrefixAllowed | A map allowing granular configuration per path prefix. Overrides global settings if a path matches. | null |
Example cors.yml
# CORS Handler Configuration
enabled: true

# Global Configuration
# Allowed origins. Wildcards (*) are NOT supported for security.
allowedOrigins:
  - http://localhost:3000
  - https://my-app.com

# Allowed methods
allowedMethods:
  - GET
  - POST
  - PUT
  - DELETE
  - OPTIONS

# Path-Specific Configuration (Optional)
# Use this if you are running a Gateway and need different rules for different downstream services.
pathPrefixAllowed:
  /v1/pets:
    allowedOrigins:
      - https://petstore.com
    allowedMethods:
      - GET
  /v1/market:
    allowedOrigins:
      - https://market.com
    allowedMethods:
      - POST
Usage
To use the CorsHttpHandler, register it in your handler.yml configuration file and add it to the middleware chain.
handler.yml
handlers:
  - com.networknt.cors.CorsHttpHandler@cors
  # ... other handlers

chains:
  default:
    - cors
    # ... other handlers
Logic
The handler operates with the following logic:
- Check Request: It determines if the incoming request is a CORS request (contains
Originheader). - Match Config:
- It checks
pathPrefixAllowedfirst. If the request path matches a configured prefix, it uses that specific configuration. - Otherwise, it uses the global
allowedOriginsandallowedMethods.
- It checks
- Process Pre-flight (OPTIONS):
- If the request is an
OPTIONSrequest, it validates theOriginandAccess-Control-Request-Method. - It sets the
Access-Control-Allow-Origin,Access-Control-Allow-Methods,Access-Control-Allow-Headers,Access-Control-Allow-Credentials, andAccess-Control-Max-Ageheaders. - It returns a
200 OKresponse immediately, stopping the chain.
- If the request is an
- Process Actual Request:
- For non-
OPTIONSrequests, it validates theOrigin. - It adds the
Access-Control-Allow-OriginandAccess-Control-Allow-Credentialsheaders to the response. - It then passes control to the next handler in the chain.
- For non-
Origin Matching
The handler performs strict origin matching. If the Origin header matches one of the allowedOrigins, that specific origin is reflected in the Access-Control-Allow-Origin header. If it does not match, the request may be rejected (403) or handled without CORS headers depending on the flow.
DeRef Token Middleware
The DerefMiddlewareHandler is designed to handle “By Reference” tokens (opaque tokens) at the edge of your microservices architecture (e.g., in a BFF or Gateway). It exchanges these opaque tokens for “By Value” tokens (JWTs) by communicating with an OAuth 2.0 provider.
Introduction
In some security architectures, organizations prefer not to expose JWTs (which contain claims and potentially sensitive information) to public clients (browsers, mobile apps). Instead, they issue opaque “Reference Tokens”.
However, internal microservices typically rely on JWTs for stateless authentication and authorization. The DerefMiddlewareHandler bridges this gap by intercepting requests with reference tokens and “dereferencing” them into JWTs before passing the request to downstream services.
Logic Flow
The handler performs the following steps:
- Check Header: It looks for the
Authorizationheader. - Validate Existence: If the header is missing, it returns an error (
ERR10002). - Format Check:
- It checks if the token contains a dot (
.). - If existing dot: It assumes the token is already a JWT (Signed JWTs always have 3 parts separated by dots). The handler ignores it and passes the request to the next handler.
- If no dot: It treats the token as a Reference Token.
- It checks if the token contains a dot (
- Dereference:
- It calls the OAuth 2.0 provider (via
OauthHelper) to exchange the reference token for a JWT. - If the exchange fails or returns an error, it terminates the request with an appropriate error status (
ERR10044orERR10045). - If successful, it replaces the
Authorizationheader in the current request with the newBearer <JWT>.
- It calls the OAuth 2.0 provider (via
- Proceed: The request continues to the next handler in the chain with the valid JWT.
Configuration
The handler is configured via the deref.yml file.
| Config Field | Description | Default |
|---|---|---|
enabled | Indicates if the middleware is enabled. | false |
Example deref.yml
# Dereference Token Middleware Configuration
enabled: true
Note: The actual connection details for the OAuth 2.0 provider (URL, credentials) are typically handled by the
clientmodule configuration andOauthHelperinternal settings, not directly inderef.yml.
Usage
To use this handler, register it in handler.yml and place it before the JwtVerifyHandler or any other handler that requires a valid JWT.
handler.yml
handlers:
  - com.networknt.deref.DerefMiddlewareHandler@deref
  # ... other handlers

chains:
  default:
    - deref
    - security # (JwtVerifyHandler)
    # ... other handlers
Error Codes
ERR10002: MISSING_AUTH_TOKEN - TheAuthorizationheader is missing.ERR10044: EMPTY_TOKEN_DEREFERENCE_RESPONSE - The OAuth provider returned an empty response.ERR10045: TOKEN_DEREFERENCE_ERROR - The OAuth provider returned an error message.
Dump Handler
The DumpHandler is a middleware handler used to log the detailed request and response information. It is primarily used for debugging and troubleshooting in development or testing environments.
Warning: detailed logging of requests and responses can be very slow and may consume significant storage. It is generally not recommended for production environments unless explicitly needed for brief diagnostic sessions.
Introduction
Why requests fail is not always obvious. Sometimes, you need to see exactly what headers, cookies, or body content were sent by the client, or exactly what the server responded with. The DumpHandler captures this information and writes it to the logs.
Configuration
The handler is configured via the dump.yml file.
| Config Field | Description | Default |
|---|---|---|
enabled | Indicates if the dump middleware is globally enabled. | false |
mask | If true, sensitive data may be masked (implementation dependent). | false |
logLevel | Sent logs at this level (TRACE, DEBUG, INFO, WARN, ERROR). | INFO |
indentSize | Number of spaces for indentation in the log output. | 4 |
useJson | If true, logs request/response details as a JSON object (ignoring indentSize). | false |
requestEnabled | Global switch to enable/disable dumping of request data. | false |
responseEnabled | Global switch to enable/disable dumping of response data. | false |
Detailed Configuration (request & response)
You can granularly control which parts of the HTTP message are logged using the request and response objects in the config.
Request Options:
url: Log the request URL.headers: Log headers.cookies: Log cookies.queryParameters: Log query parameters.body: Log the request body.- Filters:
filteredHeaders,filteredCookies,filteredQueryParametersallow you to exclude specific sensitive keys.
Response Options:
headers: Log headers.cookies: Log cookies.statusCode: Log the HTTP status code.body: Log the response body.
Example dump.yml
# Dump Handler Configuration
enabled: true
logLevel: INFO
indentSize: 4
useJson: false
mask: false

# Enable Request Dumping
requestEnabled: true
request:
  url: true
  headers: true
  filteredHeaders:
    - Authorization
    - X-Correlation-Id
  cookies: true
  filteredCookies:
    - JSESSIONID
  queryParameters: true
  filteredQueryParameters:
    - password
  body: true

# Enable Response Dumping
responseEnabled: true
response:
  headers: true
  cookies: true
  body: true
  statusCode: true
Usage
To use the DumpHandler, register it in handler.yml and add it to the middleware chain.
Placement: It is highly recommended to place the DumpHandler after the BodyHandler. If placed before BodyHandler, the request body input stream might not be readable or might be consumed prematurely if not handled correctly.
handler.yml
handlers:
  - com.networknt.dump.DumpHandler@dump
  # ... other handlers

chains:
  default:
    - correlation
    - body
    - dump  # Place after BodyHandler
    # ... other handlers
Logging
The handler writes to the standard SLF4J logger. You should configure your logback.xml to capture these logs, potentially directing them to a separate file to avoid cluttering your main application logs.
logback.xml Example
<appender name="DUMP_FILE" class="ch.qos.logback.core.rolling.RollingFileAppender">
    <file>target/dump.log</file>
    <encoder>
        <pattern>%-5level [%thread] %date{ISO8601} %msg%n</pattern>
    </encoder>
    <rollingPolicy class="ch.qos.logback.core.rolling.FixedWindowRollingPolicy">
        <fileNamePattern>target/dump.log.%i.zip</fileNamePattern>
        <minIndex>1</minIndex>
        <maxIndex>5</maxIndex>
    </rollingPolicy>
    <triggeringPolicy class="ch.qos.logback.core.rolling.SizeBasedTriggeringPolicy">
        <maxFileSize>10MB</maxFileSize>
    </triggeringPolicy>
</appender>

<!-- Logger for the dump handler package -->
<logger name="com.networknt.dump" level="INFO" additivity="false">
    <appender-ref ref="DUMP_FILE"/>
</logger>
Output Example
INFO  [XNIO-1 task-1] 2026-02-03 10:15:30 DumpHelper.java:23 - Http request/response information:
request:
    url: /v1/pets
    headers:
        Host: localhost:8080
        Content-Type: application/json
    body: {
        "id": 123,
        "name": "Sparky"
    }
response:
    statusCode: 200
    headers:
        Content-Type: application/json
    body: {
        "status": "success"
    }
Encode Decode Middleware
The encode-decode module provides two middleware handlers to handle compression and decompression of HTTP request and response bodies. This is crucial for optimizing bandwidth usage and supporting clients that send compressed data.
Request Decode Handler
The RequestDecodeHandler is responsible for handling requests where the body content is compressed (e.g., GZIP or Deflate). It checks the Content-Encoding header and automatically wraps the request stream to decompress the content on the fly, allowing subsequent handlers to read the plain content.
Configuration
The handler is configured via request-decode.yml.
| Config Field | Description | Default |
|---|---|---|
enabled | Enable or disable the handler. | false |
decoders | A list of supported compression schemes. | ["gzip", "deflate"] |
Usage
Register com.networknt.decode.RequestDecodeHandler in your handler.yml. It should be placed early in the chain, before any handler that needs to read the request body (like BodyHandler).
handlers:
  - com.networknt.decode.RequestDecodeHandler@decode
  # ... other handlers

chains:
  default:
    - decode
    - body
    # ...
Response Encode Handler
The ResponseEncodeHandler is responsible for compressing the response body before sending it to the client. It automatically negotiates the compression method based on the client’s Accept-Encoding header.
Configuration
The handler is configured via response-encode.yml.
| Config Field | Description | Default |
|---|---|---|
enabled | Enable or disable the handler. | false |
encoders | A list of supported compression schemes. | ["gzip", "deflate"] |
Usage
Register com.networknt.encode.ResponseEncodeHandler in your handler.yml. It is typically placed early in the chain so that it wraps the response exchange for all subsequent handlers.
handlers:
  - com.networknt.encode.ResponseEncodeHandler@encode
  # ... other handlers

chains:
  default:
    - encode
    # ... other handlers
Summary
- Request Decode: Decompresses incoming request bodies (Client -> Server).
- Response Encode: Compresses outgoing response bodies (Server -> Client).
Exception Handler
The ExceptionHandler is a critical middleware component that sits at the beginning of the request/response chain. Its primary role is to catch any unhandled exceptions thrown by subsequent handlers, log them, and return a standardized error response to the client.
Introduction
In Light-4j, exceptions are used to signal errors. While business handlers are encouraged to handle known exceptions locally to provide context-specific responses, the ExceptionHandler acts as a safety net (or “last line of defense”) to ensure that:
- No exception crashes the server or returns a raw stack trace to the client.
- All unhandled exceptions result in a proper JSON error response.
- Requests are dispatched from the IO thread to the Worker thread (if not already there).
Thread Model
One important feature of this handler is that it explicitly checks if the request is currently running in the IO Thread. If so, it dispatches the request to the Worker Thread.
if (exchange.isInIoThread()) {
    exchange.dispatch(this);
    return;
}
This ensures that business logic, which might block or throw exceptions, runs in the worker pool, preventing the non-blocking IO threads from hanging.
Logic Flow
- Dispatch: Logic moves execution to a worker thread.
- Chain Execution: It wraps
Handler.next(exchange, next)in atry-catchblock. - Exception Catching: If an exception bubbles up, it is categorized and handled:
- FrameworkException (Runtime): Returns the specific Status code defined in the exception.
- Other RuntimeExceptions: Returns generic error
ERR10010(Status 500). - ApiException (Checked): Returns the specific Status code defined in the exception.
- ClientException (Checked): Returns the specific Status code if set, otherwise
ERR10011(Status 400). - Other Checked Exceptions: Returns generic error
ERR10011(Status 400).
Configuration
The handler is configured via exception.yml. By default, it is enabled.
# Exception Handler Configuration
enabled: true
Error Codes
The handler relies on status.yml to map error codes to messages.
| Error Code | Status | Description |
|---|---|---|
ERR10010 | 500 | RuntimeException: Generic internal server error. |
ERR10011 | 400 | UncaughtException: Generic bad request or unhandled checked exception. |
Usage
This handler should be the first (or one of the very first) handlers in your chain defined in handler.yml.
handler.yml
handlers:
  - com.networknt.exception.ExceptionHandler@exception
  # ... other handlers

chains:
  default:
    - exception
    - metrics
    - trace
    - correlation
    # ... business handlers
Best Practices
- Keep it Enabled: Do not disable this handler in production unless you have a specific reason and alternative exception handling mechanism.
- Handle Business Exceptions: Try to catch and handle semantic exceptions (like “User Not Found”) in your business handler to return a more meaningful error code than the generic fallbacks provided here.
Expect100 Continue Handler
The Expect100ContinueHandler is a middleware handler designed to manage the HTTP Expect: 100-continue protocol. This protocol allows a client to send a header with the request headers to ask the server if it is willing to accept the request body before sending it.
Introduction
Some HTTP clients (like curl or Apache HttpClient) automatically send an Expect: 100-continue header when the request body is large (usually > 1024 bytes). They then wait for the server to reply with HTTP/1.1 100 Continue before transmitting the body.
If the backend or the gateway does not handle this properly, the client might hang waiting for the 100 response, or the connection might be mishandled. This handler provides proper support for this protocol within the Light-4j handler chain.
Logic Flow
When the handler detects Expect: 100-continue in the request header:
- Check Ignored Paths: If the request path matches
ignoredPathPrefixes, the handler simply removes theExpectheader and lets the request proceed. This is useful if downstream services don’t support or understand the header. - Check In-Place Paths: If the request path matches
inPlacePathPrefixes, the handler immediately sends a100 Continueresponse to the client and then removes the header. This signals the client to start sending the body immediately. - Default Behavior: If neither of the above applies, it adds a request wrapper (
Expect100ContinueConduit) and a response commit listener to manage the 100-continue handshake transparently during the request lifecycle.
Configuration
The handler is configured via expect-100-continue.yml.
| Config Field | Description | Default |
|---|---|---|
enabled | Enable or disable the handler. | false |
ignoredPathPrefixes | List of path prefixes where the header should be removed without sending a 100 response. | [] |
inPlacePathPrefixes | List of path prefixes where a 100 response is sent immediately, then the header is removed. | [] |
expect-100-continue.yml
# Expect100Continue Handler Configuration
enabled: true

# Remove Expect header for these paths (simulating it never existed)
ignoredPathPrefixes:
  - /v1/old-service

# Send 100 Continue immediately for these paths
inPlacePathPrefixes:
  - /v1/upload
Usage
Register com.networknt.expect100continue.Expect100ContinueHandler in your handler.yml. It should be placed early in the chain, before any handler that reads the body.
handler.yml
handlers:
  - com.networknt.expect100continue.Expect100ContinueHandler@expect
  # ... other handlers

chains:
  default:
    - expect
    # ...
Why use this handler?
Without this handler, Undertow (the underlying server) might handle 100-continue automatically in a way that doesn’t fit a proxy/gateway scenario, or downstream services might reject the request with the Expect header. This handler gives you fine-grained control over how to negotiate this protocol.
External Service Handler
The External Service Handler (ExternalServiceHandler) enables the gateway or service to access third-party services, potentially through a corporate proxy (forward proxy).
Introduction
In enterprise environments, internal services often need to call external APIs (e.g., Salesforce, Slack) but are restricted by firewalls and MUST go through a corporate web gateway (like McAfee Web Gateway). The default RouterHandler or ProxyHandler may not support this specific forward proxy configuration easily or may be too heavy-weight.
The ExternalServiceHandler uses the JDK 11+ HttpClient to make these calls. It supports:
- Configuring a forward proxy (host and port).
- Routing requests based on path prefixes to different external hosts.
- URL rewriting.
- Custom timeouts per path.
- Connection retries.
Configuration
The handler is configured via external-service.yml.
| Config Field | Description | Default |
|---|---|---|
enabled | Enable or disable the handler. | false |
proxyHost | The hostname of the corporate proxy/gateway. | null |
proxyPort | The port of the corporate proxy. | 443 |
connectTimeout | Connection timeout in milliseconds. | 3000 |
timeout | Request timeout in milliseconds. | 5000 |
enableHttp2 | Use HTTP/2 for the external connection. | false |
verifyHostname | Enable hostname verification for TLS/SSL connections. Set to false for self-signed certs. | true |
pathPrefixes | A list of objects defining path-to-host mapping and specific timeouts. | [] |
pathHostMappings | Only legacy simple mapping. Use pathPrefixes instead. | null |
urlRewriteRules | Regex rules to rewrite the URL path before sending to upstream. | [] |
external-service.yml Example
enabled: true
# Corporate Proxy Settings
proxyHost: proxy.corp.example.com
proxyPort: 8080

# Global Timeouts
connectTimeout: 2000
timeout: 5000

# TLS Configuration
verifyHostname: true

# Mapping Paths to External Hosts
pathPrefixes:
  - pathPrefix: /sharepoint
    host: https://sharepoint.microsoft.com
    timeout: 10000
  - pathPrefix: /salesforce
    host: https://api.salesforce.com
    timeout: 5000
  - pathPrefix: /openai
    host: https://api.openai.com

# URL Rewriting (Optional)
urlRewriteRules:
  - /openai/(.*) /$1
Features
Forward Proxy Support
If proxyHost and proxyPort are configured, all outgoing requests will be routed through this proxy. This is essential for accessing the internet from within a DMZ or secure corporate network.
Path-Based Routing
The handler intercepts requests matching a configured prefix (e.g., /sharepoint) and routes them to the corresponding target host (e.g., https://sharepoint.microsoft.com).
- pathPrefixes: The recommended config, allowing specific timeouts per route.
- pathHostMappings: Simple space-separated string mappings (Legacy).
URL Rewriting
You can rewrite the path before it is sent to the target. For example, stripping the /openai prefix so that a request to /openai/v1/chat becomes /v1/chat at the target https://api.openai.com.
Metrics Injection
Like the Proxy Handler, this handler can inject metrics into the MetricsHandler to track the latency of external calls separately from internal processing.
Body Handling
It supports buffering request bodies for POST, PUT, and PATCH methods to forward them to the external service.
Usage
-
Register the handler in
handler.yml.handlers: - com.networknt.proxy.ExternalServiceHandler@external -
Add it to the default chain or specific paths. Since it works based on path prefixes, it is often placed in the default chain before the router or other terminal handlers, so it can intercept specific traffic.
chains:
  default:
    - exception
    - metrics
    - header
    - external  # <--- Intercepts configured paths (e.g. /sharepoint)
    - prefix
    - router
If the request path matches one of the
pathPrefixes, theExternalServiceHandlertakes over, makes the remote call, and ends the exchange (it acts as a terminal handler for those requests). If the path does not match, it callsHandler.next(exchange, next)to pass the request down the chain.
Limitations
- It acts as a simple pass-through. Complex logic (aggregation, transformation) should be handled by an orchestrator or specialized handler.
- It creates a new
HttpRequestfor each call but reuses theHttpClient.
Header Handler
The HeaderHandler is a middleware component in the light-4j framework designed to modify request and response headers as they pass through the handler chain. This is particularly useful for cross-cutting concerns such as:
- Security: Updating or removing authorization headers (e.g., converting a Bearer token to a Basic Authorization header in a proxy scenario).
- Privacy: Removing sensitive internal headers before sending a response to the client.
- Context Propagation: Injecting correlation IDs or other context information into headers.
- API Management: Standardizing headers across different microservices.
The handler is highly configurable, allowing for global header manipulation as well as path-specific configurations.
Configuration
The HeaderHandler uses a configuration file named header.yml to define its behavior.
Configuration Options
The configuration supports the following sections:
enabled: A boolean flag to enable or disable the handler globally. Default isfalse.request: Defines header manipulations for incoming requests.remove: A list of header names to remove from the request.update: A map of key/value pairs to add or update in the request headers. If a key exists, its value is replaced.
response: Defines header manipulations for outgoing responses.remove: A list of header names to remove from the response.update: A map of key/value pairs to add or update in the response headers.
pathPrefixHeader: A map where keys are URL path prefixes and values arerequestandresponseconfigurations specific to that path. This allows granular control over header manipulation based on the endpoint being accessed.
Example header.yml (Fully Expanded)
# Enable header handler or not, default to false
enabled: false

# Global Request header manipulation
request:
  # Remove all the headers listed here
  remove:
  - header1
  - header2
  # Add or update the header with key/value pairs
  update:
    key1: value1
    key2: value2

# Global Response header manipulation
response:
  # Remove all the headers listed here
  remove:
  - header1
  - header2
  # Add or update the header with key/value pairs
  update:
    key1: value1
    key2: value2

# Per-path header manipulation
pathPrefixHeader:
  /petstore:
    request:
      remove:
        - headerA
        - headerB
      update:
        keyA: valueA
        keyB: valueB
    response:
      remove:
        - headerC
        - headerD
      update:
        keyC: valueC
        keyD: valueD
  /market:
    request:
      remove:
        - headerE
        - headerF
      update:
        keyE: valueE
        keyF: valueF
    response:
      remove:
        - headerG
        - headerH
      update:
        keyG: valueG
        keyH: valueH
Reference header.yml (Template)
This is the default configuration file packaged with the module (src/main/resources/config/header.yml). It uses placeholders that can be overridden by values.yml or handling external configurations.
# Enable header handler or not. The default to false and it can be enabled in the externalized
# values.yml file. It is mostly used in the http-sidecar, light-proxy or light-router.
enabled: ${header.enabled:false}
# Request header manipulation
request:
  # Remove all the request headers listed here. The value is a list of keys.
  remove: ${header.request.remove:}
  # Add or update the header with key/value pairs. The value is a map of key and value pairs.
  # Although HTTP header supports multiple values per key, it is not supported here.
  update: ${header.request.update:}
# Response header manipulation
response:
  # Remove all the response headers listed here. The value is a list of keys.
  remove: ${header.response.remove:}
  # Add or update the header with key/value pairs. The value is a map of key and value pairs.
  # Although HTTP header supports multiple values per key, it is not supported here.
  update: ${header.response.update:}
# requestPath specific header configuration. The entire object is a map with path prefix as the
# key and request/response like above as the value. For config format, please refer to test folder.
pathPrefixHeader: ${header.pathPrefixHeader:}
Configuring via values.yml
You can use values.yml to override specific properties. The properties can be defined in various formats (YAML, JSON string, comma-separated string) to suit different configuration sources (file system, config server).
# header.yml overrides
header.enabled: true

# List of strings (JSON format)
header.request.remove: ["header1", "header2"]

# Map (JSON format)
header.request.update: {"key1": "value1", "key2": "value2"}

# List (Comma separated string)
header.response.remove: header1,header2

# Map (Comma and colon separated string)
header.response.update: key1:value1,key2:value2

# Map (YAML format)
# Note: YAML format is suitable for file-based configuration.
# For config server usage, use a JSON string representation.
header.pathPrefixHeader:
  /petstore:
    request:
      remove:
        - headerA
        - headerB
      update:
        keyA: valueA
        keyB: valueB
    response:
      remove:
        - headerC
        - headerD
      update:
        keyC: valueC
        keyD: valueD
  /market:
    request:
      remove:
        - headerE
        - headerF
      update:
        keyE: valueE
        keyF: valueF
    response:
      remove:
        - headerG
        - headerH
      update:
        keyG: valueG
        keyH: valueH
Usage
To use the HeaderHandler in your application:
- Add the Dependency: Ensure the
headermodule is included in your project’spom.xml. - Register the Handler: Add
com.networknt.header.HeaderHandlerto your middleware chain inhandler.yml. - Configure: Provide a
header.ymlor configuredvalues.ymlin yoursrc/main/resources/configfolder (or external config directory) to define the desired header manipulations.
IP Whitelist
The ip-whitelist middleware handler is designed to secure specific endpoints (e.g., health checks, metric endpoints, admin screens) by allowing access only from trusted IP addresses. This is often used for endpoints that cannot be easily secured via OAuth 2.0 or other standard authentication mechanisms, or as an additional layer of security.
It serves as a critical component in scenarios where services like Consul, Prometheus, or internal orchestration tools need access to technical endpoints without user-level authentication.
Requirements
The handler supports:
- Per-Path Configuration: Rules are defined for specific url path prefixes.
- IPv4 and IPv6: Full support for both IP versions.
- Flexible matching:
- Exact match: e.g.,
127.0.0.1orFE45:00:00:000:0:AAA:FFFF:0045 - Wildcard match: e.g.,
10.10.*.*orFE45:00:00:000:0:AAA:FFFF:* - CIDR Notation (Slash): e.g.,
127.0.0.48/30orFE45:00:00:000:0:AAA:FFFF:01F4/127
- Exact match: e.g.,
- Default Policy: Configurable default behavior (allow or deny) when no specific rule is matched.
Configuration
The configuration is managed via whitelist.yml.
Configuration Options
enabled: (boolean) Enable or disable the handler globally. Defaulttrue.defaultAllow: (boolean) Determines the behavior for the IP addresses listed in the configuration.true(Whitelist Mode - Most Common): IfdefaultAllowis true, the IPs listed for a path are ALLOWED. Any IP accessing that path that is not in the list is DENIED. If a path is not defined in the config, access is ALLOWED globally for that path.false(Blacklist Mode): IfdefaultAllowis false, the IPs listed for a path are DENIED. Any IP accessing that path that is not in the list is ALLOWED. If a path is not defined in the config, access is DENIED globally for that path.
paths: A map where keys are request path prefixes and values are lists of IP patterns.
Example whitelist.yml (Template)
# IP Whitelist configuration

# Indicate if this handler is enabled or not.
enabled: ${whitelist.enabled:true}

# Default allowed or denied behavior.
defaultAllow: ${whitelist.defaultAllow:true}

# List of path prefixes and their access rules.
paths: ${whitelist.paths:}
Configuring via values.yml
You can define the rules in values.yml using either YAML or JSON format.
YAML Format
Suitable for file-based configuration.
whitelist.enabled: true
whitelist.defaultAllow: true
whitelist.paths:
  /health:
    - 127.0.0.1
    - 10.10.*.*
  /prometheus:
    - 192.168.1.5
    - 10.10.*.*
  /admin:
    - 127.0.0.1
JSON Format
Suitable for config servers or environment variables where a single string is required.
whitelist.paths: {"/health":["127.0.0.1","10.10.*.*"],"/prometheus":["192.168.1.5"]," /admin":["127.0.0.1"]}
Logic Flow
- Extract IP: The handler extracts the source IP address from the request.
- Match Path: It checks if the request path starts with any of the configured prefixes.
- Find ACL: If a matching path prefix is found, it retrieves the corresponding Access Control List containing rules (IP patterns).
- Evaluate Rules:
- It iterates through the rules for the IP version (IPv4/IPv6).
- If a rule matches the source IP:
- It returns
!rule.isDeny(). (IndefaultAllow=truemode, rules are allow rules, sodenyis false, returning true).
- It returns
- If no rule matches the source IP:
- It returns
!defaultAllow. (IndefaultAllow=truemode, if IP is not in the allow list, it returns false (deny)).
- It returns
- No Path Match: If the request path is not configured:
- It returns
defaultAllow. (IndefaultAllow=truemode, unknown paths are open).
- It returns
Error Handling
If access is denied, the handler terminates the exchange and returns an error.
- Status Code: 403 Forbidden
- Error Code:
ERR10049 - Message:
INVALID_IP_FOR_PATH - Description:
Peer IP %s is not in the whitelist for the endpoint %s
Usage
- Add the
ip-whitelistmodule dependency to yourpom.xml. - Add
com.networknt.whitelist.WhitelistHandlerto yourhandler.ymlchain. - Configure
whitelist.yml(orvalues.yml) with your specific IP rules.
Path Prefix Service Handler
The PathPrefixServiceHandler is a middleware handler primarily used in the Light-Gateway or http-sidecar. It maps a request path prefix to a serviceId, allowing the router to discover and invoke the correct downstream service without requiring the caller to provide the service_id header or perform full OpenAPI validation.
Introduction
In the Light-4j architecture, the Router Handler typically relies on a service_id header to locate the target service in the service registry (like Consul).
The PathPrefixServiceHandler simplifies this by enabling path-based routing. If your downstream services have unique path prefixes (e.g., /v1/users -> user-service, /v1/orders -> order-service), this handler can automatically lookup the serviceId based on the request URL and inject it into the request header.
Logic Flow
- Intercept Request: The handler intercepts the incoming request.
- Match Prefix: It checks the request path against the configured
mappingtable. - Inject Header:
- If a matching prefix is found, it retrieves the corresponding
serviceId. - It injects this
serviceIdinto theservice_idheader (if not already present). - It populates the
endpointin the audit data for logging/metrics.
- If a matching prefix is found, it retrieves the corresponding
- No Match: If no match is found, it marks the endpoint as
Unknownin the audit data but allows the request to proceed (best-effort).
Configuration
The handler is configured via the pathPrefixService.yml file.
| Config Field | Description | Default |
|---|---|---|
enabled | Enable or disable the handler. | true |
mapping | A map where the key is the path prefix and the value is the serviceId. | {} |
Example pathPrefixService.yml
# Path Prefix Service Configuration
enabled: true

# Mapping: Path Prefix -> Service ID
mapping:
  /v1/address: party.address-1.0.0
  /v2/address: party.address-2.0.0
  /v1/contact: party.contact-1.0.0
  /v1/pets: petstore-3.0.1
Configuration Formats
The mapping can be defined in multiple formats to support different configuration sources (like standard config files or a config server).
1. YAML Format (Standard):
mapping:
  /v1/address: party.address-1.0.0
  /v2/address: party.address-2.0.0
2. JSON Format (String): Useful for environment variables or config servers that expect strings.
mapping: '{"/v1/address": "party.address-1.0.0", "/v2/address": "party.address-2.0.0"}'
3. Java Map Format (String):
Key-value pairs separated by &.
mapping: /v1/address=party.address-1.0.0&/v2/address=party.address-2.0.0
Usage
To use this handler, register it in handler.yml and place it before the RouterHandler.
handler.yml
handlers:
  - com.networknt.router.middleware.PathPrefixServiceHandler@prefix
  # ... other handlers

chains:
  default:
    - correlation
    - metrics
    - prefix   # Place before router
    - router
Note: Do not map system endpoints like
/healthor/server/infoin this handler, as they are common to all services.
Comparison with PathServiceHandler
- PathPrefixServiceHandler: Simple prefix matching. Does not require OpenAPI specifications. Fast and lightweight. Best for simple routing requirements.
- PathServiceHandler: Requires OpenAPI handlers. Can perform more complex matching based on specific endpoints (Method + Path).
Path Service Handler
The PathServiceHandler is a middleware handler used to discover the serviceId based on the request endpoint (Method + Path). It is similar to the PathPrefixServiceHandler but offers finer granularity by leveraging the endpoint information from the audit attachment (populated by OpenAPI/Swagger handlers).
Introduction
In a microservices architecture, the router needs to know the serviceId to route the request to the correct downstream service. While PathPrefixServiceHandler uses a simple path prefix, PathServiceHandler uses the exact endpoint (e.g., /v1/pets/{petId}@GET) to map to a serviceId.
This is particularly useful when:
- You have multiple services sharing the same path prefix but serving different endpoints.
- You want to route specific endpoints to different services (e.g., read vs. write separation).
Prerequisite: This handler typically comes after the
OpenApiHandler(orSwaggerHandler) in the chain because it relies on the Audit Info attachment (auditInfo) where the normalized endpoint string is stored.
Logic Flow
- Check Service ID: It first checks if the
service_idheader is already present. If so, it skips logic. - Retrieve Endpoint: It retrieves the
endpointstring from the Audit Info attachment (e.g.,/v1/pets/123@get-> normalized to/v1/pets/{petId}@get). - Lookup Mapping: It looks up this endpoint in the configured
mapping. - Inject Header: If a match is found, it injects the mapped
serviceIdinto theservice_idheader.
Configuration
The handler is configured via the pathService.yml file.
| Config Field | Description | Default |
|---|---|---|
enabled | Enable or disable the handler. | true |
mapping | A map where the key is the endpoint string and the value is the serviceId. | {} |
Configuration Format
The mapping can be defined in YAML, JSON, or Java Map string format.
Endpoint Format: [path]@[method] (method must be lowercase).
Example pathService.yml:
# Path Service Configuration
enabled: true

# Mapping: Endpoint -> Service ID
mapping:
  /v1/address/{id}@get: party.address-1.0.0
  /v2/address@get: party.address-2.0.0
  /v1/contact@post: party.contact-1.0.0
Usage
To use this handler, register it in handler.yml and place it after the OpenApiHandler and before the RouterHandler.
handler.yml
handlers:
  - com.networknt.router.middleware.PathServiceHandler@path
  # ... other handlers

chains:
  default:
    - correlation
    - openapi-handler
    - path   # Place after OpenAPI and before Router
    - router
Comparison
| Feature | PathPrefixServiceHandler | PathServiceHandler |
|---|---|---|
| Matching | Path Prefix (/v1/pets) | Exact Endpoint (/v1/pets/{id}@get) |
| Dependency | None | OpenApiHandler (for parameter validation & normalization) |
| Granularity | Coarse (Service per prefix) | Fine (Service per endpoint) |
| Performance | Faster | Slightly slower (depends on OpenAPI parsing) |
Rate Limit
The rate-limit middleware handler is designed to protect your APIs from being overwhelmed by too many requests. It can be used for two primary purposes:
- DDoS Protection: Limiting concurrent requests from the public internet to prevent denial-of-service attacks.
- Throttling: Protecting slow backend services or managing API quotas for different clients or users.
This handler impacts performance slightly, so it is typically not enabled by default. It should be placed early in the middleware chain, typically after ExceptionHandler and MetricsHandler, to fail fast and still allow metrics to capture rate-limiting events.
Dependency
To use the handler, add the following dependency to your pom.xml:
<dependency>
    <groupId>com.networknt</groupId>
    <artifactId>rate-limit</artifactId>
    <version>${version.light-4j}</version>
</dependency>
Note: The configuration class is located in the limit-config module.
Handler Configuration
Register the handler in handler.yml:
handlers:
  - com.networknt.limit.LimitHandler@limit

chains:
  default:
    - exception
    - metrics
    - limit
    - ...
Configuration (limit.yml)
The handler is configured via limit.yml.
# Rate Limit Handler Configuration

# Enable or disable the handler
enabled: ${limit.enabled:false}

# Error code returned when limit is reached.
# Use 503 for DDoS protection (to trick attackers) or 429 for internal throttling.
errorCode: ${limit.errorCode:429}

# Default rate limit: e.g., 10 requests per second and 10000 quota per day.
rateLimit: ${limit.rateLimit:10/s 10000/d}

# If true, rate limit headers are always returned, even for successful requests.
headersAlwaysSet: ${limit.headersAlwaysSet:false}

# Key of the rate limit: server, address, client, user
# server: Shared limit for the entire server.
# address: Limit per IP address.
# client: Limit per client ID (from JWT).
# user: Limit per user ID (from JWT).
key: ${limit.key:server}

# Custom limits can be defined for specific keys
server: ${limit.server:}
address: ${limit.address:}
client: ${limit.client:}
user: ${limit.user:}

# Key Resolvers
clientIdKeyResolver: ${limit.clientIdKeyResolver:com.networknt.limit.key.JwtClientIdKeyResolver}
addressKeyResolver: ${limit.addressKeyResolver:com.networknt.limit.key.RemoteAddressKeyResolver}
userIdKeyResolver: ${limit.userIdKeyResolver:com.networknt.limit.key.JwtUserIdKeyResolver}
Rate Limit Keys
1. Server Key
The limit is shared across all incoming requests. You can define specific limits for different path prefixes:
limit.server:
  /v1/address: 10/s
  /v2/address: 1000/s
2. Address Key
The source IP address is used as the key. Each IP gets its own quota.
limit.address:
  192.168.1.100: 10/h 1000/d
  192.168.1.102:
    /v1: 10/s
3. Client Key
The client_id from the JWT token is used as the key. Note: JwtVerifierHandler must be in the chain before the limit handler.
limit.client:
  my-client-id: 100/m 10000/d
4. User Key
The user_id from the JWT token is used as the key. Note: JwtVerifierHandler must be in the chain before the limit handler.
limit.user:
  [email protected]: 10/m 10000/d
Rate Limit Headers
When a limit is reached (or if headersAlwaysSet is true), the following headers are returned:
- X-RateLimit-Limit: The configured limit (e.g.,
10/s). - X-RateLimit-Remaining: The number of requests remaining in the current time window.
- X-RateLimit-Reset: The number of seconds until the current window resets.
- Retry-After: (Only when limit is reached) The timestamp when the client can retry.
Module Registration
The limit-config module automatically registers itself with the ModuleRegistry when LimitConfig.load() is called. This allows the configuration to be visible via the Server Info endpoint and supports hot reloading of configurations.
Request Injection Middleware
The Request Injection middleware (RequestInterceptorInjectionHandler) is designed to inject implementations of the RequestInterceptor interface into the request chain. This allows developers to modify request metadata and body transparently before the request reaches the business handler.
Introduction
In many scenarios, you may need to inspect or modify the request body or headers based on complex rules or external data. While the request-transformer middleware handles rule-based transformation, the request-injection middleware provides a programmatic way to inject custom logic via the RequestInterceptor interface.
A key feature of this handler is its ability to buffer the request body (even for large requests using chunked transfer encoding), allowing interceptors to read and modify the full body content.
Configuration
The handler is configured via request-injection.yml.
| Config Field | Description | Default |
|---|---|---|
enabled | Enable or disable the handler. | true |
appliedBodyInjectionPathPrefixes | A list of path prefixes where body injection should be active. | [] |
maxBuffers | Max number of 16K buffers to use for buffering the body. Default 1024 (16MB). | 1024 |
- appliedBodyInjectionPathPrefixes: Body injection involves buffering the entire request in memory, which is expensive. It should only be enabled for specific paths that require it. For other paths, the interceptors are still called, but
shouldReadBodywill return false, skipping the buffering logic unless an interceptor specifically demands it and the path matches.
request-injection.yml Example
enabled: true
maxBuffers: 1024
appliedBodyInjectionPathPrefixes:
  - /v1/pets
  - /v1/store
RequestInterceptor Interface
To use this middleware, you must implement the RequestInterceptor interface and register your implementation via the service provider interface (SPI) or service.yml if using the SingletonServiceFactory.
public interface RequestInterceptor {
    /**
     * Handle the request.
     * @param exchange The HttpExchange
     * @throws Exception Exception
     */
    void handleRequest(HttpServerExchange exchange) throws Exception;

    /**
     * Indicate if the interceptor requires the request body.
     * @return boolean
     */
    default boolean isRequiredContent() {
        return false;
    }
}
- handleRequest: Implement your logic here. You can modify headers, check security, or rewrite the body (if available in attachment).
- isRequiredContent: Return
trueif your interceptor needs to inspect the request body. This combined withappliedBodyInjectionPathPrefixesconfig determines if the handler will buffer the request stream.
Logic Flow
- Check Config: The handler takes
RequestInjectionConfigto check if the current request path matchesappliedBodyInjectionPathPrefixes. - Check Interceptors: It checks if any registered
RequestInterceptorreturnstrueforisRequiredContent(). - Buffer Body: If both conditions are met (and method has content like POST/PUT), it reads the request channel into a
PooledByteBufferarray. - Invoke Interceptors: It calls
handleRequest()on all registered interceptors.- Interceptors can access the buffered body via
exchange.getAttachment(AttachmentConstants.BUFFERED_REQUEST_DATA_KEY).
- Interceptors can access the buffered body via
- Continue: After all interceptors run (and assuming none terminated the exchange), the request processing continues to the next handler.
Payload Size Limit
The maxBuffers configuration limits the maximum size of the request body that can be buffered.
- Buffer size = 16KB.
- Default
maxBuffers= 1024. - Total max size = 16MB.
If the request body exceeds this limit, the handler will throw a RequestTooBigException and return error ERR10068 (PAYLOAD_TOO_LARGE).
Usage
Register com.networknt.handler.RequestInterceptorInjectionHandler in your handler.yml.
handlers:
  - com.networknt.handler.RequestInterceptorInjectionHandler@injection
  # ...

chains:
  default:
    - injection
    # ...
Response Injection Middleware
The Response Injection middleware (ResponseInterceptorInjectionHandler) allows developers to inject ResponseInterceptor implementations into the request/response chain. These interceptors can modify the response headers and body before it is sent back to the client.
Introduction
Modification of the response body in an asynchronous, non-blocking server like Undertow is complex because the response is often streamed. This middleware handles the complexity by injecting a custom SinkConduit (ModifiableContentSinkConduit) when necessary. This allows interceptors to buffer the response, modify it, and then send the modified content to the client.
Configuration
The handler is configured via response-injection.yml.
| Config Field | Description | Default |
|---|---|---|
enabled | Enable or disable the handler. | true |
appliedBodyInjectionPathPrefixes | A list of path prefixes where response body injection should be active. | [] |
- appliedBodyInjectionPathPrefixes: Modifying the response body requires buffering the entire response in memory (to replace it). This is an expensive operation and should only be enabled for specific paths.
response-injection.yml Example
enabled: true
appliedBodyInjectionPathPrefixes:
  - /v1/pets
  - /v1/details
ResponseInterceptor Interface
To use this middleware, Implement the ResponseInterceptor interface.
public interface ResponseInterceptor extends Interceptor {
    /**
     * Indicate if the interceptor requires the response body.
     * @return boolean
     */
    boolean isRequiredContent();

    /**
     * Indicate if execution is async.
     * @return boolean (default false)
     */
    default boolean isAsync() { return false; }

    /**
     * Handle the response.
     * @param exchange The HttpExchange
     * @throws Exception Exception
     */
    void handleRequest(HttpServerExchange exchange) throws Exception;
}
- isRequiredContent: Return
trueif you need to modify the response body. This signals the middleware to inject theModifiableContentSinkConduit. - handleRequest: Implement your transformation logic.
Compression Handling
If an interceptor requires response content (isRequiredContent() returns true), the middleware forces the Accept-Encoding header in the request to identity.
- This prevents the upstream handler (or backend service) from compressing the response (e.g., GZIP), ensuring the interceptor receives plain text (JSON/XML) to modify.
- If the response is already compressed (e.g., from a static file handler that ignores Accept-Encoding), the middleware might skip injection to avoid corruption, as indicated by
!isCompressed(exchange)check.
Usage
-
Register the handler in
handler.yml:handlers: - com.networknt.handler.ResponseInterceptorInjectionHandler@responseInjection -
Add it to your chain (usually early in the chain, so it wraps subsequent handlers):
chains:
  default:
    - exception
    - metrics
    - responseInjection
    - ...
Logic Flow
- Request Flow:
- Handler checks if any registered
ResponseInterceptorrequires content. - If yes, and path matches config, and response is not already compressed:
- It wraps the response channel with
ModifiableContentSinkConduit. - It sets request
Accept-Encodingtoidentity.
- It wraps the response channel with
- Handler checks if any registered
- Response Flow:
- When the downstream handler writes the response, it goes into the
ModifiableContentSinkConduit. - The conduit buffers the response.
- Interceptors are invoked to modify the buffered response.
- The modified response is sent to the original sink.
- When the downstream handler writes the response, it goes into the
Prometheus Metrics
The prometheus module in light-4j provides a systems monitoring middleware handler that integrates with Prometheus. Unlike other metrics modules that “push” data to a central server (e.g., InfluxDB), Prometheus adopts a pull-based model where the Prometheus server periodically scrapes metrics from instrumented targets.
Features
- Runtime Collection: Captures HTTP request counts and response times using the Prometheus dimensional data model.
- Dimensionality: Automatically attaches labels like
endpointandclientIdto every metric, allowing for granular filtering and aggregation in Grafana. - JVM Hotspot Monitoring: Optional collection of JVM-level metrics including CPU usage, memory pools, garage collection, and thread states.
- Standardized Scrape Endpoint: Provides a dedicated handler to expose metrics in the standard Prometheus text format.
- Auto-Registration: The module automatically registers its configuration with the
ModuleRegistryduring initialization.
Configuration (prometheus.yml)
The behavior of the Prometheus middleware is controlled by the prometheus.yml file.
# Prometheus Metrics Configuration
---
# If metrics handler is enabled or not. Default is false.
enabled: ${prometheus.enabled:false}

# If the Prometheus hotspot monitor is enabled or not.
# includes thread, memory, classloader statistics, etc.
enableHotspot: ${prometheus.enableHotspot:false}
Setup
To enable Prometheus metrics, you need to add two handlers to your handler.yml: one to collect the data and another to expose it as an endpoint for scraping.
1. Add Handlers to handler.yml
handlers:
  # Captures metrics for every request
  - com.networknt.metrics.prometheus.PrometheusHandler@prometheus
  # Exposes the metrics to the Prometheus server
  - com.networknt.metrics.prometheus.PrometheusGetHandler@getprometheus

chains:
  default:
    - exception
    - prometheus  # Place early in the chain
    - correlation
    - ...
2. Define the Scrape Path
You must expose a GET endpoint (typically /v1/prometheus or /metrics) that invoke the getprometheus handler.
paths:
  - path: '/v1/prometheus'
    method: 'get'
    exec:
      - getprometheus
Collected Metrics
The PrometheusHandler defines several core application metrics:
- requests_total: Total number of HTTP requests received.
- success_total: Total number of successful requests (status codes 200-399).
- auth_error_total: Total number of authentication/authorization errors (status codes 401, 403).
- request_error_total: Total number of client-side request errors (status codes 400-499).
- server_error_total: Total number of server-side errors (status codes 500+).
- response_time_seconds: A summary of HTTP response latencies.
JVM Hotspot Monitoring
When enableHotspot is set to true, the module initializes the Prometheus DefaultExports, which captures:
- Process Statistics:
process_cpu_seconds_total,process_open_fds. - Memory Usage:
jvm_memory_pool_bytes_used,jvm_memory_pool_bytes_max. - Thread Areas:
jvm_threads_state,jvm_threads_deadlocked. - Garbage Collection:
jvm_gc_collection_seconds.
Scraping with Prometheus
To pull data from your service, configure your Prometheus server’s scrape_configs in its configuration file:
scrape_configs:
  - job_name: 'light-4j-services'
    scrape_interval: 15s
    metrics_path: /v1/prometheus
    static_configs:
      - targets: ['localhost:8080']
    scheme: https
    tls_config:
      insecure_skip_verify: true
Dependency
Add the following to your pom.xml:
<dependency>
    <groupId>com.networknt</groupId>
    <artifactId>prometheus</artifactId>
    <version>${version.light-4j}</version>
</dependency>
Module Registration
The prometheus module registers itself with the ModuleRegistry automatically when PrometheusConfig.load() is called. This registration (along with the current configuration values) can be inspected via the Server Info endpoint.
Sanitizer Handler
The SanitizerHandler is a middleware component in light-4j designed to address Cross-Site Scripting (XSS) concerns by sanitizing request headers and bodies. It leverages the OWASP Java Encoder to perform context-aware encoding of potentially malicious user input.
Features
- Context-Aware Encoding: Uses the
owasp-java-encoderto safely encode data. - Header Sanitization: Encodes request headers to prevent header-based XSS or injection.
- Body Sanitization: Deep-scans JSON request bodies and encodes string values in Maps and Lists.
- Selective Sanitization: Fine-grained control with
AttributesToEncodeandAttributesToIgnorelists for both headers and bodies. - Flexible Encoders: Supports multiple encoding formats like
javascript-source,javascript-attribute,javascript-block, etc. - Auto-Registration: Automatically registers with
ModuleRegistryduring configuration loading for runtime visibility.
Dependency
To use the SanitizerHandler, include the following dependency in your pom.xml:
<dependency>
    <groupId>com.networknt</groupId>
    <artifactId>sanitizer</artifactId>
    <version>${version.light-4j}</version>
</dependency>
Configuration (sanitizer.yml)
The behavior of the handler is managed through sanitizer.yml.
# Sanitizer Configuration
---
# Indicate if sanitizer is enabled or not. Default is false.
enabled: ${sanitizer.enabled:false}

# --- Body Sanitization ---
# If enabled, the request body will be sanitized.
# Note: Requires BodyHandler to be in the chain before SanitizerHandler.
bodyEnabled: ${sanitizer.bodyEnabled:true}

# The encoder for the body. Default is javascript-source.
bodyEncoder: ${sanitizer.bodyEncoder:javascript-source}

# Optional list of body keys to encode. If specified, ONLY these keys are scanned.
bodyAttributesToEncode: ${sanitizer.bodyAttributesToEncode:}

# Optional list of body keys to ignore. All keys EXCEPT these will be scanned.
bodyAttributesToIgnore: ${sanitizer.bodyAttributesToIgnore:}

# --- Header Sanitization ---
# If enabled, the request headers will be sanitized.
headerEnabled: ${sanitizer.headerEnabled:true}

# The encoder for the headers. Default is javascript-source.
headerEncoder: ${sanitizer.headerEncoder:javascript-source}

# Optional list of header keys to encode. If specified, ONLY these headers are scanned.
headerAttributesToEncode: ${sanitizer.headerAttributesToEncode:}

# Optional list of header keys to ignore. All headers EXCEPT these will be scanned.
headerAttributesToIgnore: ${sanitizer.headerAttributesToIgnore:}
Setup
1. Order in Chain
If bodyEnabled is set to true, the SanitizerHandler must be placed in the handler chain after the BodyHandler. This is because the sanitizer expects the request body to be already parsed into the exchange attachment.
2. Register Handler
In your handler.yml, register the handler and add it to your chain.
handlers:
  - com.networknt.sanitizer.SanitizerHandler@sanitizer

chains:
  default:
    - ...
    - body
    - sanitizer
    - ...
When to use Sanitizer
The SanitizerHandler is primarily intended for applications that collect user input via Web or Mobile UIs and later use that data to generate HTML pages (e.g., forums, blogs, profile pages).
Do not use this handler for:
- Services where input is only processed internally and never rendered back to a browser.
- Encrypted or binary data.
- High-performance logging services where the overhead of string manipulation is unacceptable.
Query Parameters
The SanitizerHandler does not process query parameters. Modern web servers like Undertow already perform robust sanitization and decoding of special characters in query parameters before they reach the handler chain.
Operational Visibility
The sanitizer module utilizes the Singleton pattern for its configuration. During startup, it automatically registers itself with the ModuleRegistry. You can verify the current configuration, including active encoders and ignore/encode lists, at runtime via the Server Info endpoint.
Encode Library
The underlying library used for sanitization is the OWASP Java Encoder. The default encoding level is javascript-source, which provides a high degree of security without corrupting most types of textual data.
Security Handler
The SecurityHandler (implemented as JwtVerifyHandler in REST, GraphQL, etc.) is responsible for verifying the security tokens (JWT or SWT) in the request header. It is a core component of the light-4j framework and provides distributed policy enforcement without relying on a centralized gateway.
Configuration
The security configuration is usually defined in security.yml, but it can be overridden by framework-specific files like openapi-security.yml or graphql-security.yml.
Example security.yml
# Security configuration for security module in light-4j.
---
# Enable JWT verification flag.
enableVerifyJwt: ${security.enableVerifyJwt:true}

# Enable SWT verification flag.
enableVerifySwt: ${security.enableVerifySwt:true}

# swt clientId header name.
swtClientIdHeader: ${security.swtClientIdHeader:swt-client}

# swt clientSecret header name.
swtClientSecretHeader: ${security.swtClientSecretHeader:swt-secret}

# Extract JWT scope token from the X-Scope-Token header and validate the JWT token
enableExtractScopeToken: ${security.enableExtractScopeToken:true}

# Enable JWT scope verification. Only valid when enableVerifyJwt is true.
enableVerifyScope: ${security.enableVerifyScope:true}

# Skip scope verification if the endpoint specification is missing.
skipVerifyScopeWithoutSpec: ${security.skipVerifyScopeWithoutSpec:false}

# If set true, the JWT verifier handler will pass if the JWT token is expired already.
ignoreJwtExpiry: ${security.ignoreJwtExpiry:false}

# User for test only. should be always be false on official environment.
enableMockJwt: ${security.enableMockJwt:false}

# Enables relaxed verification for jwt. e.g. Disables key length requirements.
enableRelaxedKeyValidation: ${security.enableRelaxedKeyValidation:false}

# JWT signature public certificates. kid and certificate path mappings.
jwt:
  certificate: ${security.certificate:100=primary.crt&101=secondary.crt}
  clockSkewInSeconds: ${security.clockSkewInSeconds:60}
  # Key distribution server standard: JsonWebKeySet for other OAuth 2.0 provider| X509Certificate for light-oauth2
  keyResolver: ${security.keyResolver:JsonWebKeySet}

# Enable or disable JWT token logging for audit.
logJwtToken: ${security.logJwtToken:true}

# Enable or disable client_id, user_id and scope logging.
logClientUserScope: ${security.logClientUserScope:false}

# Enable JWT token cache to speed up verification.
enableJwtCache: ${security.enableJwtCache:true}

# Max size of the JWT cache before a warning is logged.
jwtCacheFullSize: ${security.jwtCacheFullSize:100}

# Retrieve public keys dynamically from the OAuth2 provider.
bootstrapFromKeyService: ${security.bootstrapFromKeyService:false}

# Provider ID for federated deployment.
providerId: ${security.providerId:}

# Define a list of path prefixes to skip security.
skipPathPrefixes: ${security.skipPathPrefixes:}

# Pass specific claims from the token to the backend API via HTTP headers.
passThroughClaims:
  clientId: client_id
  tokenType: token_type
Key Features
JWT Verification
Verification includes signature check, expiration check, and scope verification. The handler uses the JwtVerifier to perform these checks.
SWT Verification
The handler also supports Shared Secret Token (SWT) verification. When enabled, it checks the token using client ID and secret, which can be passed in headers specified by swtClientIdHeader and swtClientSecretHeader.
Scope Verification
If enableVerifyScope is true, the handler compares the scopes in the JWT against the scopes defined in the API specification (e.g., openapi.yaml). If the specification is missing and skipVerifyScopeWithoutSpec is true, scope verification is skipped.
Token Caching
To improve performance, verified tokens can be cached. This avoids expensive signature verification for subsequent requests with the same token. The cache size can be monitored using jwtCacheFullSize.
Dynamic Key Loading
By setting bootstrapFromKeyService to true, the handler can pull public keys (JWK) from the OAuth2 provider’s key service based on the kid (Key ID) in the JWT header.
Path Skipping
You can bypass security for specific endpoints by adding their prefixes to skipPathPrefixes.
Claim Pass-through
Claims from the JWT or SWT can be mapped to HTTP headers and passed to the backend service using passThroughClaims. This is useful for passing user information or client details without the backend having to parse the token again.
Security Attacks Mitigation
alg header attacks
The light-4j implementation is opinionated and primarily uses RS256. It prevents “alg: none” attacks and HMAC-RSA confusion attacks by explicitly specifying the expected algorithm.
kid and Key Rotation
The use of kid allows the framework to support multiple keys simultaneously, which is essential for seamless key rotation.
Unified Security
The UnifiedSecurityHandler is a powerful middleware that consolidates various security mechanisms into a single handler. It is designed to simplify security configuration, especially in complex environments like a shared light-gateway, where different paths might require different authentication methods.
By using the UnifiedSecurityHandler, you avoid chaining multiple security-specific handlers (like BasicAuthHandler, JwtVerifyHandler, ApiKeyHandler) and can manage all security policies in one place.
Configuration
The configuration for this handler is defined in unified-security.yml.
Example unified-security.yml
# Unified security configuration.
---
# Indicate if this handler is enabled.
enabled: ${unified-security.enabled:true}

# Anonymous prefixes configuration. Request paths starting with these prefixes bypass all security.
anonymousPrefixes: ${unified-security.anonymousPrefixes:}

# Path prefix security configuration.
pathPrefixAuths:
  - prefix: /api/v1
    basic: false
    jwt: true
    sjwt: false
    swt: false
    apikey: false
    jwkServiceIds: com.networknt.petstore-1.0.0
  - prefix: /api/v2
    basic: true
    jwt: true
    apikey: true
    jwkServiceIds: service1,service2
Configuration Parameters
| Parameter | Description |
|---|---|
enabled | Whether the UnifiedSecurityHandler is active. |
anonymousPrefixes | A list of path prefixes that do not require any authentication. |
pathPrefixAuths | A list of configurations defining security policies for specific path prefixes. |
Path Prefix Auth Fields
| Field | Description |
|---|---|
prefix | The request path prefix this policy applies to. |
basic | Enable Basic Authentication verification. |
jwt | Enable standard JWT verification (with scope check). |
sjwt | Enable Simple JWT verification (signature check only, no scope check). |
swt | Enable Shared Secret Token (SWT) verification. |
apikey | Enable API Key verification. |
jwkServiceIds | Comma-separated list of service IDs for JWK lookup (used if jwt is true). |
sjwkServiceIds | Comma-separated list of service IDs for JWK lookup (used if sjwt is true). |
swtServiceIds | Comma-separated list of service IDs for introspection servers (used if swt is true). |
How it works
- Anonymous Check: The handler first checks if the request path matches any prefix in
anonymousPrefixes. If it does, the request proceeds to the next handler immediately. - Path Policy Lookup: The handler iterates through
pathPrefixAuthsto find a match for the request path. - Authentication Execution:
- If Basic, JWT, SJWT, or SWT is enabled, the handler looks for the
Authorizationheader. - It identifies the authentication type (Basic vs. Bearer).
- For Bearer tokens, it determines if the token is a JWT/SJWT or an SWT.
- If SJWT (Simple JWT) is enabled, it can differentiate between a full JWT (with scopes) and a Simple JWT (without scopes) and invoke the appropriate verification logic.
- If multiple methods are enabled (e.g., both JWT and Basic), it attempts to verify based on the provided credentials.
- If ApiKey is enabled, it checks for the API key in the configured headers/parameters.
- If Basic, JWT, SJWT, or SWT is enabled, the handler looks for the
Benefits
- Centralized Management: Configure all security policies for the entire gateway or service in one file.
- Reduced Performance Overhead: Minimizes the number of handlers in the middleware chain.
- Flexibility: Supports different security requirements for different API versions or functional areas.
- Dynamic Discovery: Supports multiple JWK or introspection services per path prefix, enabling integration with multiple identity providers.
Sidecar Handler
The sidecar module provides a set of middleware handlers designed to operate in a sidecar or gateway environment. It enables the separation of cross-cutting concerns from business logic, allowing the light-sidecar to act as a micro-gateway for both incoming (ingress) and outgoing (egress) traffic.
Overview
In a sidecar deployment (typically within a Kubernetes Pod), the sidecar module manages traffic between the backend service and the external network. It allows the backend service—regardless of the language or framework it’s built with—to benefit from light-4j features like security, discovery, and observability.
Configuration (sidecar.yml)
The behavior of the sidecar handlers is controlled via sidecar.yml. This configuration is mapped to the SidecarConfig class.
Example sidecar.yml
# Light http sidecar configuration
---
# Indicator used to determine the condition for router traffic.
# Valid values: 'header' (default), 'protocol', or other custom indicators.
# If 'header', it looks for service_id or service_url in the request headers.
# If 'protocol', it treats HTTP traffic as egress and HTTPS as ingress (or vice versa depending on setup).
egressIngressIndicator: ${sidecar.egressIngressIndicator:header}
Parameters
| Parameter | Default | Description |
|---|---|---|
egressIngressIndicator | header | Determines if a request is Ingress or Egress. |
Ingress vs. Egress Logic
The SidecarRouterHandler and related middleware use the egressIngressIndicator to decide how to process a request:
- Ingress (Incoming): Traffic coming from external clients to the backend API. The sidecar applies security (Token validation), logging, and then proxies the request to the backend API.
- Egress (Outgoing): Traffic initiated by the backend API to call another service. The sidecar handles service discovery, load balancing, and token injection (via SAML or OAuth2) before forwarding the request to the target service.
Sidecar Middleware Handlers
The sidecar module includes specialized versions of standard middleware that are aware of the traffic direction.
SidecarTokenHandler
Validates tokens for Ingress traffic. If the request is identified as Egress (based on the indicator), it skips validation to allow the request to proceed to the external service.
SidecarSAMLTokenHandler
Similar to the Token Handler, it handles SAML token validation for Ingress traffic and skips for Egress.
SidecarServiceDictHandler
Applies service dictionary mapping for Egress traffic, ensuring the outgoing request is correctly mapped to a target service definition.
SidecarPathPrefixServiceHandler
Identifies the target service ID based on the path prefix for Egress traffic. For Ingress traffic, it populates audit attachments and passes the request to the proxy.
Implementation Details
The sidecar module follows the standard light-4j implementation patterns:
- Singleton + Caching:
SidecarConfiguses a cached singleton instance for performance, loaded viaSidecarConfig.load(). - Hot Reload: Supports runtime configuration updates via the
reload()method, which re-registers the module in theModuleRegistry. - Module Registry Integration: Automatically registers itself with
/server/infoto provide visibility into the active sidecar configuration.
SAML Token Handler
The SAMLTokenHandler is a middleware handler designed to support the SAML 2.0 Bearer Assertion Grant type (RFC 7522). It allows a client to exchange a SAML 2.0 assertion (and optionally a JWT client assertion) for an OAuth 2.0 access token (JWT) from an authorization server.
Introduction
In some enterprise environments, legacy identity providers (IdPs) typically issue SAML assertions. However, modern microservices usually require JWTs for authorization. This handler bridges the gap by intercepting requests containing a SAML assertion, exchanging it for a JWT with the authorization server, and then replacing the SAML assertion with the JWT in the Authorization header for downstream services.
Logic Flow
- Intercept Request: The handler looks for specific headers in the incoming request:
assertion: Contains the Base64-encoded SAML 2.0 assertion.client_assertion(Optional): Contains a JWT for client authentication (if required).
- Exchange Token: It constructs a simplified token request using these assertions and sends it to the configured OAuth 2.0 provider (via
OauthHelper). - Process Response:
- Success: If the IdP returns a valid access token (JWT), the handler:
- Sets the
Authorizationheader toBearer <access_token>. - Removes the
assertionandclient_assertionheaders to clean up the request. - Passes the request to the next handler in the chain.
- Sets the
- Failure: If the exchange fails, it returns an error response (typically with the status code from the IdP) and terminates the request.
- Success: If the IdP returns a valid access token (JWT), the handler:
Configuration
This handler shares configuration with the TokenHandler and relies on client.yml for OAuth provider details.
token.yml
The handler’s enabled status is controlled by the token.yml configuration (shared with TokenHandler).
# Token Handler Configuration
enabled: true
client.yml
The details for connecting to the OAuth provider are defined in the client.yml file under the oauth section.
oauth:
  token:
    # URL of the OAuth 2.0 token endpoint
    authorization_code_url: https://localhost:6882/oauth/token
    # Other standard client config...
security.yml
HTTP/2 support for the connection to the OAuth provider can be toggled in security.yml.
# Enable HTTP/2 for OAuth Token Request
oauthHttp2Support: true
Usage
To use this handler, register it in handler.yml and place it before any handlers that require a valid JWT (like JwtVerifyHandler) and usually before the proxy/router handler.
handler.yml
handlers:
  - com.networknt.router.middleware.SAMLTokenHandler@saml
  # ... other handlers

chains:
  default:
    - correlation
    - saml   # Exchanges SAML for JWT here
    - router # Forwards request with JWT
Headers
| Header Name | Required | Description |
|---|---|---|
assertion | Yes | The Base64-encoded SAML 2.0 assertion (xml). |
client_assertion | No | A JWT used for client authentication (if using private_key_jwt auth). |
Token Handler
The TokenHandler is a middleware handler used in the Light-Gateway or http-sidecar. Its primary responsibility is to fetch an OAuth 2.0 access token (Client Credentials Grant) from an authorization server on behalf of the client and inject it into the request header.
Introduction
In a microservices environment, a service often needs to call other services securely. Instead of implementing token retrieval logic in every service (or when using a language without a mature OAuth client), you can offload this responsibility to the gateway or sidecar.
The TokenHandler intercepts outgoing requests, checks if a valid token is cached, and if not, retrieves a new one from the configured OAuth provider derived from client.yml. It then attaches this token to the request so the downstream service can authenticate the call.
Logic Flow
- Resolve Service ID: The handler first looks for the
service_idheader. This header is typically populated by upstream handlers like: - Filter by Path: It checks if the request path matches any of the configured
appliedPathPrefixes. If not, it skips execution. - Fetch Token:
- It checks an internal cache for a valid JWT associated with the
serviceId. - If missing or expired, it initiates a Client Credentials Grant request to the OAuth provider defined in
client.yml.
- It checks an internal cache for a valid JWT associated with the
- Inject Token:
- Standard: If the
Authorizationheader is empty, it setsAuthorization: Bearer <jwt>. - On-Behalf-Of: If the
Authorizationheader already contains a token (e.g., the original user’s token), it preserves it and puts the new “scope token” (for service-to-service calls) in theX-Scope-Tokenheader.
- Standard: If the
Configuration
The handler is configured via token.yml for enabling/filtering and client.yml for OAuth provider details.
token.yml
# Token Handler Configuration
enabled: true

# List of path prefixes where this handler should be active.
# This allows you to selectively apply token injection only for specific routes.
appliedPathPrefixes:
  - /v1/pets
  - /v2/orders
client.yml
The OAuth 2.0 provider configuration is managed by the client module.
oauth:
  # Enable multiple auth servers if you need different credentials for different services
  multipleAuthServers: true
  token:
    # Default Client Credentials Config
    client_credentials:
      clientId: default_client
      clientSecret: default_secret
      uri: /oauth2/token
    # Service specific overrides (mapped by serviceId)
    serviceIdAuthServers:
      petstore-service:
        clientId: petstore_client
        clientSecret: petstore_secret
        uri: /oauth2/token
Usage
To use this handler, register it in handler.yml. It must be placed after any handler that resolves the serviceId (like PathPrefixServiceHandler) and before the RouterHandler.
handler.yml
handlers:
  - com.networknt.router.middleware.TokenHandler@token
  # ... other handlers

chains:
  default:
    - correlation
    - prefix   # Resolves service_id from path
    - token    # Uses service_id to get JWT
    - router   # Forwards request to downstream
Error Handling
If the service_id cannot be resolved (because the upstream handler is missing or failed), the TokenHandler will return an error ERR10074 indicating a dependency error.
SSE Handler
The SSE (Server-Sent Events) Handler in light-4j allows the server to push real-time updates to the client over a standard HTTP connection. This handler manages the connection lifecycle and keep-alive messages.
Configuration
The configuration for the SSE Handler is defined in sse.yml (or sse.json/yaml). It corresponds to the SseConfig.java class.
Configuration Properties
| Property | Type | Default | Description |
|---|---|---|---|
enabled | boolean | true | Enable or disable the SSE Handler. |
path | string | /sse | The default endpoint path for the SSE Handler. |
keepAliveInterval | int | 10000 | The keep-alive interval in milliseconds. Used for the default path or if no specific interval is defined for a prefix. |
pathPrefixes | list | null | A list of path prefixes with specific keep-alive intervals. See example below. |
metricsInjection | boolean | false | If true, injects metrics for the downstream API response time (useful in sidecar/gateway modes). |
metricsName | string | router-response | The name used for metrics categorization if injection is enabled. |
Configuration Example (sse.yml)
# Enable SSE Handler
enabled: true

# Default SSE Endpoint Path
path: /sse

# Default keep-alive interval in milliseconds
keepAliveInterval: 10000

# Define path prefix related configuration properties as a list of key/value pairs.
# If request path cannot match to one of the pathPrefixes or the default path, the request will be skipped.
pathPrefixes:
  - pathPrefix: /sse/abc
    keepAliveInterval: 20000
  - pathPrefix: /sse/def
    keepAliveInterval: 40000

# Metrics injection (optional, for gateway/sidecar usage)
metricsInjection: false
metricsName: router-response
Usage
Register the SseHandler in your handler.yml chain. When a client connects to the configured path (e.g., /sse), the handler will establish a persistent connection and manage keep-alive signals based on the keepAliveInterval.
Path Matching
- Prefix Matching: If
pathPrefixesare configured, the handler checks if the request path starts with any of the defined prefixes. If a match is found, the specifickeepAliveIntervalfor that prefix is used. - Exact Matching: If no prefix matches, the handler checks if the request path exactly matches the default
path(/sse). - Passthrough: If neither matches, the request is passed to the next handler in the chain.
Traceability
The handler supports traceability via the X-Traceability-Id header or an id query parameter to track connections in the SseConnectionRegistry.
Service Dict Handler
The ServiceDictHandler is a middleware handler that provides a flexible way to map request paths and methods to serviceIds. It bridges the gap between PathPrefixServiceHandler (simple prefix mapping) and PathServiceHandler (exact Swagger endpoint mapping).
Introduction
In a microservices gateway, routing requests purely based on path prefixes might be insufficient, and requiring a full OpenAPI specification for PathServiceHandler might be overkill or not feasible for some legacy services.
ServiceDictHandler offers a middle ground. It allows you to define mappings using a combination of Path Prefix and HTTP Method. This enables you to route requests to different services based on the operation (e.g., READs go to one service, WRITEs to another) without needing a full API definition.
Logic Flow
- Intercept Request: The handler captures the incoming request’s URI and HTTP Method.
- Lookup Mapping: It normalizes the request to key format
pathPrefix@methodand searches for a match in the configuration. - Inject Header:
- If a match is found, it injects the corresponding
serviceIdinto theservice_idheader. - It also populates the audit attachment with the matched endpoint Pattern.
- If a match is found, it injects the corresponding
- No Match: If no mapping is found, it marks the endpoint as
Unknownin the audit logs.
Configuration
The handler is configured via the serviceDict.yml file.
| Config Field | Description | Default |
|---|---|---|
enabled | Enable or disable the handler. | true |
mapping | A map key-value pair of pathPrefix@method -> serviceId. | {} |
Configuration Format
The key format in the mapping is [PathPrefix]@[Method]. The method should be lowercase.
Example serviceDict.yml
# Service Dictionary Configuration
enabled: true

# Mapping: PathPrefix@Method -> Service ID
mapping:
  # Route all GET requests under /v1/address to address-read service
  /v1/address@get: party.address-read-1.0.0

  # Route all POST requests under /v1/address to address-write service
  /v1/address@post: party.address-write-1.0.0

  # Route all requests (any method) under /v2/address to address-v2 service
  # Note: logic depends on specific implementation match order if keys overlap
  /v2/address@get: party.address-v2-1.0.0
Supported Formats
Like other handlers, the mapping can be provided as:
- YAML Map: Standard
key: valuestructure. - JSON String:
{"/v1/data@get": "service-1"}. - Java Map String:
/v1/data@get=service-1&/v1/data@post=service-2.
Usage
To use this handler, register it in handler.yml and place it before the RouterHandler.
handler.yml
handlers:
  - com.networknt.router.middleware.ServiceDictHandler@dict
  # ... other handlers

chains:
  default:
    - correlation
    - dict   # Perform lookup here
    - router
Comparison
| Handler | Matching key | Dependency | Use Case |
|---|---|---|---|
| PathPrefixServiceHandler | Path Prefix (/v1/data) | None | Simple routing where one path = one service. |
| ServiceDictHandler | Path + Method (/v1/data@get) | None | Routing based on Method (CQRS-style) without Swagger. |
| PathServiceHandler | Exact Endpoint (/v1/data/{id}@get) | OpenAPI/Swagger | Precise routing for RESTful APIs with specs. |
MCP Router
The MCP (Model Context Protocol) Router in light-4j allows binding LLM tools to HTTP endpoints, enabling an AI model to interact with your services via the MCP standard. It supports both Server-Sent Events (SSE) for connection establishment and HTTP POST for JSON-RPC messages.
Configuration
The configuration for the MCP Router is defined in mcp-router.yml (or mcp-router.json/yaml). It corresponds to the McpConfig.java class.
Configuration Properties
| Property | Type | Default | Description |
|---|---|---|---|
enabled | boolean | true | Enable or disable the MCP Router Handler. |
path | string | /mcp | The unified endpoint path for both connection establishment (SSE via GET) and JSON-RPC messages (POST). |
tools | list | null | A list of tools exposed by this router. Each tool maps to a downstream HTTP service. |
Configuration Example (mcp-router.yml)
# Enable MCP Router Handler
enabled: true

# Path for MCP endpoint (Streamable HTTP)
path: /mcp

# Define tools exposed by this router
tools:
  - name: getWeather
    description: Get the weather for a location
    host: https://api.weather.com
    path: /v1/current
    method: GET
    # inputSchema is optional; default is type: object
Architecture
The MCP Router implements the MCP HTTP transport specification using a Single Path architecture:
- Connection: Clients connect to the configured
path(default/mcp) via GET to establish an SSE session. The server generates a unique session ID and responds with anendpointevent containing the URI for message submission (e.g.,/mcp?sessionId=uuid). - Messaging: Clients send JSON-RPC 2.0 messages to the same
path(default/mcp) via POST. The session context is maintained via thesessionIdquery parameter or header. - Tool Execution: The router translates
tools/callrequests into HTTP requests to the configured downstream services (host+path).
Supported Methods
The router supports the following MCP JSON-RPC methods:
initialize: Returns server capabilities (tools list changed notification) and server info.notifications/initialized: Acknowledgment from the client.tools/list: Lists all configured tools with their names, descriptions, and input schemas.tools/call: Executes a specific tool by name. Theargumentsin the request are passed to the downstream service.
Advanced Search and Filtering
To prevent context window bloat for AI agents, the tools/list method supports optional filtering parameters:
query(string): Filters tools where the name or description contains this case-insensitive substring.intent(string): Additional refinement for tool discovery based on user or agent intent.
Example request:
{
  "jsonrpc": "2.0",
  "method": "tools/list",
  "params": {
    "query": "weather"
  },
  "id": 1
}
Usage
Register the McpHandler in your handler.yml chain.
Example:
paths:
  - path: '/mcp'
    method: 'GET'
    exec:
      - mcp-router
  - path: '/mcp'
    method: 'POST'
    exec:
      - mcp-router
Verification with verify_mcp.py
To assist with testing and verification, a Python script verify_mcp.py is available in the light-gateway root directory (and potentially other project roots). This script simulates an MCP client to ensure the router is correctly configured and routing requests.
Prerequisite
Install the required Python packages:
pip install requests sseclient-py
Running the Script
Run the script against your running gateway instance (default https://localhost:8443):
python3 verify_mcp.py
What it does
- Connects to SSE: Initiates a GET request to
/mcpand listens for server sent events. It confirms receipt of theendpointevent. - Initializes: Sends a POST request with the
initializeJSON-RPC method to verify protocol negotiation. - Lists Tools: Sends a
tools/listrequest to verify that configured tools are being correctly exposed by the router.
If successful, you will see output confirming the SSE connection, the endpoint event, and the JSON responses for initialization and tool listing.
MCP Audit Logging
The light-4j-mcp framework extends the standard Light-4j AuditHandler to natively support capturing fine-grained Model Context Protocol (MCP) data.
Because standard MCP traffic is structured as JSON-RPC over HTTP/SSE, simply logging the raw requestBody and responseBody would result in bulky and noisy logs (capturing boilerplate messages like initialize, notifications/initialized, and ping events). Instead, the McpHandler intelligently bridges the gap by intercepting specific tool execution calls and forwarding only the most relevant operational data to the AuditHandler.
How It Works
When a client makes a JSON-RPC request to execute an MCP tool (using the tools/call method):
- The
McpHandleridentifies the tool call and parses its payload. - It extracts the tool name and argument parameters.
- Once the tool finishes executing (or if it encounters an error, missing tool, or access-control denial), the
McpHandlercaptures the final output. - It injects this processed data into the
AUDIT_INFOmetadata attached to the HTTP exchange. - Finally, the downstream
AuditHandlerseamlessly formats and outputs these fields into your centralizedaudit.log.
Configuration
To enable MCP auditing, you need to configure your handler chain and instruct the AuditHandler to output the new fields.
1. Update audit.yml
In your audit.yml (or via externalized values.yml), augment the audit array to include the three new MCP-specific keys: toolName, toolArguments, and toolResult.
# audit.yml
audit.audit:
  - client_id
  - user_id
  - endpoint
  - serviceId
  - toolName
  - toolArguments
  - toolResult
(Note: The latest audit-config module provides these defaults automatically, but you may need to explicitly add them if overriding via values.yml or if using custom templates).
2. Update handler.yml
Ensure that the AuditHandler is placed before the McpHandler in the execution chain for your MCP endpoints. This allows the standard audit timer to start properly and attach the completion listener that ultimately writes the log to disk.
# handler.yml
paths:
  - path: '/ctrl/mcp'
    method: 'post'
    exec:
      - audit
      - mcp
Example Log Output
When a tool is executed, the AuditHandler will combine standard metadata with the custom fields and output a structured JSON log entry similar to this:
{
  "timestamp": "2026-04-11T12:00:00.123-0400",
  "serviceId": "com.networknt.mcp-router-1.0.0",
  "X-Correlation-Id": "c4ca4238a0b923820dcc509a6f75849b",
  "endpoint": "/ctrl/mcp@post",
  "toolName": "search_database",
  "toolArguments": "{\"query\":\"select * from users\",\"limit\":10}",
  "toolResult": "{\"status\":\"success\",\"rows\":10}",
  "statusCode": 200,
  "responseTime": 105
}
Security & Data Masking
Because toolArguments and toolResult are seamlessly passed to the standard AuditHandler, they natively inherit Light-4j’s built-in robust mask capabilities. If masking is enabled (audit.mask: true), any sensitive data passed through the MCP payloads will be sanitized according to your standard security configurations before being written to disk.
Token Exchange Handler
The Token Exchange Handler implements RFC 8693 OAuth 2.0 Token Exchange. It allows a gateway or sidecar to exchange an incoming token (e.g., an external Client Credentials token) for an internal token (e.g., an Authorization Code token with a user identity) by calling an OAuth 2.0 provider.
Introduction
In a microservices architecture, especially when integrating with external partners, the incoming request often carries a token issued by an external Identity Provider (IdP). This token might lack the necessary context (like internal user ID, roles, or custom claims) required by internal services.
The Token Exchange Handler intercepts the request, validates the incoming token (optional), exchanges it for an internal token via the urn:ietf:params:oauth:grant-type:token-exchange grant type, and replaces the Authorization header with the new token.
Configuration
The configuration is managed via token-exchange.yml.
| Field | Description | Default |
|---|---|---|
| enabled | Enable or disable the handler | true |
| tokenExUri | The token endpoint of the OAuth 2.0 provider | null |
| tokenExClientId | The client ID used to authenticate the exchange request | null |
| tokenExClientSecret | The client secret used to authenticate the exchange request | null |
| tokenExScope | Optional list of scopes to request for the new token | null |
| subjectTokenType | The type of the input token (RFC 8693 URN) | urn:ietf:params:oauth:token-type:jwt |
| requestedTokenType | The desired type of the output token (RFC 8693 URN) | urn:ietf:params:oauth:token-type:jwt |
| mappingStrategy | Strategy for mapping client IDs (config/database) | database |
Example token-exchange.yml
# Enable or disable the handler
enabled: true

# The path to the token exchange endpoint on OAuth 2.0 provider
tokenExUri: https://localhost:6882/oauth2/token

# The client ID for the token exchange authentication
tokenExClientId: portal-client

# The client secret for the token exchange authentication
tokenExClientSecret: portal-secret

# The scope of the returned token
tokenExScope:
  - portal.w
  - portal.r

# The subject token type. Default is urn:ietf:params:oauth:token-type:jwt
subjectTokenType: urn:ietf:params:oauth:token-type:jwt

# The requested token type. Default is urn:ietf:params:oauth:token-type:jwt
requestedTokenType: urn:ietf:params:oauth:token-type:jwt
Usage
1. Add Dependency
Add the token-exchange module to your pom.xml.
<dependency>
    <groupId>com.networknt</groupId>
    <artifactId>token-exchange</artifactId>
    <version>${version.light-4j}</version>
</dependency>
2. Register Handler
In your handler.yml, add com.networknt.token.exchange.TokenExchangeHandler to the desired chain. It should typically be placed after the TraceabilityHandler or CorrelationHandler and before the security handler if you want to validate the new token, or before the security handler if you want to validate the original token.
Note: If you place it before the AuditHandler, the audit log will reflect the exchanged token.
handlers:
  - com.networknt.token.exchange.TokenExchangeHandler@token
  # ... other handlers ...

chains:
  default:
    - exception
    - metrics
    - traceability
    - correlation
    - token
    - specification
    - security
    - body
    - validator
    # ...
Mapping Strategies
To map an external Client ID (from the subject_token) to an internal User ID:
- Database (Recommended): Use a “Shadow Client” in
light-oauth2. Create a client with the same ID as the external client and populatecustom_claimswith the internaluserIdorfunctionId.light-oauth2will automatically inject these claims into the minted token. - Config: (Future support) Map IDs directly in
token-exchange.yml.
Interceptor
Request Transformer Interceptor
The request-transformer is a powerful middleware interceptor that allows for dynamic modification of incoming requests using the light-4j rule engine. It provides a highly flexible way to manipulate request metadata (headers, query parameters, path) and the request body based on custom business logic defined in rules.
Features
- Dynamic Transformation: Modify request elements at runtime without changing application code.
- Rule-Based: Leverage the
light-4jrule engine to define complex transformation logic. - Path-Based Activation: Target specific request paths using the
appliedPathPrefixesconfiguration. - Metadata Manipulation: Add, update, or remove request headers, query parameters, path, and URI.
- Body Transformation: Overwrite the request body (supports JSON, XML, and other text-based formats).
- Short-Circuiting: Generate an immediate response body or validation error to return to the caller, stopping the handler chain.
- Encoding Support: Configurable body encoding per path prefix for legacy API compatibility.
- Auto-Registration: Automatically registers with the
ModuleRegistryfor administrative visibility.
Configuration (request-transformer.yml)
The interceptor is configured via request-transformer.yml.
# Request Transformer Configuration
---
# Indicate if this interceptor is enabled or not. Default is true.
enabled: ${request-transformer.enabled:true}

# Indicate if the transform interceptor needs to change the request body. Default is true.
requiredContent: ${request-transformer.requiredContent:true}

# Default body encoding for the request body. Default is UTF-8.
defaultBodyEncoding: ${request-transformer.defaultBodyEncoding:UTF-8}

# A list of applied request path prefixes. Only requests matching these prefixes will be processed.
# This can be a single string or a list of strings.
appliedPathPrefixes: ${request-transformer.appliedPathPrefixes:}

# Customized encoding for specific path prefixes.
# This is useful for legacy APIs that require non-UTF-8 encoding (e.g., ISO-8859-1).
# pathPrefixEncoding:
#   /v1/pets: ISO-8859-1
#   /v1/party/info: ISO-8859-1
Setup
1. Add Dependency
Add the following dependency to your pom.xml:
<dependency>
    <groupId>com.networknt</groupId>
    <artifactId>request-transformer</artifactId>
    <version>${version.light-4j}</version>
</dependency>
2. Register Interceptor
In your handler.yml, add the RequestTransformerInterceptor to the interceptors list and include it in the appropriate handler chains.
handlers:
  - com.networknt.reqtrans.RequestTransformerInterceptor@requestTransformer

chains:
  default:
    - ...
    - requestTransformer
    - ...
Transformation Rules
The interceptor passes a context map (objMap) to the rule engine. Your rules can inspect these values and return a result map to trigger specific modifications.
Rule Input Map (objMap)
auditInfo: Map of audit information (e.g., clientId, endpoint).requestHeaders: Map of current request headers.queryParameters: Map of current query parameters.pathParameters: Map of current path parameters.method: HTTP method (e.g., “POST”, “GET”).requestURL: The full request URL.requestURI: The request URI.requestPath: The request path.requestBody: The request body string (only ifrequiredContentis true).
Rule Output Result Map
To perform a transformation, your rule must return a map containing one or more of the following keys:
requestPath:String- Overwrites the exchange request path.requestURI:String- Overwrites the exchange request URI.queryString:String- Overwrites the exchange query string.requestHeaders:Map- Contains two sub-keys:remove:List<String>- List of header names to remove.update:Map<String, String>- Map of header names and values to add or update.
requestBody:String- Overwrites the request body buffer with the provided string.responseBody:String- Immediately returns this string as the response body, bypassing the rest of the chain.- Also supports
statusCode(Integer) andcontentType(String) in the result map.
- Also supports
validationError:Map- Short-circuits the request with a validation error.- Requires
errorMessage(String),contentType(String), andstatusCode(Integer).
- Requires
Example Transformation Logic
If a rule decides to update a header and the request path, the result map returned from the rule engine might look like this:
{
  "result": true,
  "requestPath": "/v2/new-endpoint",
  "requestHeaders": {
    "update": {
      "X-Transformation-Status": "transformed"
    },
    "remove": ["X-Old-Header"]
  }
}
Operational Visibility
The request-transformer module automatically registers itself with the ModuleRegistry during configuration loading. You can inspect its current status and configuration parameters at runtime via the Server Info endpoint.
Response Transformer Interceptor
The response-transformer is a powerful middleware interceptor that allows for dynamic modification of outgoing responses using the light-4j rule engine. It provides a highly flexible way to manipulate response headers and the response body based on custom business logic defined in rules.
Features
- Dynamic Transformation: Modify response elements at runtime without changing application code.
- Rule-Based: Leverage the
light-4jrule engine to define complex transformation logic. - Path-Based Activation: Target specific request paths using the
appliedPathPrefixesconfiguration. - Header Manipulation: Add, update, or remove response headers.
- Body Transformation: Overwrite the response body (supports JSON, XML, and other text-based formats).
- Encoding Support: Configurable body encoding per path prefix for legacy API compatibility.
- Auto-Registration: Automatically registers with the
ModuleRegistryduring configuration loading for administrative visibility.
Configuration (response-transformer.yml)
The interceptor is configured via response-transformer.yml.
# Response Transformer Configuration
---
# Indicate if this interceptor is enabled or not. Default is true.
enabled: ${response-transformer.enabled:true}

# Indicate if the transform interceptor needs to change the response body. Default is true.
requiredContent: ${response-transformer.requiredContent:true}

# Default body encoding for the response body. Default is UTF-8.
defaultBodyEncoding: ${response-transformer.defaultBodyEncoding:UTF-8}

# A list of applied request path prefixes. Only requests matching these prefixes will be processed.
appliedPathPrefixes: ${response-transformer.appliedPathPrefixes:}

# For certain path prefixes that are not using the defaultBodyEncoding UTF-8, you can define the customized
# encoding like ISO-8859-1 for the path prefixes here.
# pathPrefixEncoding:
#   /v1/pets: ISO-8859-1
#   /v1/party/info: ISO-8859-1
Setup
1. Add Dependency
Include the following dependency in your pom.xml:
<dependency>
    <groupId>com.networknt</groupId>
    <artifactId>response-transformer</artifactId>
    <version>${version.light-4j}</version>
</dependency>
2. Register Interceptor
In your handler.yml, add the ResponseTransformerInterceptor to the interceptors list and include it in the appropriate handler chains.
handlers:
- com.networknt.restrans.ResponseTransformerInterceptor@responseTransformer
chains:
default:
- ...
- responseTransformer
- ...
Transformation Rules
The interceptor passes a context map (objMap) to the rule engine. Your rules can inspect these values and return a result map to trigger specific modifications.
Rule Input Map (objMap)
auditInfo: Map of audit information (e.g., clientId, endpoint).requestHeaders: Map of current request headers.responseHeaders: Map of current response headers.queryParameters: Map of current query parameters.pathParameters: Map of current path parameters.method: HTTP method (e.g., “POST”, “GET”).requestURL: The full request URL.requestURI: The request URI.requestPath: The request path.requestBody: The request body (if available in the exchange attachment).responseBody: The original response body string (only ifrequiredContentis true).statusCode: The HTTP status code of the response.
Rule Output Result Map
To perform a transformation, your rule must return a map containing one or more of the following keys:
responseHeaders:Map- Contains two sub-keys:remove:List<String>- List of header names to remove.update:Map<String, String>- Map of header names and values to add or update.
responseBody:String- Overwrites the response body buffer with the provided string.
Example Transformation Logic
If a rule decides to update a header and the response body, the result map returned from the rule engine might look like this:
{
"result": true,
"responseHeaders": {
"update": {
"X-Transformation-Version": "2.0"
},
"remove": ["Server"]
},
"responseBody": "{\"status\":\"success\", \"data\": \"transformed content\"}"
}
Operational Visibility
The response-transformer module automatically registers itself with the ModuleRegistry. This allows administrators to inspect the active configuration and status of the interceptor at runtime via the Server Info endpoint.
Admin Endpoint
Cache Explorer
The CacheExplorerHandler is an admin endpoint that allows developers and operators to inspect the contents of the application’s internal caches. It is particularly useful for debugging and verifying that data (such as JWKs, ensuring config reloading, etc.) is correctly cached.
Overview
- Type: Admin Handler
- Class:
com.networknt.cache.CacheExplorerHandler - Source:
light-4j/cache-explorer
Usage
The handler operates by retrieving a specific cache by name via the CacheManager singleton.
Endpoint
The endpoint is typically accessible via the admin port (default 8473) if configured using the admin-endpoint module.
Method: GET
Path: /adm/cache (or as configured in handler.yml)
Parameters
| Parameter | Type | Required | Description |
|---|---|---|---|
name | Query | Yes | The name of the cache to inspect (e.g., jwk, jwt, myCache). |
Examples
Inspect JWK Cache
The jwk cache has special handling to format the output as a simple JSON map of strings.
Request:
GET /adm/cache?name=jwk
Response:
{
"key1": "value1",
"key2": "value2"
}
Inspect Generic Cache
For other caches, it returns the JSON representation of the cache’s key-value pairs.
Request:
GET /adm/cache?name=myCache
Response:
{
"user123": {
"name": "John",
"role": "admin"
}
}
Configuration
This module does not have a specific configuration file (e.g., cache-explorer.yml). It relies on the CacheManager being available and populated.
To use it, you must register the handler in handler.yml and add it to the admin chain (or another chain).
handler.yml Registration
handler.handlers:
# ... other handlers ...
- com.networknt.cache.CacheExplorerHandler@cache_explorer
handler.chains.default:
# ...
- cache_explorer
Note: In most standard light-4j templates, if you are using the unified admin-endpoint, this handler might not be wired by default and needs explicit registration if you want it exposed on the main port, or it might be auto-wired in the admin chain if the dependency is present (depending on the chassis version).
Config Reload
The config-reload module provides admin endpoints to reload configuration files for specific modules or plugins at runtime without restarting the server. This is particularly useful in shared environments like a gateway where restarting would impact multiple services, or for dynamic updates to policies and rules.
Endpoints
The module typically exposes two operations on the same path (e.g., /adm/modules).
Get Registered Modules
- Path:
/adm/modules - Method:
GET - Description: Returns a list of all registered modules and plugins capable of being reloaded.
- Response: A JSON array of class names (Strings).
Trigger Config Reload
- Path:
/adm/modules - Method:
POST - Description: Triggers a config reload for the specified list of modules or plugins.
- Request Body: A JSON array of class names (Strings) to reload. If the list is empty or contains “ALL”, it attempts to reload all registered modules.
- Response: A JSON array of the class names that were successfully reloaded.
Configuration
Module Configuration (configreload.yml)
The module itself is configured via configReload.yml (or configReload.yaml/json).
| Property | Description | Default |
|---|---|---|
enabled | Enable or disable the config reload endpoints. | true |
Handler Configuration (handler.yml)
To expose the endpoints, you need to configure them in your handler.yml.
paths:
- path: '/adm/modules'
method: 'get'
exec:
- admin
- modules
- path: '/adm/modules'
method: 'post'
exec:
- admin
- configReload
And in values.yml (if using aliases):
handler.handlers:
- com.networknt.config.reload.handler.ModuleRegistryGetHandler@modules
- com.networknt.config.reload.handler.ConfigReloadHandler@configReload
Security
These are sensitive admin endpoints. They should be protected by OAuth 2.0 (requiring a specific scope like admin or ${serviceId}/admin) or restricted by IP whitelist in a sidecar/gateway deployment.
Dependency
Add the following dependency to your pom.xml:
<dependency>
<groupId>com.networknt</groupId>
<artifactId>config-reload</artifactId>
<version>${version.light-4j}</version>
</dependency>
Usage Examples
List Modules
curl -k https://localhost:8443/adm/modules
Response:
[
"com.networknt.limit.LimitHandler",
"com.networknt.audit.AuditHandler",
"com.networknt.router.middleware.PathPrefixServiceHandler",
...
]
Reload Config
Reload configuration for the Limit Handler and Path Prefix Handler.
curl -k -X POST https://localhost:8443/adm/modules \
-H 'Content-Type: application/json' \
-d '[
"com.networknt.limit.LimitHandler",
"com.networknt.router.middleware.PathPrefixServiceHandler"
]'
Response:
[
"com.networknt.limit.LimitHandler",
"com.networknt.router.middleware.PathPrefixServiceHandler"
]
Health Check Handler
The Health Check Handler (HealthGetHandler) manages the server’s health endpoint. It is critical for load balancers (like F5, AWS ALB), container orchestrators (Kubernetes Liveness/Readiness probes), and the Light Control Plane to verify that the service is running and capable of handling requests.
Introduction
A running process does not always mean a functioning service. The HealthGetHandler provides a lightweight endpoint to confirm application status. It can return a simple “OK” string or a JSON object, and optionally verify downstream dependencies before reporting healthy.
Configuration
The handler is configured via health.yml.
| Config Field | Description | Default |
|---|---|---|
enabled | Enable or disable the health check. | true |
useJson | If true, returns {"result": "OK"}. If false, returns plain OK. | false |
timeout | Timeout in milliseconds for the check (important when checking downstream). | 2000 |
downstreamEnabled | If true, verify a downstream service before returning OK. | false |
downstreamHost | URL of the downstream service (e.g., http://localhost:8081 for a sidecar). | http://localhost:8081 |
downstreamPath | Path of the downstream health check. | /health |
health.yml Example
enabled: true
useJson: true
timeout: 500
# For services needing to verify a sidecar (e.g. light-proxy, kafka-sidecar)
downstreamEnabled: false
downstreamHost: http://localhost:8081
downstreamPath: /health
Usage
To use the health handler, register it in your handler.yml and map it to a path (typically /health).
handler.yml Configuration
-
Register the Handler:
handlers: - com.networknt.health.HealthGetHandler@health -
Define the Path:
paths: - path: '/health' method: 'get' exec: - health # Secure endpoint for Control Plane (optional) - path: '/adm/health/${server.serviceId}' method: 'get' exec: - security - health
Scenarios
- Kubernetes Probes: Configure
livenessProbeandreadinessProbein yourdeployment.yamlto hit/health. - Load Balancers: Configure the health monitor to check
/healthand expect “OK” (or JSON if configured). - Control Plane: The Control Plane uses a secure path (e.g.,
/adm/health/...) with service discovery to monitor specific instances.
Downstream Check
If your service relies heavily on a sidecar (like http-sidecar or kafka-sidecar) or a specific downstream API, you can enable downstreamEnabled.
- The handler will make a request to
downstreamHost+downstreamPath. - If the downstream call fails or times out, the health check returns an error, preventing traffic from being routed to this broken instance.
Note: For complex dependency checking (Database, Redis, etc.), it is recommended to extend this handler or implement a custom HealthCheck interface if using a specific framework, though HealthGetHandler is the standard entry point for Light-4j.
Server Info
Introduction
The ServerInfoGetHandler is a middleware component in the light-4j framework that provides a comprehensive overview of the server’s runtime state. This includes:
- Environment Info: Host IP, hostname, DNS, and runtime metrics (processors, memory).
- System Properties: Java version, OS details, timezone.
- Component Configuration: Configuration details for all registered modules.
- Specification: The API specification (OpenAPI, etc.) if applicable.
This handler is crucial for monitoring, debugging, and integration with the light-controller and light-portal for runtime dashboards.
Configuration
The handler is configured via info.yml.
# Server info endpoint that can output environment and component along with configuration
# Indicate if the server info is enabled or not.
enableServerInfo: ${info.enableServerInfo:true}
# String list keys that should not be sorted in the normalized info output.
keysToNotSort: ${info.keysToNotSort:["admin", "default", "defaultHandlers", "request", "response"]}
# Downstream configuration (for gateways/sidecars)
# Indicate if the server info needs to invoke downstream APIs.
downstreamEnabled: ${info.downstreamEnabled:false}
# Downstream API host.
downstreamHost: ${info.downstreamHost:http://localhost:8081}
# Downstream API server info path.
downstreamPath: ${info.downstreamPath:/adm/server/info}
If enableServerInfo is false, the endpoint will return an error ERR10013 - SERVER_INFO_DISABLED.
Handler Registration
Unlike most middleware handlers, ServerInfoGetHandler is typically configured as a normal handler in handler.yml but mapped to a specific path like /server/info.
handlers:
- com.networknt.info.ServerInfoGetHandler@info
paths:
- path: '/server/info'
method: 'get'
exec:
- security
- info
Security Note: The /server/info endpoint exposes sensitive configuration and system details. It must be protected by security handlers. In a typical light-4j deployment, this endpoint is secured requiring a special bootstrap token (e.g., from light-controller).
Module Registration
Modules in light-4j can register themselves to be included in the server info output. This allows the info endpoint to display configuration for custom or contributed modules.
To register a module:
import com.networknt.utility.ModuleRegistry;
import com.networknt.config.Config;
// Registering a module
ModuleRegistry.registerModule(
MyHandler.class.getName(),
Config.getInstance().getJsonMapConfigNoCache(MyHandler.CONFIG_NAME),
null
);
Masking Sensitive Data
Configuration files often contain sensitive data (passwords, secrets). When registering a module, you can provide a list of keys to mask in the output.
List<String> masks = new ArrayList<>();
masks.add("trustPass");
masks.add("keyPass");
masks.add("clientSecret");
ModuleRegistry.registerModule(
Client.class.getName(),
Config.getInstance().getJsonMapConfigNoCache(clientConfigName),
masks
);
Downstream Info Aggregation
For components like light-gateway, http-sidecar, or light-proxy, the server info endpoint can be configured to aggregate information from a downstream service.
downstreamEnabled: When set to true, the handler will attempt to fetch server info from the configured downstream service.downstreamHost: The base URL of the downstream service.downstreamPath: The path to the server info endpoint on the downstream service.
If the downstream service does not implement the info endpoint, the handler usually fails gracefully or returns its own info depending on the implementation specifics (e.g., in light-proxy scenarios).
Sample Output
The output is a JSON object structured as follows:
{
"environment": {
"host": {
"ip": "10.0.0.5",
"hostname": "service-pod-1",
"dns": "localhost"
},
"runtime": {
"availableProcessors": 4,
"freeMemory": 12345678,
"totalMemory": 23456789,
"maxMemory": 1234567890
},
"system": {
"javaVendor": "Oracle Corporation",
"javaVersion": "17.0.1",
"osName": "Linux",
"osVersion": "5.4.0",
"userTimezone": "UTC"
}
},
"specification": { ... },
"component": {
"com.networknt.info.ServerInfoConfig": {
"enableServerInfo": true,
"downstreamEnabled": false,
...
},
... other modules ...
}
}
Logger Handler
The logger-handler module provides a suite of administrative endpoints to manage logger levels and retrieve log contents at runtime. This allows developers and operators to troubleshoot issues in a running system by adjusting verbosity or inspecting logs without requiring a restart.
Note: These administrative features are powerful. In production environments, they must be protected by security handlers (e.g., OAuth 2.0 JWT verification with specific scopes) to prevent unauthorized access. It is highly recommended to use the Light Controller or Light Portal for centralized management.
Features
- Runtime Level Adjustment: Change logging levels for existing loggers or create new ones for specific packages/classes.
- Log Content Inspection: Retrieve log entries directly from service instances for UI display or analysis.
- Pass-Through Support: In gateway or sidecar deployments, these handlers can pass requests through to backend services (even if they use different frameworks like Spring Boot).
- Auto-Registration: The module automatically registers its configuration with the
ModuleRegistryfor visibility.
Configuration (logging.yml)
The behavior of the logging handlers is controlled via logging.yml.
# Logging endpoint configuration
---
# Indicate if the logging info is enabled or not.
enabled: ${logging.enabled:true}
# Default time period backward in milliseconds for log content retrieval.
# Default is 10 minutes (600,000 ms).
logStart: ${logging.logStart:600000}
# Downstream configuration (useful in sidecar/gateway scenarios)
downstreamEnabled: ${logging.downstreamEnabled:false}
# Downstream API host (e.g., the backend service IP)
downstreamHost: ${logging.downstreamHost:http://localhost:8081}
# Framework of the downstream service (Light4j, SpringBoot, etc.)
downstreamFramework: ${logging.downstreamFramework:Light4j}
Set Up
To enable the logging endpoints, add the following to your handler.yml:
handlers:
- com.networknt.logging.handler.LoggerGetHandler@getLogger
- com.networknt.logging.handler.LoggerPostHandler@postLogger
- com.networknt.logging.handler.LoggerGetNameHandler@getLoggerName
- com.networknt.logging.handler.LoggerGetLogContentsHandler@getLogContents
paths:
- path: '/adm/logger'
method: 'GET'
exec:
- admin # Security handler
- getLogger
- path: '/adm/logger'
method: 'POST'
exec:
- admin
- postLogger
- path: '/adm/logger/{loggerName}'
method: 'GET'
exec:
- getLoggerName
- path: '/adm/logger/content'
method: 'GET'
exec:
- admin
- getLogContents
Usage
1. Get Logger Levels
Retrieves all configured loggers and their current levels.
Endpoint: GET /adm/logger
curl -k https://localhost:8443/adm/logger
Example Response:
[
{"name": "ROOT", "level": "ERROR"},
{"name": "com.networknt", "level": "TRACE"}
]
2. Update Logger Levels
Changes the logging level for specific loggers.
Endpoint: POST /adm/logger
curl -k -H "Content-Type: application/json" -X POST \
-d '[{"name": "com.networknt.handler", "level": "DEBUG"}]' \
https://localhost:8443/adm/logger
3. Get Log Contents
Retrieves actual log messages from the application’s file appenders.
Endpoint: GET /adm/logger/content
Query Parameters:
loggerName: Filter by logger name.loggerLevel: Filter by minimal level (e.g.,TRACE).startTime/endTime: Epoch milliseconds.limit/offset: Pagination controls (default 100/0).
curl -k 'https://localhost:8443/adm/logger/content?loggerLevel=DEBUG&limit=10'
Pass-Through (Sidecars/Gateways)
When using http-sidecar or light-gateway, you can target the backend service’s loggers by adding the X-Adm-PassThrough: true header to your request.
- If the backend is Light4j, the request is passed as-is.
- If the backend is SpringBoot, the sidecar transforms the request to target Spring Boot Actuator endpoints (e.g.,
/actuator/loggers).
Example for Spring Boot Backend:
logging.downstreamEnabled: true
logging.downstreamHost: http://localhost:8080
logging.downstreamFramework: SpringBoot
curl -H "X-Adm-PassThrough: true" https://localhost:9445/adm/logger
Dependency
Add the following to your pom.xml:
<dependency>
<groupId>com.networknt</groupId>
<artifactId>logger-handler</artifactId>
<version>${version.light-4j}</version>
</dependency>
Utility
LDAP Utility
The ldap-util is a utility module in the light-4j framework that provides a helper class LdapUtil to interact with LDAP servers for authentication and authorization. It simplifies common tasks such as binding (verifying credentials) and searching for user attributes (like memberOf for group-based authorization).
Features
- Authentication: Authenticates users against an LDAP server using simple binding.
- Authorization: Retrieves user attributes (specifically
memberOf) from the LDAP server to support group-based access control. - Secure Connection: Supports both standard LDAP and LDAPS (LDAP over SSL) using a custom socket factory.
- Configuration Driven: Behavior is controlled via externalized configuration (
ldap.yml).
Configuration
The ldap-util module uses a configuration file named ldap.yml.
Configuration Options
The following properties can be defined in ldap.yml:
uri: The LDAP server URI (e.g.,ldap://localhost:389orldaps://localhost:636).domain: The LDAP domain name.principal: The user principal (DN or username) used for binding to perform searches.credential: The password for the binding principal.searchFilter: The search filter used to find user entries (e.g.,(&(objectClass=user)(sAMAccountName={0}))). The{0}placeholder is replaced by the username during runtime.searchBase: The base DN (Distinguished Name) where searches will start.
Example ldap.yml
# LDAP server connection and search settings.
---
# The LDAP server uri.
uri: ${ldap.uri:ldap://localhost:389}
# The LDAP domain name.
domain: ${ldap.domain:}
# The user principal for binding (authentication).
principal: ${ldap.principal:cn=admin,dc=example,dc=org}
# The user credential (password) for binding.
credential: ${ldap.credential:admin}
# The search filter (e.g., (&(objectClass=user)(sAMAccountName={0}))).
searchFilter: ${ldap.searchFilter:(&(objectClass=person)(uid={0}))}
# The search base DN (Distinguished Name).
searchBase: ${ldap.searchBase:dc=example,dc=org}
Usage
The primary interface is the com.networknt.ldap.LdapUtil class.
Authentication
To verify a user’s password:
boolean isAuthenticated = LdapUtil.authenticate("username", "password");
This method first searches for the user’s DN using the configured principal, and then attempts to bind with the found DN and the provided password.
Authorization
To retrieve a user’s groups (memberOf attribute):
Set<String> groups = LdapUtil.authorize("username");
This method uses the configured principal to search for the user and extracts all values from the memberOf attribute.
Integration
The ldap-util is used by other modules in the light platform that require LDAP integration, such as the ldap-security handler for protecting endpoints with LDAP credentials.
Whenever LdapConfig.load() is called, the module automatically registers itself with the ModuleRegistry so that its configuration can be viewed via the Server Info endpoint.
Module
Load Balance
The light-4j platform encourages client-side discovery to avoid proxies in front of multiple service instances. This architecture reduces network hops and latency. The client-side load balancer is responsible for selecting a single available service instance from a list of discovered URLs for a downstream request.
LoadBalance Interface
All load balancing strategies enforce the LoadBalance interface.
public interface LoadBalance {
/**
* Select one url from a list of url with requestKey as optional.
*
* @param urls List of available URLs
* @param serviceId Service ID
* @param tag Service tag (optional)
* @param requestKey Optional key for hashing (e.g., userId, clientId)
* @return Selected URL
*/
URL select(List<URL> urls, String serviceId, String tag, String requestKey);
default int getPositive(int originValue){
return 0x7fffffff & originValue;
}
}
Strategies
Round Robin
The RoundRobinLoadBalance strategy picks a URL from the list sequentially. It distributes the load equally across all available instances.
- Assumption: All service instances have similar resource configurations and capabilities.
- Mechanism: Uses an internal
AtomicIntegerindex per service to cycle through the list. - Parameters: The
requestKeyis ignored.
Local First
The LocalFirstLoadBalance strategy prioritizes service instances running on the same host (same IP address) to minimize network latency.
- Mechanism:
- It identifies the local IP address.
- It filters the list of available URLs for those matching the local IP.
- If local instances are found, it performs Round Robin among them.
- If no local instances are found, it falls back to Round Robin across all available URLs.
- Use Case: Ideal for deployments where multiple services run on the same physical or virtual machine (e.g., standalone Java processes,
light-hybrid-4jservices).
Consistent Hash
The ConsistentHashLoadBalance strategy ensures that requests with the same requestKey (e.g., client_id, user_id) are routed to the same service instance. This is useful for caching or stateful services (Data Sharding / Z-Axis Scaling).
- Mechanism: Uses the hash code of the
requestKeyto select a specific instance. - Current Status: Basic implementation using modulo hashing. A more advanced consistent hashing ring implementation is planned.
Configuration
The load balancer implementation is typically configured as a singleton in service.yml. Only one implementation should be active per client instance during runtime.
Example: Round Robin Configuration
In service.yml:
singletons:
- com.networknt.balance.LoadBalance:
- com.networknt.balance.RoundRobinLoadBalance
Example: Local First Configuration
In service.yml:
singletons:
- com.networknt.balance.LoadBalance:
- com.networknt.balance.LocalFirstLoadBalance
Usage
The load balancer is used internally by Cluster implementations or directly by clients (like light-consumer-4j) after service discovery returns a list of healthy nodes.
// Example usage pattern
List<URL> urls = registry.discover(serviceId, tag);
URL selectedUrl = loadBalance.select(urls, serviceId, tag, requestKey);
Cluster
The Cluster module acts as the orchestrator for client-side service discovery. It integrates the Service Registry (to find service instances) and Load Balance (to select the best instance) modules, providing a simple interface for clients to resolve a service ID to a concrete URL for invocation.
It maintains a local cache of discovered services to minimize calls to the underlying registry (Consul, ZooKeeper, or Direct) and handles notifications when service instances change.
Cluster Interface
The module’s core is the Cluster interface, which provides methods to resolve service addresses.
public interface Cluster {
// Resolve a serviceId to a single URL string (e.g., "https://192.168.1.10:8443")
String serviceToUrl(String protocol, String serviceId, String tag, String requestKey);
// Get a list of all available service instances as URIs
List<URI> services(String protocol, String serviceId, String tag);
}
Parameters
- protocol:
httporhttps. - serviceId: The unique identifier of the service (e.g.,
com.networknt.petstore-1.0.0). - tag: An optional environment tag (e.g.,
dev,prod). If used, discovery will be filtered by this tag. - requestKey: An optional key used for load balancing (e.g., for Consistent Hash). Can be null for policies like Round Robin.
Default Implementation: LightCluster
LightCluster is the default implementation provided by light-4j.
Workflow
- Check Cache: It first checks its internal in-memory cache (
serviceMap) for the list of URLs associated with theserviceIdandtag. - Discovery (if cache miss):
- It creates a “subscribe URL” representing the service.
- It subscribes to the
Registry(Direct, Consul, etc.) to receive updates (notifications) about this service. - It performs an initial discovery lookup to get the current list of instances.
- It populates the cache with the results.
- Load Balance:
- Once the list of URLs is retrieved (from cache or discovery),
LightClusterdelegates to theLoadBalancemodule. - The load balancer selects a single
URLbased on the configured strategy (Round Robin, Local First, etc.) and therequestKey.
- Once the list of URLs is retrieved (from cache or discovery),
- Return: The selected URL is returned as a string.
Caching and Updates
LightCluster registers a ClusterNotifyListener with the registry. When service instances change (e.g., a node goes down or a new one comes up), the registry notifies this listener, ensuring the serviceMap cache is updated in near real-time.
Configuration
The cluster module does not have its own configuration file (e.g., cluster.yml). Instead, it relies on dependency injection via service.yml to wire up the Cluster, Registry, and LoadBalance implementations.
configuring service.yml
To use LightCluster, ensure your service.yml typically looks like this (it may vary depending on your specific registry choice):
singletons:
# Registry configuration (e.g., DirectRegistry for local testing)
- com.networknt.registry.URL:
- com.networknt.registry.URLImpl:
protocol: https
host: localhost
port: 8080
path: direct
parameters:
com.networknt.petstore-1.0.0: https://localhost:8443,https://localhost:8444
- com.networknt.registry.Registry:
- com.networknt.registry.support.DirectRegistry
# Load Balancer configuration
- com.networknt.balance.LoadBalance:
- com.networknt.balance.RoundRobinLoadBalance
# Cluster configuration
- com.networknt.cluster.Cluster:
- com.networknt.cluster.LightCluster
In a production environment using Consul, the service.yml would specify ConsulRegistry instead.
Usage
You primarily use the Cluster instance via the Http2Client or Client methods that abstract this lookup, but you can also use it directly if needed.
Cluster cluster = SingletonServiceFactory.getBean(Cluster.class);
// Find a healthy instance for Petstore service
String url = cluster.serviceToUrl("https", "com.networknt.petstore-1.0.0", "dev", null);
if (url != null) {
// Make call to url
}
Switch
The Switch module (source package com.networknt.switcher) provides a mechanism to manage runtime feature flags or service availability switches. It allows parts of the system to turn logic on or off dynamically without restarting the server.
A common use case is during the server shutdown process: a “service available” switch can be turned off to stop accepting new requests while allowing existing requests to complete.
Components
- Switcher: A simple entity class representing a named switch with a boolean state (
onoroff). - SwitcherService: An interface defining operations to manage switchers (init, get, set, listener).
- LocalSwitcherService: The default in-memory implementation of
SwitcherService. - SwitcherUtil: A static utility class that provides global access to the
SwitcherService.
Usage
The module is primarily used via the SwitcherUtil class.
Initializing a Switcher
You can initialize a switcher with a name and a default state.
import com.networknt.switcher.SwitcherUtil;
// Initialize a switcher named "maintenanceMode" to false (off)
SwitcherUtil.initSwitcher("maintenanceMode", false);
Checking Switch State
Check if a switch is currently enabling.
if (SwitcherUtil.isOpen("maintenanceMode")) {
// Logic when maintenance mode is ON
} else {
// Normal operation logic
}
You can also check with a default value if the switcher might not have been initialized yet.
// Returns true if "newFeature" is open, otherwise returns the default (false)
boolean isFeatureEnabled = SwitcherUtil.switcherIsOpenWithDefault("newFeature", false);
Setting Switch State
Change the state of a switch programmatically.
// Turn on maintenance mode
SwitcherUtil.setSwitcherValue("maintenanceMode", true);
Listeners
You can register a SwitcherListener to be notified when a switcher’s value changes.
SwitcherUtil.registerSwitcherListener("maintenanceMode", new SwitcherListener() {
@Override
public void onSwitcherChanged(String key, boolean value) {
System.out.println("Switcher " + key + " changed to " + value);
}
});
Example: Graceful Shutdown
In the light-4j server shutdown hook, the framework might use a switcher to signal that the server is shutting down.
- Server startup:
SwitcherUtil.initSwitcher(Constants.SERVER_STATUS_SWITCHER, true); - Request Handler: Checks
SwitcherUtil.isOpen(Constants.SERVER_STATUS_SWITCHER). If false, returns 503 Service Unavailable. - Shutdown Hook:
SwitcherUtil.setSwitcherValue(Constants.SERVER_STATUS_SWITCHER, false);
This allows the registry to be notified and the load balancer to stop sending traffic, while the server wraps up in-flight requests.
Consul Registry
The consul module integrates with HashiCorp Consul to provide service registry and discovery for the light-4j framework. It allows services to automatically register themselves upon startup and discovering other services using client-side load balancing.
Overview
- Registry: When a service starts, it registers itself with the Consul agent. It deregisters on graceful shutdown.
- Discovery: Clients using
ClusterandLoadBalancemodules can discover available service instances. TheConsulRegistryimplementation uses blocking queries (long polling) to receive real-time updates from Consul about service health and availability. - Health Checks: Supports TCP, HTTP, and TTL health checks to ensure only healthy instances are returned to clients.
Configuration
The module requires configuration in multiple files.
1. service.yml
You must configure the Registry singleton to use ConsulRegistry.
singletons:
- com.networknt.registry.URL:
- com.networknt.registry.URLImpl:
protocol: light
host: localhost
port: 8080
path: consul
parameters:
registryRetryPeriod: '30000'
- com.networknt.consul.client.ConsulClient:
- com.networknt.consul.client.ConsulClientImpl
- com.networknt.registry.Registry:
- com.networknt.consul.ConsulRegistry
2. consul.yml
This file controls the connection to Consul and the health check behavior.
| Property | Description | Default |
|---|---|---|
consulUrl | URL of the Consul agent. | http://localhost:8500 |
consulToken | Access token for Consul ACL. | the_one_ring |
checkInterval | Interval for health checks (e.g., 10s). | 10s |
deregisterAfter | Time to wait after a failure before deregistering. | 2m |
tcpCheck | Enable TCP ping health check. | false |
httpCheck | Enable HTTP endpoint health check. | false |
ttlCheck | Enable active TTL heartbeat. | true |
wait | Long polling wait time (max 10m). | 600s |
Health Check Options:
- TCP: Consul pings the service IP/Port. Simple, but less reliable in containerized environments.
- HTTP: Consul calls
/health/{serviceId}. Recommended for most services as it proves the application is responsive. - TTL: The service actively sends heartbeats to Consul. Useful if the service is behind a NAT or cannot be reached by Consul.
3. server.yml
The service must be configured to enable the registry and usually dynamic ports (especially for Kubernetes).
serviceId: com.networknt.petstore-1.0.0
enableRegistry: true
dynamicPort: true
minPort: 2400
maxPort: 2500
4. secret.yml
For security, the Consul token should be managed in secret.yml.
consulToken: your-secure-jwt-or-uuid-token
Deployment
When deploying to Kubernetes:
- Host Network: Services should use
hostNetwork: trueso they register with the Node’s IP address. - Downward API: Pass the host IP to the container so the service knows what IP to register.
spec:
hostNetwork: true
containers:
- env:
- name: STATUS_HOST_IP
valueFrom:
fieldRef:
fieldPath: status.hostIP
Blocking Queries
ConsulRegistry uses Consul’s blocking query feature. Instead of polling every X seconds, it opens a connection that Consul holds open for up to wait time (default 10 minutes). If the service catalog changes (new instance, health failure), Consul returns the result immediately. This provides near-real-time updates with minimal overhead.
Usage
You rarely interact with ConsulRegistry directly. Instead, you use the Cluster or Http2Client which uses the registry behind the scenes.
// The cluster lookups will automatically use ConsulRegistry to find instances
Cluster cluster = SingletonServiceFactory.getBean(Cluster.class);
String url = cluster.serviceToUrl("https", "com.networknt.petstore-1.0.0", "dev", null);
Common Module
The common module provides shared utilities, constants, and enumerations that are used across both the client and server components of the Light-4j framework.
Components
ContentType
ContentType is an enumeration that defines standard HTTP Content-Type header values. It simplifies code maintenance by replacing hardcoded strings with strongly typed constants.
Supported Types:
application/jsontext/xmlapplication/xmlapplication/yamlapplication/x-www-form-urlencodedmultipart/form-data- … and more.
It also includes a helper method toContentType(String value) to convert a string header value into the corresponding enum constant.
SecretConstants
This class defines standard keys for sensitive values found in secret.yml or other configuration files. These constants ensure consistency when accessing secrets across different modules.
Common Constants:
- Certificates:
serverKeystorePass,serverTruststorePass,clientKeystorePass, etc. - OAuth2:
authorizationCodeClientSecret,clientCredentialsClientSecret, etc. - Infrastructure:
consulToken,emailPassword.
DecryptUtil
DecryptUtil is a critical utility for handling encrypted sensitive values within configuration files (like secret.yml). It enables the “Encrypt-Once, Deploy-Everywhere” pattern where secrets are stored in version control in an encrypted format and decrypted only at runtime.
How it works
- Iterative Decryption: The
decryptMapmethod recursively iterates through a configuration map (nested maps and lists). - Detection: It identifies values that start with the
CRYPTprefix. - Decryption: When an encrypted value is found, it uses the configured
Decryptorimplementation to decrypt it.
Usage
The framework typically handles this automatically when loading secret.yml. However, if you are loading custom configuration files with encrypted values, you can use it directly:
Map<String, Object> myConfig = Config.getInstance().getJsonMapConfig("my-config");
if(myConfig != null) {
// recursively decrypt all values in the map
DecryptUtil.decryptMap(myConfig);
}
Decryptor Configuration
DecryptUtil relies on a Decryptor implementation being registered in service.yml. The default implementation typically uses AES encryption.
For example, in service.yml:
singletons:
- com.networknt.decrypt.Decryptor:
- com.networknt.decrypt.AESDecryptor
For more details on generating keys and encrypting values, refer to the Decryptor Module.
Config
The Config module is the backbone of the light-4j framework, handling the loading and management of configuration files for all modules and the application itself. It follows a “configuration over code” philosophy and supports externalized configuration for containerized deployments.
Singleton and Instance
The Config class is a singleton. It caches loaded configurations to ensure high performance.
// Get the singleton instance
Config config = Config.getInstance();
Formats and Priority
Supported formats are yml, yaml, and json.
The loading priority for a given configuration name (e.g., server) is:
server.ymlserver.yamlserver.json
YAML is highly recommended due to its readability and support for comments.
Loading Sequence
The Config module loads configuration files in a specific order, allowing for hierarchical overrides. This is critical for managing configurations across different environments (Dev, Test, Prod) without rebuilding the application.
- Externalized Directory: Specified by the system property
-Dlight-4j-config-dir=/config. This is the highest priority and is typically used in Docker/Kubernetes to map a volume containing environment-specific configs. - Application Resources: Files found in
src/main/resources/configof your application. - Module Resources: Default configuration files packaged within the jar of each module (e.g.,
light-4jcore modules).
Usage
Loading as Map
Useful for dynamic configurations.
Map<String, Object> serverConfig = Config.getInstance().getJsonMapConfig("server");
int port = (int) serverConfig.get("httpsPort");
Loading as Object (POJO)
Encouraged for type safety. The POJO must map to the JSON/YAML structure.
ServerConfig serverConfig = (ServerConfig) Config.getInstance().getJsonObjectConfig("server", ServerConfig.class);
Loading Strings or Streams
For loading raw files like certificates or text files.
String certContent = Config.getInstance().getStringFromFile("primary.crt");
InputStream is = Config.getInstance().getInputStreamFromFile("primary.crt");
Configuration Injection
Starting from 1.5.26, you can inject values into your yml files using the syntax ${VAR:default}. The values are resolved from:
- values.yml: A global values file in the config path.
- Environment Variables: System environment variables.
Syntax
${VAR}: value of VAR. Throws exception if missing.${VAR:default}: value of VAR. Usesdefaultif missing.${VAR:?error}: value of VAR. Throws custom error message if missing.${VAR:$}: Escapes the injection (keeps${VAR}).
Example
server.yml:
serviceId: ${SERVER_SERVICEID:com.networknt.petstore-1.0.0}
values.yml:
SERVER_SERVICEID: com.networknt.petstore-2.0.0
Injecting Environment Variables into values.yml
You can also inject environment variables directly into values.yml. This allows for a two-stage injection where environment variables populate values.yml, and values.yml populates other configuration files. This is particularly useful when using secret management tools (like HashiCorp Vault) that populate environment variables, allowing you to manage sensitive data without committing it to the code repository.
values.yml:
router.hostWhitelist:
- 192.168.0.*
- localhost
- ${DOCKER_HOST_IP}
If the environment variable DOCKER_HOST_IP is set to 192.168.5.10, the final loaded configuration for router.hostWhitelist will include 192.168.5.10.
Benefits:
- Security: Sensitive information (IPs, credentials) remains in environment variables/secrets engine.
- Flexibility: You can use the same
values.ymlstructure across environments, populated by environment-specific variables.
Handling Secrets
Release 1.6.0+ supports transparent decryption of sensitive values.
Setup
In your config.yml (or service.yml in newer versions):
decryptorClass: com.networknt.decrypt.AESDecryptor
Decryptors
- AESDecryptor: Uses default password
light. - AutoAESDecryptor: Reads password from environment variable
light-4j-config-password. - ManualAESDecryptor: Prompts for password in the console/terminal at startup.
If a value in your config file starts with CRYPT: (e.g., CRYPT:adfasdfadf...), the Config module will automatically attempts to decrypt it when loading.
Best Practices
- Externalize Environments: Use
-Dlight-4j-config-diror mapped volumes in Kubernetes for strictly environment-specific configs (like DB connections, secrets). - App Level Configs: Put common configurations that differ from defaults in
src/main/resources/config. - Values.yml: Use
values.ymlto centrally manage variables that are injected into multiple other config files. - Secrets: Never commit plain text passwords. Use the encryption feature or Kubernetes Secrets mapped to files in the config directory.
Service Startup and Configuration Injection
In the previous section, we introduced the config module of the light-4j platform and demonstrated how values.yml can be used to override default externalized configuration properties across all configuration files.
While using a local values.yml file is suitable for a standalone light-4j server, configuration can also be dynamically injected during startup via the light-config-server (part of the light-portal). To enable a light-4j service to leverage the light-config-server, specific bootstrap configuration files and environment variables must be configured.
Prerequisites
startup.yml
The startup.yml file is used to replace the default configuration loader with a customized implementation, such as one that fetches configuration from a remote server instead of the local filesystem.
Below is an example of a startup.yml file configured for an ai-gateway development environment. It specifies the DefaultConfigLoader, which attempts to load configuration from the light-portal and falls back to the local filesystem for cached versions.
# This is the config file to replace the default config loader to a customized one.
# For example, load the config files from the config server instead of filesystem.
# The following dummy entry is just to prevent the warning message during startup.
# dummy: dummyEntry
# For real config loader config, please follow the format below with your implementation.
# light-4j provides a DefaultConfigLoader that loads config files from the light-portal
# and fallback to local file systems for cached config files.
# The following is the config for the DefaultConfigLoader.
configLoaderClass: com.networknt.server.DefaultConfigLoader
# All variables below can be used to look up the config files for a particular service,
# but only the productId is required. If other variables are not provided, the default
# "current" value will be used from the config server.
host: dev.lightapi.net
serviceId: com.networknt.ai.gateway-1.0.0
envTag: DEV
# Indicate to the config server we prefer YAML format over JSON format. default is JSON.
acceptHeader: application/yaml
# The connect timeout for bootstrap from the config server. Default is 3 seconds.
timeout: 3000
Environment Variables
Several environment variables must be set before starting the service. These variables facilitate the bootstrap process, establish a connection to the configuration server, and manage the loading and caching of configuration files.
Standard Configuration
The following environment variables are typically required for a development instance:
LIGHT_PORTAL_AUTHORIZATION=Bearer eyJraWQiOiJBWnAwMk1DdWNydVpmRkpieXlGd3VnIiwiYWxnIjoiUlMyNTYifQ.eyJpc3MiOiJ1cm46Y29tOm5ldHdvcmtudDpvYXV0aDI6djEiLCJhdWQiOiJ1cm46Y29tLm5ldHdvcmtudCIsImV4cCI6MjA4ODEwODIyNywianRpIjoiUlc4X1g5UHNmTUIxcmpIeUZ5Z0JKUSIsImlhdCI6MTc3Mjc0ODIyNywibmJmIjoxNzcyNzQ4MTA3LCJ2ZXIiOiIxLjAiLCJjaWQiOiIwMTljOTI3My0yNjYzLTdhOWUtODJmNC05NGY5ZjVmNzljM2EiLCJzY3AiOlsicG9ydGFsLnciLCJwb3J0YWwuciJdLCJyb2xlcyI6ImFHOXpkQzFoWkcxcGJpQjFjMlZ5IiwidXNlcklkIjoiMDE5NjRiMDUtNTUzMi03Yzc5LThjZGUtMTkxZGNiZDQyMWI4IiwiaG9zdCI6IjAxOTY0YjA1LTU1MmEtN2M0Yi05MTg0LTY4NTdlN2YzZGM1ZiIsImVtYWlsIjoic3RldmUuaHVAc3VubGlmZS5jb20iLCJlaWQiOiJzaDM1In0.uM7iTEHnOZKVtZk6evtar-IGhoh615er9UjQ0ozHfyLlYEBsUZK8KIk4h4R4gwgPX_ldbNBLcGT7bn2pd6JOwlfBM_VDtRZbtVjHRefaK1uYHOdRg9Ckn8xTFdYa9HCQkge7cRlgvx-HsHZn3404BeKa1YjBiJKCGRVHe7QXkKT5Mhsgma3MpQtQFnCVdswrJL1QHP2M0mjwgEH6Y1FnuBPey5IZYXkl_I4ecN2D4XM5I15sv7bvGVGLpdczJJP_YP9L-wFE_lGomst6_2FHQvF-VSry2eDtFS0o_lvW2MKrBB2roeqwZTRf5H9RiHSLVNjb4vvbQTvVfWEG3y7zGQ;CONFIG_SERVER_CLIENT_TRUSTSTORE_LOCATION=/home/steve/workspace/light-gateway/config/ai-gateway/config/bootstrap.truststore;CONFIG_SERVER_CLIENT_TRUSTSTORE_PASSWORD=password;CONFIG_SERVER_CLIENT_VERIFY_HOST_NAME=false;LIGHT_ENV=DEV
Containerized Environments (Docker)
When running within a Docker container, the following variables should be exported to the container environment:
export CONFIG_SERVER_CLIENT_TRUSTSTORE_LOCATION=/config/bootstrap.truststore
export CONFIG_SERVER_CLIENT_TRUSTSTORE_PASSWORD=password
export CONFIG_SERVER_CLIENT_VERIFY_HOST_NAME=false
export LIGHT_PORTAL_AUTHORIZATION=eyJraWQiOiIxMDAiLCJhbGciOiJSUzI1NiJ9.eyJpc3MiOiJ1cm46Y29tOm5ldHdvcmtudDpvYXV0aDI6djEiLCJhdWQiOiJ1cm46Y29tLm5ldHdvcmtudCIsImV4c
CI6MTk0MTEyMjc3MiwianRpIjoiTkc4NWdVOFR0SEZuSThkS2JsQnBTUSIsImlhdCI6MTYyNTc2Mjc3MiwibmJmIjoxNjI1NzYyNjUyLCJ2ZXJzaW9uIjoiMS4wIiwiY2xpZW50X2lkIjoiZjdkNDIzNDgtYzY0Ny
00ZWZiLWE1MmQtNGM1Nzg3NDIxZTcyIiwic2NvcGUiOiJwb3J0YWwuciBwb3J0YWwudyIsInNlcnZpY2UiOiIwMTAwIn0.Q6BN5CGZL2fBWJk4PIlfSNXpnVyFhK6H8X4caKqxE1XAbX5UieCdXazCuwZ15wxyQJg
WCsv4efoiwO12apGVEPxIc7gpvctPrRIDo59dmTjfWH0p3ja0Zp8tYLD-5Sh65WUtJtkvPQk0uG96JJ64Da28lU4lGFZaCvkaS-Et9Wn0BxrlCE5_ta66Qc9t4iUMeAsAHIZJffOBsREFhOpC0dKSXBAyt9yuLDuD
t9j7HURXBHyxSBrv8Nj_JIXvKhAxquffwjZF7IBqb3QRr-sJV0auy-aBQ1v8dYuEyIawmIP5108LH8QdH-K8NkI1wMnNOz_wWDgixOcQqERmoQ_Q3g
export LIGHT_ENV=dev
export LIGHT_4J_CONFIG_DIR=/config
export LIGHT_CONFIG_SERVER_URI=https://localhost:8443
Orchestrated Environments (Kubernetes)
In Kubernetes, these variables should be defined within the deployment manifest.
Local Development
For local development, it is often preferred to manage these variables outside of global profiles (like .profile or .bashrc) to avoid conflicts between different light-4j projects. However, a common baseline configuration might look like this:
export CONFIG_SERVER_CLIENT_TRUSTSTORE_LOCATION=/home/steve/networknt/light-4j/server/src/main/resources/config/bootstrap.truststore
export CONFIG_SERVER_CLIENT_TRUSTSTORE_PASSWORD=password
export CONFIG_SERVER_CLIENT_VERIFY_HOST_NAME=false
export LIGHT_PORTAL_AUTHORIZATION=Bearer eyJraWQiOiIxMDAiLCJhbGciOiJSUzI1NiJ9.eyJpc3MiOiJ1cm46Y29tOm5ldHdvcmtudDpvYXV0aDI6djEiLCJhdWQiOiJ1cm46Y29tLm5ldHdvcmtudCIsImV4c
CI6MTk0MTEyMjc3MiwianRpIjoiTkc4NWdVOFR0SEZuSThkS2JsQnBTUSIsImlhdCI6MTYyNTc2Mjc3MiwibmJmIjoxNjI1NzYyNjUyLCJ2ZXJzaW9uIjoiMS4wIiwiY2xpZW50X2lkIjoiZjdkNDIzNDgtYzY0Ny
00ZWZiLWE1MmQtNGM1Nzg3NDIxZTcyIiwic2NvcGUiOiJwb3J0YWwuciBwb3J0YWwudyIsInNlcnZpY2UiOiIwMTAwIn0.Q6BN5CGZL2fBWJk4PIlfSNXpnVyFhK6H8X4caKqxE1XAbX5UieCdXazCuwZ15wxyQJg
WCsv4efoiwO12apGVEPxIc7gpvctPrRIDo59dmTjfWH0p3ja0Zp8tYLD-5Sh65WUtJtkvPQk0uG96JJ64Da28lU4lGFZaCvkaS-Et9Wn0BxrlCE5_ta66Qc9t4iUMeAsAHIZJffOBsREFhOpC0dKSXBAyt9yuLDuD
t9j7HURXBHyxSBrv8Nj_JIXvKhAxquffwjZF7IBqb3QRr-sJV0auy-aBQ1v8dYuEyIawmIP5108LH8QdH-K8NkI1wMnNOz_wWDgixOcQqERmoQ_Q3g
export LIGHT_ENV=dev
JVM Options
Project-specific variables are best managed using Java Virtual Machine (JVM) -D system properties passed via the command line.
-Dlight-4j-config-dir=config/ai-gateway/config -Dlight-config-server-uri=https://local.lightapi.net
-Dlight-4j-config-dir: Points directly to the externalized configuration folder for a specific service.-Dlight-config-server-uri: Enables or disables the configuration server bootstrap process for the service.
bootstrap.truststore
To securely connect to a light-portal instance running with a self-signed certificate, the appropriate bootstrap.truststore must be present in the local configuration folder. Using the example JVM options above, this file should reside in the config/ai-gateway/config directory alongside the startup.yml file.
Startup Sequence
When a light-4j service starts with the DefaultConfigLoader configured in startup.yml, it follows a specific sequence to ensure all necessary configurations and assets are loaded before the server becomes operational.
- Environment Identification: The loader first identifies the execution environment (
light-env) by checking system properties, environment variables, or theenvTaginstartup.yml. It defaults todevif no value is found. - Bootstrap Context Initialization: If a
light-config-server-uriis detected, the loader initializes a secure HTTP client using thebootstrap.truststore. This allows the service to communicate securely with the light-portal. - Remote Configuration Fetching:
- Configuration Logic: The service calls the configuration server’s contexts (e.g.,
/config-server/configs) using query parameters defined instartup.yml(e.g.,productId,serviceId,envTag). - Value Injection: The retrieved values (typically from a centralized
values.ymlon the portal) are injected into the coreConfigmodule. This process includes clearing existing caches and ensuring encrypted values are decrypted.
- Configuration Logic: The service calls the configuration server’s contexts (e.g.,
- Asset Retrieval: The loader subsequently fetches static assets such as certificates (
/config-server/certs) and other required files (/config-server/files), saving them directly into the externalized configuration directory (targetConfigsDirectory). - Local Persistence (Caching): To support offline restarts, the loader saves the fetched
values.ymland static files to the local file system. - Logging Reconfiguration: If a custom Logback configuration file is provided via the
logback.configurationFileproperty, the loader resets the logging context and reapplies the fetched or local configuration.
Fallback Mechanism
The DefaultConfigLoader is designed with a robust fallback mechanism to ensure service availability even if the light-config-server is unreachable.
- Config Server Missing: If
light-config-server-uriis not provided, the service immediately defaults to loading configurations from the local file system. - Connection Failure: If the service fails to connect to the configuration server (due to a timeout or network error), it attempts to use the locally cached
values.ymlin thelight-4j-config-dir. - Missing Cache: If the config server is unreachable and no local cache exists, the service will throw a
RuntimeExceptionand terminate the startup process to prevent running with incomplete or incorrect configurations.
Value Injection
The light-4j framework provides a powerful mechanism to inject values into configuration files from external sources, such as environment variables or a centralized values.yml file. This allows for dynamic and flexible configuration management without modifying the application code.
Basic Usage
Property injection uses the ${key:defaultValue} pattern. When a configuration file is loaded, any property with this pattern will be replaced by:
- Environment Variable: If an environment variable matching the
key(often converted to uppercase with underscores) exists, its value is used. - values.yml: If the key is defined in the
values.ymlfile, its value is used. - Default Value: If neither is found, the
defaultValueis used.
Example:
server.port: ${PORT:8080}
Centralized values.yml
The values.yml file (also supports .yaml or .json) acts as a central repository for all injected values. It is typically located in the same config directory as other configuration files.
When using values.yml, you should prefix keys with the name of the configuration file they correspond to, although this is not strictly required if you use generic keys.
Example values.yml:
server.serviceId: com.networknt.gateway-1.0.0
router.maxRequestTime: 5000
db.user: root
db.password: ${DB_PASS:password}
Self-Injection in values.yml
A recent enhancement allows values.yml to support property injection from its own entries. This enables you to reuse values and maintain consistency within the centralized configuration file.
Implementation Details
To support self-injection, the ConfigInjection class follows a two-pass initialization strategy:
- Exclusion:
values.ymlis explicitly excluded from the standard injection process during its initial load. This ensures it is loaded as a raw map, preventing any “cannot be expanded” exceptions during startup. - Pass 1: The raw values are loaded into the internal
decryptedValueMapandundecryptedValueMap. - Pass 2: Once the maps are assigned to the static fields, the system performs a second pass using
CentralizedManagement.mergeMap. During this pass, ${key} patterns are resolved against the internal maps, allowing for recursive resolution of self-references and environment variables.
Example of Self-Injection
# values.yml
db.host: localhost
db.user: root
db.url: jdbc:mysql://${db.host}:3306/mydb?user=${db.user}
In this example, db.url correctly resolves to jdbc:mysql://localhost:3306/mydb?user=root during application startup.
Exclusion List
If you want to prevent certain configuration files from being processed for injection, you can add them to the exclusionConfigFileList in config.yml.
# config.yml
exclusionConfigFileList:
- openapi
- values
Note
values.ymlandconfig.ymlare automatically excluded from the initial injection pass by the framework to maintain system stability.
Decryption
Value injection also supports automatic decryption of values. If a value is encrypted (usually prefixed with CRYPT:), it will be decrypted using the configured Decryptor before being injected.
Cache Manager
The CacheManager module provides a unified interface for managing in-memory caches within the light-4j application. It abstracts the underlying caching implementation, allowing developers to configure and use caches without tying their code to a specific library.
The default implementation provided by light-4j is based on Caffeine, a high-performance Java caching library.
CacheManager Interface
The CacheManager interface defines standard operations for interacting with caches:
public interface CacheManager {
void addCache(String cacheName, long maxSize, long expiryInMinutes);
Map<Object, Object> getCache(String cacheName);
void put(String cacheName, String key, Object value);
Object get(String cacheName, String key);
void delete(String cacheName, String key);
void removeCache(String cacheName);
int getSize(String cacheName);
}
Configuration
The configuration is managed by CacheConfig and corresponds to cache.yml (or cache.json/cache.properties).
The configuration allows defining multiple named caches, each with its own size limit and expiration policy.
Configuration Properties
| Property | Type | Description |
|---|---|---|
caches | list | A list of cache definitions. |
Cache Item Properties
Each item in the caches list contains:
| Property | Type | Description |
|---|---|---|
cacheName | string | Unique name for the cache. |
expiryInMinutes | int | Expiration time in minutes (TTL). |
maxSize | int | Maximum number of entries in the cache. |
Configuration Example (cache.yml)
# Cache Configuration
caches:
- cacheName: jwt
expiryInMinutes: 10
maxSize: 10000
- cacheName: jwk
expiryInMinutes: 1440
maxSize: 100
Values Example (values.yml)
You can override the cache configuration in values.yml. Note that since caches is a list, you typically override the entire list or use stringified JSON if supported by the config loader, but YAML list format is standard.
cache.caches:
- cacheName: userCache
expiryInMinutes: 60
maxSize: 500
- cacheName: tokenCache
expiryInMinutes: 15
maxSize: 2000
Usage
To use the cache manager, you can retrieve the singleton instance and interact with your named caches.
Retrieving the Instance
The CacheManager follows a singleton pattern (or can be injected via dependency injection if using a DI framework).
CacheManager cacheManager = CacheManager.getInstance();
Basic Operations
// Put a value into the cache
cacheManager.put("userCache", "userId123", userObject);
// Get a value from the cache
Object value = cacheManager.get("userCache", "userId123");
if (value != null) {
// Cache hit
}
// Delete a specific key
cacheManager.delete("userCache", "userId123");
// Remove an entire cache
cacheManager.removeCache("userCache");
Implementation
The default implementation CaffeineCacheManager uses Caffeine’s Caffeine.newBuilder() to create caches with:
maximumSize: Limits the cache size.expireAfterWrite: Expires entries after the specified duration.
This implementation is registered automatically via SingletonServiceFactory or module registration when CacheConfig loads.
Data Source
The data-source module provides a flexible way to configure and manage JDBC data sources in light-4j applications. It wraps HikariCP to provide high-performance connection pooling.
Overview
Unlike the simple javax.sql.DataSource configuration in service.yml, the data-source module offers:
- Support for multiple data sources.
- Detailed HikariCP configuration.
- Encrypted password support.
- Separation of concerns (DataSource config vs. Service config).
Dependency
Add the following dependency to your pom.xml:
<dependency>
<groupId>com.networknt</groupId>
<artifactId>data-source</artifactId>
<version>${version.light-4j}</version>
</dependency>
<dependency>
<groupId>com.zaxxer</groupId>
<artifactId>HikariCP</artifactId>
</dependency>
<!-- Add your JDBC driver dependency here (e.g., mysql-connector-java, postgresql) -->
Configuration
Configuration is primarily handled in datasource.yml.
datasource.yml
You can define multiple data sources by giving them unique names (e.g., PostgresDataSource, H2DataSource).
# Example Configuration
PostgresDataSource:
DriverClassName: org.postgresql.ds.PGSimpleDataSource
jdbcUrl: jdbc:postgresql://postgresdb:5432/mydb
username: postgres
# Password can be encrypted using the light-4j decryptor
password: CRYPT:747372737...
maximumPoolSize: 10
connectionTimeout: 30000
# Optional HikariCP settings
settings:
autoCommit: true
# Optional driver parameters
parameters:
ssl: 'false'
H2DataSource:
DriverClassName: org.h2.jdbcx.JdbcDataSource
jdbcUrl: jdbc:h2:mem:testdb;DB_CLOSE_DELAY=-1
username: sa
password: sa
service.yml
You need to register the data sources in service.yml so they can be injected or retrieved via SingletonServiceFactory.
singletons:
# Register the Decryptor for encrypted passwords
- com.networknt.utility.Decryptor:
- com.networknt.decrypt.AESDecryptor
# Register specific Data Sources
- com.networknt.db.GenericDataSource:
- com.networknt.db.GenericDataSource:
- java.lang.String: PostgresDataSource
- com.networknt.db.GenericDataSource:
- java.lang.String: H2DataSource
# Or specific implementations if available
- javax.sql.DataSource:
- com.networknt.db.GenericDataSource::getDataSource:
- java.lang.String: PostgresDataSource
Usage
Getting a DataSource
You can retrieve the DataSource instance using SingletonServiceFactory.
import com.networknt.service.SingletonServiceFactory;
import com.networknt.db.GenericDataSource;
import javax.sql.DataSource;
public class MyDao {
public void query() {
// Option 1: Get the GenericDataSource wrapper
GenericDataSource genericDs = SingletonServiceFactory.getBean(GenericDataSource.class);
// Note: If you have multiple, you might need getBean(Class, name) or check how it's registered.
// Option 2: If registered as javax.sql.DataSource
DataSource ds = SingletonServiceFactory.getBean(DataSource.class);
try (Connection conn = ds.getConnection()) {
// ... use connection
}
}
}
Multiple Data Sources
If you have multiple data sources, it is best to register them by name in service.yml and retrieve them by name or class if you created specific subclasses.
// Retrieving by name if registered as such (requires custom registration logic or specific class beans)
GenericDataSource postgres = (GenericDataSource) SingletonServiceFactory.getBean("PostgresDataSource");
Features
Encrypted Passwords
You can use the light-4j encryption tool to encrypt database passwords. Prefix the encrypted string with CRYPT: in datasource.yml or secret.yml.
Setting Configuration
The settings map in datasource.yml matches the setXxx methods of HikariDataSource. For example:
settings:
autoCommit: false
idleTimeout: 60000
DB Provider
The db-provider module is a lightweight database provider designed to simplify the initialization of a generic SQL/JDBC data source, typically for internal services or control plane components (like light-portal or light-config-server) that need a single, primary database connection.
Overview
Unlike the more flexible data-source module which is designed for multiple, named data sources, db-provider focuses on providing a single, global HikariDataSource initialized at startup. It is often used in conjunction with a StartupHookProvider to ensure the database connection is ready before the server starts handling requests.
Configuration
The module is configured via db-provider.yml (or yaml/json).
| Property | Description | Default |
|---|---|---|
driverClassName | JDBC driver class name. | org.postgresql.Driver |
jdbcUrl | JDBC connection URL. | jdbc:postgresql://timescale:5432/configserver |
username | Database username. | postgres |
password | Database password (supports encryption). | secret |
maximumPoolSize | Max connections in the pool. | 3 |
Example db-provider.yml:
driverClassName: org.h2.Driver
jdbcUrl: jdbc:h2:mem:testdb
username: sa
password: sa
maximumPoolSize: 5
Startup Hook
To use this module, you typically register the SqlDbStartupHook in your service.yml. This hook reads the configuration, creates the HikariDataSource, and initializes the CacheManager.
service.yml:
startupHooks:
- com.networknt.db.provider.SqlDbStartupHook
Usage
Once initialized by the startup hook, the data source is available via the static field in SqlDbStartupHook.
import com.networknt.db.provider.SqlDbStartupHook;
import javax.sql.DataSource;
import java.sql.Connection;
public class MyService {
public void doSomething() {
DataSource ds = SqlDbStartupHook.ds;
try (Connection conn = ds.getConnection()) {
// ... perform DB operations
} catch (SQLException e) {
// handle exception
}
}
}
Key Classes
DbProviderConfig: Loads configuration fromdb-provider.yml.SqlDbStartupHook: Initializes the globalHikariDataSourceandCacheManager.DbProvider: Interface for provider extensions (defaulting toDbProviderImpl).
When to use
- Use
db-providerif you are building a simple service or a light-4j platform component (like Config Server) that needs a single, standard SQL connection setup globally at startup. - Use
data-sourceif you need multiple data sources, named data sources, or more complex configuration that doesn’t rely on a specific startup hook.
Decryptor
The decryptor module provides a mechanism to decrypt sensitive configuration values (like passwords, tokens, and keys) at runtime. This allows you to check in your configuration files with encrypted values, enhancing security.
Configuration
The decryptor is configured in config.yml.
| Property | Description | Default |
|---|---|---|
decryptorClass | The implementation class of the Decryptor interface. | com.networknt.decrypt.AutoAESDecryptor |
Note: The default class name in newer versions might be AutoAESSaltDecryptor. The Config module loads this class to handle any value starting with CRYPT:.
Implementations
The module provides several implementations of the Decryptor interface.
AutoAESSaltDecryptor
This is the default and recommended implementation. It uses AES encryption with a salt.
- Key Source: Checks the environment variable
LIGHT_4J_CONFIG_PASSWORD. - Fallback: If the environment variable is not set, it defaults to the password
light(useful for testing). - Usage: Locate the sensitive value in your config file (e.g.,
values.ymlorsecret.yml) and replace the plain text withCRYPT:encoded_string.
ManualAESSaltDecryptor
This implementation prompts the user to enter the password in the console/terminal during server startup. This is useful for local development or environments where environment variables cannot be securely set.
Encryption Utility
To encrypt your secrets, you can use the light-encryptor utility tool.
- Clone
https://github.com/networknt/light-encryptor. - Run the utility (Java jar) with your master password and the clear text string.
- The tool will output the encrypted string (e.g.,
CRYPT:fa343a...). - Copy this string into your configuration file.
Deployment
- Generate Encrypted Values: Use
light-encryptorto generateCRYPT:...strings. - Update Config: Put these strings in
secret.ymlor other config files. - Set Master Password: In your deployment environment (Kubernetes, VM), set the
LIGHT_4J_CONFIG_PASSWORDenvironment variable to your master password.- In Kubernetes, use a Secret mapped to an environment variable.
env:
- name: LIGHT_4J_CONFIG_PASSWORD
valueFrom:
secretKeyRef:
name: my-app-secret
key: master-password
Creating a Review Decryptor
If you need a custom encryption algorithm (e.g., integrating with a cloud KMS or HashiCorp Vault), you can implement the com.networknt.decrypt.Decryptor interface and update config.yml to point to your class.
Email Sender Module
The email-sender module provides a simple utility to send emails using Jakarta Mail (formerly JavaMail). It is designed to be used within the Light-4j framework and integrates with the configuration system.
Introduction
This module simplifies the process of sending emails from your application. It supports:
- Sending both plain text and HTML emails.
- Sending emails with attachments.
- Template variable replacement for dynamic email bodies.
- Configuration via
email.yml(localized or centralized).
Configuration
The module is configured using the email.yml file.
| Config Field | Description | Default |
|---|---|---|
host | SMTP server host name or IP address. | mail.lightapi.net |
port | SMTP server port number (typical values: 25, 587, 465). | 587 |
user | SMTP username or sender email address. | [email protected] |
pass | SMTP password. Should be encrypted or provided via enviroment variable EMAIL_PASS. | password |
debug | Enable Jakarta Mail debug output. | true |
auth | Enable SMTP authentication. | true |
Example email.yml
host: smtp.gmail.com
port: 587
user: [email protected]
pass: your_app_password
debug: false
auth: true
Security Note: Never commit plain text passwords to version control. Use Decryptor Module to encrypt sensitive values in configuration files or use environment variables.
Usage
dependency
Add the following dependency to your pom.xml.
<dependency>
<groupId>com.networknt</groupId>
<artifactId>email-sender</artifactId>
<version>${version.light-4j}</version>
</dependency>
Sending a Simple Email
import com.networknt.email.EmailSender;
public void send() {
EmailSender sender = new EmailSender();
try {
sender.sendMail("[email protected]", "Subject Line", "<h1>Hello World</h1>");
} catch (MessagingException e) {
logger.error("Failed to send email", e);
}
}
Sending an Email with Attachment
public void sendWithAttachment() {
EmailSender sender = new EmailSender();
try {
sender.sendMailWithAttachment(
"[email protected]",
"Report",
"Please find the attached report.",
"/tmp/report.pdf"
);
} catch (MessagingException e) {
logger.error("Failed to send email", e);
}
}
Template Replacement
The EmailSender provides a utility to replace variables in a template string. Variables are defined as [key].
Map<String, String> replacements = new HashMap<>();
replacements.put("name", "John Doe");
replacements.put("link", "https://example.com/activate");
String template = "<p>Hi [name],</p><p>Click <a href='[link]'>here</a> to activate.</p>";
String content = EmailSender.replaceTokens(template, replacements);
sender.sendMail("[email protected]", "Activation", content);
Handler Module
The handler module is the core component of the Light-4j framework responsible for managing the request/response lifecycle. It implements the Chain of Responsibility pattern, allowing developers to compose complex processing flows using small, reusable middleware components.
core Concepts
MiddlewareHandler
The MiddlewareHandler interface is the contract for all middleware plugins. It allows handlers to be chained together.
public interface MiddlewareHandler extends LightHttpHandler {
HttpHandler getNext();
MiddlewareHandler setNext(final HttpHandler next);
boolean isEnabled();
}
- Chaining: Each handler holds a reference to the
nexthandler in the chain. - Enabling: Handlers can be enabled or disabled via configuration.
- Execution: When
handleRequestis called, the handler performs its logic and then callsHandler.next(exchange, next)to pass control to the next handler.
LightHttpHandler
The LightHttpHandler interface extends Undertow’s HttpHandler. It is recommended for all business handlers to implement this interface. It provides helper methods for:
- Standardized Error Responses:
setExchangeStatushelps return consistent JSON error responses based onstatus.yml. - Audit Logging: Automatically integrates with the Audit module to log errors and stack traces if configured.
HandlerProvider
The HandlerProvider interface is used by Service modules to expose a bundle of handlers.
public interface HandlerProvider {
HttpHandler getHandler();
}
This is often used when a library provides a set of API endpoints that need to be injected into the main application (e.g., ServerInfoGetHandler or HealthGetHandler).
Handler Orchestration
The Handler class is the main orchestrator. It loads the configuration from handler.yml and initializes:
- Handlers: Instantiates handler classes.
- Chains: Composes lists of handlers into named execution chains.
- Paths: Maps HTTP methods and path templates to specific executor chains.
When a request arrives, Handler.start(exchange) matches the request path against the configured paths.
- If a match is found, the corresponding chain ID is attached to the exchange, and execution begins.
- If no path matches, it attempts to execute
defaultHandlersif configured. - If no match and no default handlers, the request processing stops (or falls through to the next external handler).
Configuration (handler.yml)
The configuration file handler.yml is central to defining how requests are processed.
1. Handlers
Defines all the handler classes used in the application. You can provide an alias using @ to reference them easily in chains.
handlers:
# Format: com.package.ClassName@alias
- com.networknt.exception.ExceptionHandler@exception
- com.networknt.metrics.MetricsHandler@metrics
- com.networknt.validator.ValidatorHandler@validator
- com.example.MyBusinessHandler@myHandler
2. Chains
Defines reusable sequences of handlers. The default chain is commonly used for shared middleware.
chains:
default:
- exception
- metrics
- validator
secured:
- exception
- metrics
- security
- validator
3. Paths
Maps specific API endpoints to execution chains.
paths:
- path: '/v1/address'
method: 'get'
exec:
- default
- myHandler
- path: '/v1/admin'
method: 'post'
exec:
- secured
- adminHandler
- path: The URI template (e.g.,
/v1/pets/{petId}). - method: HTTP method (GET, POST, etc.).
- exec: A list of chains or handlers to execute in order.
4. Default Handlers
A fallback chain executed if no path matches. Useful for 404 handling or SPA routing.
defaultHandlers:
- exception
- cors
- fileHandler
Best Practices
- Use Aliases: Always use aliases (e.g.,
@exception) inhandlerslists. It makeschainsandpathsconfiguration much more readable. - Granular Chains: Define common middleware stacks (like
default,middleware,security) inchainsand reuse them inpaths. This reduces duplication. - Order Matters: Place
ExceptionHandlerat the very beginning of the chain to catch errors from all subsequent handlers. PlaceMetricsHandlerearly to capture accurate timing.
Http2 Client
The Http2Client module provided by light-4j is a high-performance, asynchronous HTTP client that supports both HTTP/1.1 and HTTP/2. It is built on top of Undertow’s client capabilities and is designed to be efficient, lightweight, and easy to use in microservices architectures.
Features
- HTTP/1.1 and HTTP/2 Support: Transparently handles both protocol versions.
- Asynchronous & Non-blocking: Uses callbacks and futures to handle requests without blocking threads.
- Connection Pooling: Built-in connection pooling for efficient resource management, especially for HTTP/1.1.
- OAuth 2.0 Integration: Built-in support for handling OAuth 2.0 tokens (client credentials, authorization code, etc.).
- Service Discovery: Integrates with light-4j service discovery to resolve service IDs to URLs.
- TLS/SSL Support: Comprehensive TLS configuration including two-way SSL.
Important
Migration Notice: The
borrowConnection/returnConnectionmethods are deprecated. Migrate to the newborrow()/restore()SimplePool API for better metrics, health checks, and pool management. See the SimplePool Migration Guide for details.
Configuration
The client is configured via client.yml.
Key Configuration Sections
TLS (tls)
Configures Transport Layer Security settings.
| Property | Description | Default |
|---|---|---|
verifyHostname | Verify the hostname against the certificate. | true |
loadTrustStore | Load the trust store. | true |
trustStore | Path to the trust store file. | client.truststore |
loadKeyStore | Load the key store (for 2-way SSL). | false |
tlsVersion | TLS version to use (e.g., TLSv1.2, TLSv1.3). | TLSv1.2 |
Request (request)
Configures request behavior and connection pooling.
| Property | Description | Default |
|---|---|---|
timeout | Request timeout in milliseconds. | 3000 |
enableHttp2 | Enable HTTP/2 support. | true |
connectionPoolSize | Max connections per host in the pool. | 1000 |
maxReqPerConn | Max requests per connection before closing. | 1000000 |
poolMetricsEnabled | Enable connection pool metrics. | false |
healthCheckEnabled | Enable background connection health checks. | true |
healthCheckIntervalMs | Health check interval in milliseconds. | 30000 |
OAuth (oauth)
Configures interactions with OAuth 2.0 providers for token management. Includes sections for token (acquiring tokens), sign (signing requests), and key (fetching JWKs).
Example client.yml
tls:
verifyHostname: true
loadTrustStore: true
trustStore: client.truststore
trustStorePass: password
request:
timeout: 3000
enableHttp2: true
connectionPoolSize: 100
poolMetricsEnabled: true
healthCheckEnabled: true
oauth:
token:
server_url: https://localhost:6882
client_credentials:
client_id: my-client
client_secret: my-secret
Usage
Getting the Client Instance
The Http2Client is a singleton.
import com.networknt.client.Http2Client;
Http2Client client = Http2Client.getInstance();
Making a Request (Recommended - SimplePool)
Use borrow() to get a connection token and restore() to return it.
import com.networknt.client.simplepool.SimpleConnectionState.ConnectionToken;
import io.undertow.client.ClientConnection;
import io.undertow.client.ClientRequest;
import io.undertow.util.Methods;
import java.net.URI;
import java.util.concurrent.CountDownLatch;
import java.util.concurrent.atomic.AtomicReference;
// ...
ConnectionToken token = null;
try {
// Borrow a connection token
token = client.borrow(
new URI("https://example.com"),
Http2Client.WORKER,
Http2Client.BUFFER_POOL,
true // HTTP/2 enabled
);
ClientConnection connection = token.connection().getRawConnection();
// Create the request
ClientRequest request = new ClientRequest().setMethod(Methods.GET).setPath("/api/v1/data");
request.getRequestHeaders().put(Headers.HOST, "example.com");
// Latch to wait for response
final CountDownLatch latch = new CountDownLatch(1);
final AtomicReference<ClientResponse> reference = new AtomicReference<>();
// Send the request
connection.sendRequest(request, client.createClientCallback(reference, latch));
// Wait for the response
latch.await();
// Process response
ClientResponse response = reference.get();
int statusCode = response.getResponseCode();
String body = response.getAttachment(Http2Client.RESPONSE_BODY);
System.out.println("Status: " + statusCode);
System.out.println("Body: " + body);
} catch (Exception e) {
e.printStackTrace();
} finally {
// Always restore the token
if (token != null) {
client.restore(token);
}
}
Handling Token Injection
The client can automatically inject OAuth tokens.
// Inject Client Credentials token
client.addCcToken(request);
// Inject Authorization Code token (Bearer token passed from caller)
client.addAuthToken(request, "bearer_token_string");
Propagating Headers
For service-to-service calls, you often need to propagate headers like correlation ID and traceability ID.
// Propagate headers from an existing HttpServerExchange
client.propagateHeaders(request, exchange);
Pool Warm-Up
Pre-establish connections to reduce first-request latency:
// Warm up connections at application startup
client.warmUpPool(URI.create("https://api.example.com:443"));
Pool Metrics
Access connection pool statistics:
SimplePoolMetrics metrics = client.getPoolMetrics();
if (metrics != null) {
logger.info(metrics.getSummary());
}
Shutdown
Stop background threads during application shutdown:
client.shutdown();
Best Practices
- Use SimplePool API: Prefer
borrow()/restore()over deprecatedborrowConnection()/returnConnection(). - Release Connections: Always restore tokens in a
finallyblock to avoid leaking connections. - Timeouts: Always set timeouts for your requests to prevent indefinite hanging.
- HTTP/2: Enable HTTP/2 for better performance (multiplexing) if your infrastructure supports it.
- Singleton: Use the singleton
Http2Client.getInstance()rather than creating new instances. - Shutdown: Call
client.shutdown()during application shutdown to stop health check threads.
Related Documentation
SimplePool Migration Guide
This guide helps migrate from deprecated Http2Client connection pooling methods to the new SimplePool API.
Important
The old
borrowConnection/returnConnectionmethods are deprecated for removal. Migrate toborrow()/restore()for better pool management, metrics, and health checks.
Quick Reference
| Old API (Deprecated) | New API (SimplePool) |
|---|---|
borrowConnection(uri, worker, pool, isHttp2) | borrow(uri, worker, pool, isHttp2) |
returnConnection(connection) | restore(token) |
ClientConnection | ConnectionToken |
Key Difference: Token-Based Pool Management
The SimplePool uses a token pattern instead of raw connections:
// OLD: Returns ClientConnection directly
ClientConnection conn = client.borrowConnection(uri, worker, pool, true);
try {
// use connection
} finally {
client.returnConnection(conn);
}
// NEW: Returns ConnectionToken that wraps the connection
ConnectionToken token = client.borrow(uri, worker, pool, true);
try {
ClientConnection conn = token.connection().getRawConnection();
// use connection
} finally {
client.restore(token);
}
Why tokens? Tokens track which specific borrow operation acquired a connection, enabling:
- Accurate metrics (borrow/restore counts per URI)
- Leak detection
- Proper HTTP/2 multiplexing management
Migration Patterns
Pattern 1: Simple Borrow/Return (with .get)
Before:
ClientConnection connection = null;
try {
connection = client.borrowConnection(uri, worker, pool, options).get();
// Send request
connection.sendRequest(request, callback);
} finally {
if (connection != null) {
client.returnConnection(connection);
}
}
After:
import com.networknt.client.simplepool.SimpleConnectionState;
SimpleConnectionState.ConnectionToken token = null;
try {
token = client.borrow(uri, worker, pool, options);
ClientConnection connection = token.connection().getRawConnection();
// Send request
connection.sendRequest(request, callback);
} finally {
if (token != null) {
client.restore(token);
}
}
Pattern 2: With Timeout
The new borrow() method handles timeouts internally through configuration rather than as a method parameter.
Before:
// Note: The deprecated method took a timeout parameter (e.g., 10 seconds)
ClientConnection connection = client.borrowConnection(10, uri, worker, pool, options);
After:
// Note: timeout parameter is removed in the new API
ConnectionToken token = client.borrow(uri, worker, pool, options);
ClientConnection connection = token.connection().getRawConnection();
Pattern 3: Async (IoFuture)
Before:
IoFuture<ClientConnection> future = client.borrowConnection(uri, worker, pool, options);
Migration Rule:
The async IoFuture<ClientConnection> pattern cannot be directly migrated because the new borrow() method is synchronous. These usages should be migrated to a different async pattern or kept on the old API until fully deprecated.
Pattern 4: HTTP/1.1 vs HTTP/2
// HTTP/2 (multiplexed)
ConnectionToken token = client.borrow(uri, worker, bufferPool, true);
// HTTP/1.1 (non-multiplexed)
ConnectionToken token = client.borrow(uri, worker, bufferPool, false);
New Features After Migration
After migrating to SimplePool, you gain access to:
Pool Metrics
SimplePoolMetrics metrics = client.getPoolMetrics();
if (metrics != null) {
logger.info(metrics.getSummary());
}
Pool Warm-Up
// Pre-establish connections at startup
client.warmUpPool(URI.create("https://api.example.com:443"));
Health Checks
Enable in configuration:
client:
request:
healthCheckEnabled: true
healthCheckIntervalMs: 30000
Configuration
Enable SimplePool features in client.yml:
client:
request:
# Pool sizing
connectionPoolSize: 10
connectionExpireTime: 1800000
# Metrics (default: false)
poolMetricsEnabled: true
# Warm-up (default: false)
poolWarmUpEnabled: true
poolWarmUpSize: 2
# Health checks (default: true)
healthCheckEnabled: true
healthCheckIntervalMs: 30000
Backward Compatibility
During the transition period:
- Deprecated methods internally redirect to SimplePool when possible
- Old pool (
Http2ClientConnectionPool) is still available as fallback - Both pools can coexist during migration
AI Migration Instructions
For automated migration tools and AI assistants, use these patterns:
SEARCH_PATTERN: borrowConnection call
\bclient\.borrowConnection\s*\([^)]*\)
REPLACE_PATTERN: Convert to borrow
- Change method name from
borrowConnectiontoborrow - Change return type from
ClientConnectiontoConnectionToken - Extract connection:
token.connection().getRawConnection() - Change
returnConnection(connection)torestore(token)
SEARCH_PATTERN: returnConnection call
\bclient\.returnConnection\s*\(\s*(\w+)\s*\)
REPLACE_PATTERN: Convert to restore
client.restore($1Token)
where $1Token is the corresponding token variable.
VARIABLE_RENAME
connection→tokenconn→token- Add
.connection().getRawConnection()when accessing the raw connection
IMPORT_CHANGES
Add:
import com.networknt.client.simplepool.SimpleConnectionState;
Troubleshooting
Connection Not Returned to Pool
Symptom: Pool exhaustion, connections not being reused
Cause: restore() not called in finally block
Fix: Always use try-finally:
ConnectionToken token = null;
try {
token = client.borrow(...);
// use connection
} finally {
if (token != null) client.restore(token);
}
Cannot find symbol ConnectionToken
Symptom: Compilation error stating Cannot find symbol class ConnectionToken.
Cause: Missing import for SimpleConnectionState.
Fix: Add the required import:
import com.networknt.client.simplepool.SimpleConnectionState;
getRawConnection() returns null
Symptom: NullPointerException or unexpected behavior because token.connection().getRawConnection() returns null.
Cause: The connection has not been properly established yet.
Fix: Check token.connection().isOpen() before attempting to use the raw connection:
if (token.connection().isOpen()) {
ClientConnection connection = token.connection().getRawConnection();
// use connection
}
Metrics Show Zero
Cause: Metrics not enabled
Fix: Add to configuration:
client:
request:
poolMetricsEnabled: true
Related Documentation
Monad Result
The monad-result module provides a functional way to handle success and failure occurrences in your application logic. It is an implementation of a Result monad, similar to Optional in Java, but designed to carry failure information (error status) instead of just being empty.
This approach promotes cleaner code by avoiding the use of exceptions for expected business logic failures, making the control flow more explicit and easier to follow.
Core Components
The module consists of three main parts:
1. Result
An interface that represents the result of an operation. It can be either a Success or a Failure.
2. Success
An implementation of Result that holds the successful value.
3. Failure
An implementation of Result that holds a com.networknt.status.Status object describing the error.
Usage
Creating Results
You can create success or failure results using the static factory methods:
import com.networknt.monad.Result;
import com.networknt.monad.Success;
import com.networknt.monad.Failure;
import com.networknt.status.Status;
// Create a success result
Result<String> success = Success.of("Hello World");
// Create a failure result with a Status object
Status status = new Status("ERR10001");
Result<String> failure = Failure.of(status);
Transforming Results
The Result interface provides several monadic methods to work with the values without explicitly checking for success or failure:
Map
Applies a function to the value if the result is a success. If it’s a failure, it returns the failure as-is.
Result<Integer> length = success.map(String::length);
FlatMap
Similar to map, but the mapping function returns another Result. This is useful for chaining multiple operations that can fail.
Result<User> user = idResult.flatMap(id -> userService.getUser(id));
Fold
Reduces the Result to a single value by providing functions for both success and failure cases. This is often used at the end of a chain to convert the result into a response body or an external format.
String message = result.fold(
val -> "Success: " + val,
fail -> "Error: " + fail.getError().getMessage()
);
Lift
Allows combining two Result instances by applying a function to their internal values. If either result is a failure, it returns a failure.
Result<String> result1 = Success.of("Hello");
Result<String> result2 = Success.of("World");
Result<String> combined = result1.lift(result2, (r1, r2) -> r1 + " " + r2);
Conditional Execution
You can perform actions based on the state of the result using ifSuccess and ifFailure:
result.ifSuccess(val -> System.out.println("Got value: " + val))
.ifFailure(fail -> System.err.println("Error Status: " + fail.getError()));
Why use Monad Result?
- Explicit Error Handling: Failures are part of the method signature and cannot be accidentally ignored like unchecked exceptions.
- Improved Readability: Functional chaining (map, flatMap) leads to cleaner logic compared to deeply nested if-else blocks.
- Composability: It is easy to combine multiple operations into a single result using
flatMapandlift.
Dependency
Add the following to your pom.xml:
<dependency>
<groupId>com.networknt</groupId>
<artifactId>monad-result</artifactId>
<version>${version.light-4j}</version>
</dependency>
JSONPath vs JSON Pointer
It is a common misconception that JSON Pointer and JSONPath are direct competitors fighting a “war.” In reality, they are different tools designed to solve entirely different problems. Neither won a war against the other; rather, both won their respective domains.
To put it simply: JSON Pointer won the war for direct structural referencing, while JSONPath won the war for querying and filtering.
Here is a breakdown of how they compare, their pros and cons, and their implementations in Java and Rust.
1. JSON Pointer (RFC 6901)
JSON Pointer is a simple string syntax for identifying a specific, single value within a JSON document. It is essentially a URI fragment for JSON.
- Syntax Example:
/store/book/0/author
Pros:
- Unambiguous: A JSON Pointer always points to exactly one specific node, or it points to nothing.
- Extremely Fast: Parsing it requires zero complex logic—it just splits the string by
/and walks the JSON tree. - Universal Standard: It has been an IETF standard since 2013 and is the undisputed foundational technology behind JSON Schema, JSON Patch, and OpenAPI/Swagger document linking.
Cons:
- No Querying Power: You cannot use wildcards, deep-scanning, or conditions. If you want “all books under $10,” JSON Pointer is completely useless.
- Rigid: If the array order changes, your pointer (e.g.,
/book/0) will point to the wrong item.
2. JSONPath (RFC 9535)
JSONPath was originally inspired by XML’s XPath. It is a full-fledged query language used to extract multiple elements based on conditions, wildcards, and deep traversal.
- Syntax Example:
$.store.book[?(@.price < 10)].author
Pros:
- Highly Expressive: You can perform deep scans (
..), use wildcards (*), slice arrays ([0:2]), and apply conditional filters ([?(@.price < 10)]). - Resilient to Structure Changes: Because you query by properties rather than exact paths, it handles dynamic or unpredictable JSON structures beautifully.
Cons:
- Historically Fragmented: Because JSONPath was based on a 2007 blog post, dozens of libraries implemented edge cases differently. (However, JSONPath was finally standardized as RFC 9535 in February 2024, which is slowly resolving this fragmentation).
- Performance Overhead: It is much slower than JSON Pointer because it has to parse logical expressions, evaluate conditions, and scan the JSON tree.
- Always Returns a List: Because it is a query language, JSONPath evaluates to a NodeList (an array of matches). Even if you query for a single specific item, you get a list containing one item, requiring you to unpack it.
Implementation in Java
JSON Pointer
- Built-in: Modern Java JSON libraries support it out of the box. In Jackson, you simply use the
.at()method:JsonNode author = rootNode.at("/store/book/0/author"); - Jakarta EE (JSR 374) also has native support via the
JsonPointerinterface.
JSONPath
- De Facto Standard: The undisputed champion in the Java ecosystem is Jayway JSONPath (
com.jayway.jsonpath:json-path). It is incredibly robust, highly configurable, and is heavily utilized by enterprise frameworks (for example, it powers Spring Framework’sMockMvcJSON testing).
Implementation in Rust
JSON Pointer
- Built-in: The ubiquitous
serde_jsoncrate supports JSON Pointer natively. You do not need any extra crates.#![allow(unused)] fn main() { // To read: let author = value.pointer("/store/book/0/author"); // To mutate: let author_mut = value.pointer_mut("/store/book/0/author"); }
JSONPath
- Because
serde_jsondoes not include JSONPath natively, you must rely on third-party crates. - Top Recommendation:
serde_json_path. This is a modern crate specifically built to adhere to the brand-new RFC 9535 standard. It parses JSONPath queries and applies them againstserde_json::Valuetypes, returning a list of references to the matching nodes.#![allow(unused)] fn main() { use serde_json_path::JsonPath; let path = JsonPath::parse("$.store.book[?(@.price < 10)]").unwrap(); let cheap_books = path.query(&value); } - Alternative:
jsonpath-rustis another historically popular crate, butserde_json_pathis currently the best choice if you want strict adherence to the new 2024 IETF standard.
Summary: Which should you choose?
- Use JSON Pointer if you know the exact location of the data, want maximum performance, or are building a system that modifies/patches JSON.
- Use JSONPath if you need to search, filter, scrape, or extract multiple pieces of data from a dynamic JSON payload.
Why JSONPath is Superior for AI / MCP Data Masking
1. Unpredictable & Dynamic Payloads
AI models (even those utilizing strict JSON schemas for tool calling) can sometimes generate dynamic, deeply nested, or slightly hallucinated JSON structures.
- JSON Pointer requires you to know the exact, rigid path (e.g.,
/mcp/arguments/user/0/ssn). If the AI puts the SSN inside a nested object you didn’t expect, JSON Pointer misses it, and sensitive data leaks to the model. - JSONPath has the Deep Scan operator (
..). You can configure your mask module to redact$..ssn,$..password, or$..credit_card. This ensures that no matter where the AI model or the backend places the sensitive key in the JSON tree, the masking module will find it and redact it.
2. Masking Arrays of Objects
If an MCP tool returns a list of users, you need to mask the email of every user.
- JSON Pointer: Cannot iterate over arrays. You would have to programmatically guess the array length and generate pointers (
/users/0/email,/users/1/email, etc.) in a loop. - JSONPath: Handles this natively and elegantly:
$.users[*].email.
3. Rule-Based Masking Configuration
When building a security module, administrators usually write masking rules in a configuration file (e.g., masking-rules.yml). JSONPath allows you to write highly expressive security policies:
$..[?(@.category == 'sensitive')].value(Mask the value of any object flagged as sensitive).$..socialSecurityNumber(Global deep-scan redaction).
The Challenges You Must Manage (If Staying with JSONPath)
Because this module will act as a middleware/interceptor for MCP traffic, there are two major things you need to be careful with if you stay with JSONPath:
1. Mutation (Updating the JSON)
Finding the PII is only half the battle; your module actually needs to modify the JSON payload to replace the data with ***.
- In Java (NetworkNT): If you are using the Jayway JSONPath library, this is well-supported. You can use its built-in mutation methods, which are very clean for data masking:
DocumentContext ctx = JsonPath.parse(jsonPayload); ctx.set("$..password", "********"); ctx.set("$..ssn", "***-**-****"); String maskedJson = ctx.jsonString(); - In Rust: Most JSONPath crates only return references to the matched nodes, making mutation harder. You often have to resolve the JSONPath to a list of paths, and then iterate through the JSON tree to manually mutate those nodes.
2. Performance Overhead
JSONPath is slower than JSON Pointer because parsing deep-scan wildcards requires traversing the entire JSON tree. Since an MCP conversation might involve rapid back-and-forth tool calls, a heavy JSONPath evaluation on every single request/response could add latency.
- Mitigation: Compile your JSONPath expressions once at startup rather than evaluating the raw string on every request. (e.g., in Java:
JsonPath compiledPath = JsonPath.compile("$..password");).
Summary Recommendation
Stick with JSONPath.
In the context of data security and PII redaction, a missed field is a critical security vulnerability. JSON Pointer’s rigidity makes it too risky for masking dynamic MCP payloads because if the structure shifts, the masking fails silently. JSONPath’s ability to recursively search the payload ($..secret) provides the safety net required for a robust Privacy & Data Masking module.
Other Masking Method
While JSONPath is excellent for finding and masking specific JSON keys (e.g., $..password), it is not the only solution, and in the context of AI and MCP (Model Context Protocol), relying solely on JSONPath is actually dangerous.
Here is why: JSONPath only understands the structure of the data. If a user sends a prompt to an AI model that looks like this:
{
"user_prompt": "Hi, my name is John Doe and my SSN is 123-45-678. Can you help me?"
}
JSONPath cannot help you here unless you drop the entire user_prompt field, which defeats the purpose of the AI call. The PII is embedded inside unstructured text.
To fully fulfill your Privacy & Data Masking requirement, here are the alternative and complementary solutions used in the industry, ranging from simple to advanced.
1. Pattern Matching (Regular Expressions)
Instead of searching for JSON keys, you scan the raw JSON string (or specific string values) for known patterns of sensitive data.
- How it works: You run Regex patterns for Credit Cards, SSNs, Emails, Phone Numbers, and IP addresses across the payload and replace matches with
***. - Pros:
- Catches PII embedded inside unstructured text (e.g., inside an LLM prompt).
- Very fast to execute.
- Cons:
- Cannot detect names, physical addresses, or context-specific secrets easily.
- High risk of false positives (e.g., catching a 9-digit product ID and thinking it’s an SSN).
2. Named Entity Recognition (NER) / NLP-based Masking
This is the gold standard for AI-facing API gateways. You use a lightweight, local Natural Language Processing (NLP) model to read the text and intelligently identify entities.
- How it works: Libraries like Microsoft Presidio (open-source, widely used for AI data masking) or spaCy analyze the text. They understand context, so they know “John Doe” is a
PERSONand “Seattle” is aLOCATION. - Pros:
- Incredible accuracy for unstructured text.
- Catches complex PII like names, addresses, and organizations.
- Cons:
- Requires running an NLP engine (adds computational overhead/latency).
- Overkill if your payloads are strictly structured machine-to-machine data.
3. Schema-Driven Masking (OpenAPI / JSON Schema)
Since I see you are working within the NetworkNT ecosystem (a framework heavily driven by OpenAPI specifications), this is a highly native alternative to JSONPath.
- How it works: Instead of evaluating paths at runtime, you define what is sensitive directly in your
openapi.yamlusing vendor extensions (e.g.,x-mask: trueorx-pii: true).
During the request/response lifecycle, your middleware checks the OpenAPI schema tree (which is already parsed and cached) and masks the corresponding fields during serialization/deserialization.properties: socialSecurity: type: string x-mask: true - Pros:
- Much faster than JSONPath, because you aren’t doing deep-scans on every request.
- Centralized governance (Security teams can look at the OpenAPI spec and immediately know what is masked).
- Cons:
- Only works if you have a strict schema. If the AI hallucinates a new field or uses dynamic tool-call arguments, the schema might not catch it.
4. Cloud Data Loss Prevention (DLP) APIs
If you don’t want to build the masking engine yourself, you can offload it to a dedicated cloud service.
- How it works: You send the payload to Google Cloud DLP, AWS Macie, or Nightfall AI. They scan it, mask the PII using their massive AI models, and return the safe payload.
- Pros: Enterprise-grade accuracy. Low maintenance.
- Cons: Adds significant network latency to every MCP call. Costs money per API call.
Recommendation for your MCP Mask Module
For an MCP (Model Context Protocol) tool/call, the data usually flows in two ways:
- Strictly structured data: (The AI calling a tool with specific JSON arguments).
- Unstructured data: (The user’s prompt, or the AI’s textual response).
The best architectural approach is a Hybrid System:
- Use JSONPath (or Schema-Driven Masking) for the Structure: Use this to aggressively drop or mask known sensitive keys (e.g.,
$..password,$..api_key,$..credit_card). This is your first line of defense. - Use Regex/Presidio for the Values: For the remaining text fields (like
arguments.user_inputorcontent.text), run a Regex or NER scanner to catch PII (SSNs, emails, names) that a user might have accidentally typed into the free-text prompt before it hits the LLM.
If you must choose just one simple, zero-dependency alternative to JSONPath that catches unstructured data, Regular Expressions applied only to JSON string values is the most common starting point.
Token Client
The token-client is a Light-4j module designed to securely exchange sensitive Personally Identifiable Information (PII) for format-preserved proxy tokens (e.g., swapping a Social Security Number for a reversible proxy token like TK-1234).
It serves as the highly optimized bridge between your Light-4j microservices and the persistent light-tokenization vault service.
Architecture & Caching Strategy
Because Tokenization translations execute continuously during API workloads (especially when integrated within edge gateways or MCP routers), retrieving tokens rapidly is critical to preventing network I/O congestion.
To guarantee hyper-low latency without requiring complex, redundant cache code, the token-client fundamentally relies on a Decorator Pattern that natively wraps the core Light-4j cache-manager.
1. The Fallback Interface: HttpTokenClient
The base engine is the HttpTokenClient. Using Light-4j’s Http2Client multiplexing and SimplePool resource handlers, it establishes secure asynchronous connections outbound to the actual tokenization.lightapi.net REST endpoint to query the persistent database vault.
2. The Transparent Multi-Tier Decorator: CacheTokenClient
Instead of forcing you to deploy a localized Cache vs a Distributed Cache, the CacheTokenClient simply proxies cache lookups to CacheManager.getInstance().get("token_vault_cache").
This means the Token Client natively adopts your Microservice’s active caching topology!
- If your
service.ymlconfiguresCaffeine, the Token Client automatically operates an L1 heap-memory cache. - If your
service.ymlconfiguresHazelcastorRedis, the Token Client instantly shares its resolving proxy maps across your entire Kubernetes node cluster!
Bi-Directional Mapping Performance
When a cache miss occurs, the HttpTokenClient retrieves the mapping from the persistence vault. Before returning the result, the CacheTokenClient intercepts the exact translation and persists it bi-directionally back into the target cache-manager system:
cleartext -> proxy_token(Accelerates futuretokenize()requests)reverse:proxy_token -> cleartext(Accelerates futuredetokenize()requests)
Because of this symmetric pre-caching approach, nearly all subsequent token lookups bypass external network walls entirely, returning payloads in <0.01ms.
Example Integration
Include the module in your target API pom.xml:
<dependency>
<groupId>com.networknt</groupId>
<artifactId>token-client</artifactId>
<version>${project.version}</version>
</dependency>
Initialize the client with the fallback decorator in your handlers:
import com.networknt.token.TokenClient;
import com.networknt.token.HttpTokenClient;
import com.networknt.token.CacheTokenClient;
// 1. Initialize the network client out to the persistence vault
TokenClient httpClient = new HttpTokenClient("https://tokenization.lightapi.net");
// 2. Wrap it in the Cache Manager system
TokenClient tokenClient = new CacheTokenClient(httpClient);
// 3. Execute! If not cached, it will fetch from HTTP.
String secureProxy = tokenClient.tokenize("987-65-4321", 2);
// 4. Reverse! Executes entirely in-memory if already cached.
String ssn = tokenClient.detokenize(secureProxy);
Data Mask
In a production environment, various logging statements are written to log files or persistent storage to assist in identifying and resolving issues. Since a broad group of people might have access to these logs, sensitive information such as credit card numbers, SIN numbers, or passwords must be masked before logging for confidentiality and compliance.
The mask module provides a utility to handle these masking requirements across different data formats.
StartupHookProvider
The mask module depends on JsonPath, which allows for easy access to nested elements in JSON strings. To ensure consistency and performance, you should configure JsonPath to use the Jackson parser (which is standard in light-4j) instead of the default json-smart parser.
The light-4j framework provides JsonPathStartupHookProvider for this purpose. You can enable it by updating your service.yml:
singletons:
- com.networknt.server.StartupHookProvider:
- com.networknt.server.JsonPathStartupHookProvider
When using light-codegen, this provider is often included in the generated service.yml but commented out by default.
Configuration (mask.yml)
The masking behavior is fully configurable via mask.yml. It supports four sections: string, regex, json, and map.
Example mask.yml
---
# Replacement rules for specific keys.
# Key maps to a map of "regex-to-find": "replacement-string"
string:
uri:
"password=[^&]*": "password=******"
# Masking based on regex groups.
# Matching groups in the value will be replaced by stars (*) of the same length.
regex:
header:
Authorization: "^Bearer\\s+(.*)$"
# Masking based on JSON Path.
# Key maps to a map of "json-path": "mask-expression"
json:
user:
"$.password": ""
"$.creditCard.number": "^(?:4[0-9]{12}(?:[0-9]{3})?|5[1-5][0-9]{14})$"
Usage
The com.networknt.mask.Mask utility class provides static methods to apply masking based on the configuration above.
1. Mask with String
Used for simple replacements, typically in URIs or query parameters.
// Uses the 'uri' key from the 'string' section in mask.yml
String maskedUri = Mask.maskString("https://localhost?user=admin&password=123", "uri");
// Result: https://localhost?user=admin&password=******
2. Mask with Regex
Replaces the content of matching groups with the * character. This is useful for headers or cookies where you want to preserve the surrounding structure.
// Uses the 'header' key and 'Authorization' name from the 'regex' section
String input = "Bearer eyJhbGciOiJIUzI1...";
String masked = Mask.maskRegex(input, "header", "Authorization");
// Result: Bearer ****************...
3. Mask with JsonPath
The most powerful way to mask JSON data. It supports single values, nested objects, and arrays.
// Uses the 'user' key from the 'json' section
String json = "{\"username\":\"admin\", \"password\":\"secret123\"}";
String maskedJson = Mask.maskJson(json, "user");
// Result: {"username":"admin", "password":"*********"}
Masking Lists/Arrays
The JSON masking logic automatically handles arrays if the JSON Path targets an array element (e.g., $.items[*].id). It ensures that only the values are masked while preserving the array structure.
Dependency
Add the following to your pom.xml:
<dependency>
<groupId>com.networknt</groupId>
<artifactId>mask</artifactId>
<version>${version.light-4j}</version>
</dependency>
Auto-Registration
The mask module registers itself with the ModuleRegistry automatically when the configuration is loaded. You can verify the loaded masking rules through the Server Info endpoint.
Portal Registry
The portal-registry module enables light-4j services to self-register with a centralized Light Portal controller (light-controller) instead of using local agents like Consul. It addresses the issues of resource utilization, long polling inefficiencies, and complex setup associated with Consul.
Key Features
- Centralized Registration: Services register directly with the controller cluster.
- WebSocket Discovery: Instead of HTTP blocking queries/long polling, the client opens a WebSocket connection to the controller to receive real-time updates about service instances. This significantly reduces thread usage and network overhead.
- No Local Agent: Eliminates the need for a sidecar or node-level agent.
Configuration
To switch from Consul to Portal Registry, you need to update pom.xml, service.yml, and add portal-registry.yml.
1. pom.xml
Replace consul dependency with portal-registry.
<dependency>
<groupId>com.networknt</groupId>
<artifactId>portal-registry</artifactId>
<version>${version.light-4j}</version>
</dependency>
2. service.yml
Configure the Registry singleton to use PortalRegistry.
singletons:
# Define the URL parameters for the registry connection
- com.networknt.registry.URL:
- com.networknt.registry.URLImpl:
protocol: light
host: localhost
port: 8080
path: portal
parameters:
registryRetryPeriod: '30000'
# The client implementation (connects to Portal)
- com.networknt.portal.registry.client.PortalRegistryClient:
- com.networknt.portal.registry.client.PortalRegistryClientImpl
# The Registry interface implementation
- com.networknt.registry.Registry:
- com.networknt.portal.registry.PortalRegistry
3. portal-registry.yml
This module has its own configuration file.
| Property | Description | Default |
|---|---|---|
portalUrl | URL of the light-controller (e.g., https://lightapi.net or https://light-controller). | https://lightapi.net |
portalToken | Bootstrap token for accessing the controller. | - |
checkInterval | Interval for health checks (e.g., 10s). | 10000 (ms) |
deregisterAfter | Time to wait after failure before deregistering. | 120000 (ms) |
httpCheck | Enable HTTP health check (Controller polls Service). | false |
ttlCheck | Enable TTL heartbeat (Service calls Controller). | true |
healthPath | Path for HTTP health check (e.g., /health/). | /health/ |
Example portal-registry.yml:
portalUrl: https://light-controller-test.networknt.com
portalToken: ${portalRegistry.portalToken}
ttlCheck: true
4. server.yml
Ensure registry is enabled.
enableRegistry: true
serviceId: com.networknt.petstore-1.0.0
How It Works
Registration (Service Startup)
When a service starts, PortalRegistry sends a registration request to the portalUrl. It includes the simplified service metadata (host, port, serviceId, environment).
Depending on configuration:
- TTL Check: The service starts a background thread (
PortalRegistryHeartbeatManager) to send periodic heartbeats to the controller. - HTTP Check: The controller is expected to poll the service’s
healthPath.
Discovery (Client Side)
When a client (like light-router) needs to find a service:
- Initial Lookup: It queries the controller for the current list of healthy instances for a given
serviceIdandtag. - Subscription: It establishes a WebSocket connection to
wss://{portalUrl}/ws. - Real-time Updates: When service instances change (up/down/scaling), the controller pushes the new list to the client via the WebSocket. The client updates its local cache immediately.
This WebSocket approach is much more efficient than Consul’s blocking query, especially when subscribing to many services, as it multiplexes updates over a single connection.
Direct Registry
If you don’t have Consul or the Light Portal deployed for service registry and discovery, you can use the built-in DirectRegistry as a temporary solution. It provides a simple way to define service-to-host mappings and allows for an easy transition to more robust enterprise registry solutions later.
There are two main ways to define the mapping between a serviceId and its corresponding hosts:
- service.yml: The original method, defined as part of the
URLImplparameters. - direct-registry.yml: The recommended method for dynamic environments like
http-sidecarorlight-gatewayand it supports configuration hot reload.
1. Configuration via service.yml
Defining mappings in service.yml is straightforward but comes with a significant limitation: the configuration cannot be reloaded without restarting the server.
Single URL Mapping
A simple mapping from one serviceId to exactly one service instance.
singletons:
- com.networknt.registry.URL:
- com.networknt.registry.URLImpl:
protocol: https
host: localhost
port: 8080
path: direct
parameters:
com.networknt.apib-1.0.0: http://localhost:7002
com.networknt.apic-1.0.0: http://localhost:7003
- com.networknt.registry.Registry:
- com.networknt.registry.support.DirectRegistry
- com.networknt.balance.LoadBalance:
- com.networknt.balance.RoundRobinLoadBalance
- com.networknt.cluster.Cluster:
- com.networknt.cluster.LightCluster
Multiple URL Mapping
For a service with multiple instances, provide a comma-separated list of URLs.
parameters:
com.networknt.apib-1.0.0: http://localhost:7002,http://localhost:7005
Using Environment Tags
To support multi-tenancy, you can pass tags (e.g., environment) into the registered URLs.
parameters:
com.networknt.portal.command-1.0.0: https://localhost:8440?environment=0000,https://localhost:8441?environment=0001
Note: This is the legacy approach and it is not recommended as hot reload is not supported when serviceId to hosts mapping is defined this way.
2. Configuration via direct-registry.yml (Recommended)
When using DirectRegistry in http-sidecar or light-gateway, it is highly recommended to use direct-registry.yml. This file supports the config-reload feature, allowing you to update service mappings without downtime.
To use this method, ensure that the parameters section in the URLImpl configuration within service.yml is either empty or commented out.
Example direct-registry.yml
This file maps serviceId (optionally with an environment tag) to host URLs.
---
# direct-registry.yml
# Mapping between serviceId and hosts (comma-separated).
# If a tag is used, separate it from serviceId using a vertical bar |
directUrls:
code: http://192.168.1.100:6881,http://192.168.1.101:6881
token: http://192.168.1.100:6882
com.networknt.test-1.0.0: http://localhost,https://localhost
command|0000: https://192.168.1.142:8440
command|0001: https://192.168.1.142:8441
Mappings can also be provided in JSON or Map String formats via environment variables or the config server within values.yml.
Reloading Configuration
When DirectRegistry initializes, it automatically registers its configuration with the ModuleRegistry. You can use the config-reload API to trigger a reload of direct-registry.yml from the local filesystem or a config server.
Simultaneous Reloads
Because components like RouterHandler site on top of the registry and cache their own mappings, you must reload the related modules simultaneously to ensure consistency.
Example Reload Request:
curl --location --request POST 'https://localhost:8443/adm/modules' \
--header 'Content-Type: application/json' \
--header 'Authorization: Bearer <TOKEN>' \
--data-raw '[
"com.networknt.router.middleware.PathPrefixServiceHandler",
"com.networknt.router.RouterHandler",
"com.networknt.registry.support.DirectRegistry"
]'
Auto-Registration & Visibility
The direct-registry module now implements auto-registration via the DirectRegistryConfig singleton. The current active mappings and configuration parameters can be inspected at runtime via the Server Info endpoint.
Dependency
Add the following to your pom.xml:
<dependency>
<groupId>com.networknt</groupId>
<artifactId>registry</artifactId>
<version>${version.light-4j}</version>
</dependency>
Rule Loader
The rule-loader is a vital infrastructure module in light-4j that enables services to dynamically load and manage business logic rules during startup. It serves as the bridge between the YAML Rule Engine and the specific service endpoints, allowing for flexible, rule-based request and response processing.
Overview
Rules in the light-4j ecosystem are often shared across multiple lines of business or organizations. By centralizing these rules in the light-portal, applications can subscribe to them and have them automatically fetched and instantiated at runtime.
Features
- Dual Rule Sources: Fetch rules from the
light-portalfor production environments or load them from a localrules.ymlfile for offline testing. - Startup Integration: Uses a standard
StartupHookProviderto ensuring all rules are ready before the server starts accepting traffic. - Endpoint-to-Rule Mapping: Flexible mapping of endpoints to specific rule sets (e.g., access control, request transformation, response filtering).
- Service Dependency Enrichment: Automatically fetches service-specific permissions and enriches rule contexts.
- Dynamic Action Loading: Automatically discovery and instantiates action classes defined within the rules to prevent runtime errors.
- Auto-Registration: Automatically registers with
ModuleRegistryfor runtime configuration inspection.
Configuration (rule-loader.yml)
The rule-loader.yml file defines how and where the rules are fetched.
# Rule Loader Configuration
---
# A flag to enable the rule loader. Default is true.
enabled: ${rule-loader.enabled:true}
# Source of the rules: 'light-portal' or 'config-folder'.
# 'light-portal' fetches from a remote server.
# 'config-folder' expects a rules.yml file in the externalized config directory.
ruleSource: ${rule-loader.ruleSource:light-portal}
# The portal host URL (used when ruleSource is light-portal).
portalHost: ${rule-loader.portalHost:https://localhost}
# The authorization token for connecting to the light-portal.
portalHost: ${rule-loader.portalToken:}
# Endpoint to rules mapping (used when ruleSource is config-folder).
# endpointRules:
# /v1/pets@get:
# res-tra:
# - ruleId: transform-pet-response
# /v1/orders@post:
# access-control:
# - ruleId: check-order-permission
Rule Sources
1. Light Portal (light-portal)
In this mode, the loader interacts with the portal API to fetch the latest rules authorized for the service based on the hostId, apiId, and apiVersion defined in values.yml or server.yml. The fetched rules are cached locally in the target configuration directory as rules.yml for resilience.
2. Config Folder (config-folder)
This mode is ideal for local development or air-gapped environments. The loader looks for a rules.yml file in the configuration directory and uses the endpointRules map defined in rule-loader.yml to link endpoints to rule IDs.
Setup
1. Add Dependency
Include the rule-loader in your pom.xml:
<dependency>
<groupId>com.networknt</groupId>
<artifactId>rule-loader</artifactId>
<version>${version.light-4j}</version>
</dependency>
2. Configure Startup Hook
The RuleLoaderStartupHook must be registered in your service.yml or handler.yml under the startup hooks section.
- com.networknt.server.StartupHookProvider:
- com.networknt.rule.RuleLoaderStartupHook
Operational Visibility
The rule-loader module utilizes the Singleton pattern for its configuration and automatically registers itself with the ModuleRegistry. You can inspect the current ruleSource, portalHost, and active endpointRules mappings at runtime via the Server Info endpoint.
Action Class discovery
During the initialization phase, the loader iterates through all actions defined in the loaded rules and attempts to instantiate their associated Java classes. This proactive step ensures that all required JAR files are present on the classpath and that the classes are correctly configured before the first request arrives.
HTTP Server
The server module is the entry point of the light-4j framework. It wraps the Undertow core HTTP server and manages its entire lifecycle. This includes initializing configuration loaders, merging status codes, registering the server with the module registry, and orchestrating the request/response handler chain.
Core Responsibilities
- Lifecycle Management: Controls server startup, initialization, and graceful shutdown.
- Configuration Injection: Orchestrates the loading of configurations from local files or the light-config-server.
- Handler Orchestration: Wires together the middleware handler chain and the final business logic handler.
- Service Registration: Automatically registers the service instance with registries like Consul or Zookeeper when enabled.
- Distributed Security: Integrates with TLS and distributed policy enforcement at the edge.
Server Configuration (server.yml)
The behavior of the server is primarily controlled through server.yml. This configuration is mapped to the ServerConfig class.
Example server.yml
# Server configuration
---
ip: ${server.ip:0.0.0.0}
httpPort: ${server.httpPort:8080}
enableHttp: ${server.enableHttp:false}
httpsPort: ${server.httpsPort:8443}
enableHttps: ${server.enableHttps:true}
enableHttp2: ${server.enableHttp2:true}
keystoreName: ${server.keystoreName:server.keystore}
keystorePass: ${server.keystorePass:password}
keyPass: ${server.keyPass:password}
enableTwoWayTls: ${server.enableTwoWayTls:false}
truststoreName: ${server.truststoreName:server.truststore}
truststorePass: ${server.truststorePass:password}
serviceId: ${server.serviceId:com.networknt.petstore-1.0.0}
enableRegistry: ${server.enableRegistry:false}
dynamicPort: ${server.dynamicPort:false}
minPort: ${server.minPort:2400}
maxPort: ${server.maxPort:2500}
environment: ${server.environment:dev}
buildNumber: ${server.buildNumber:latest}
shutdownGracefulPeriod: ${server.shutdownGracefulPeriod:2000}
bufferSize: ${server.bufferSize:16384}
ioThreads: ${server.ioThreads:4}
workerThreads: ${server.workerThreads:200}
backlog: ${server.backlog:10000}
alwaysSetDate: ${server.alwaysSetDate:true}
serverString: ${server.serverString:L}
allowUnescapedCharactersInUrl: ${server.allowUnescapedCharactersInUrl:false}
maxTransferFileSize: ${server.maxTransferFileSize:1000000}
maskConfigProperties: ${server.maskConfigProperties:true}
Configuration Parameters
| Parameter | Default | Description |
|---|---|---|
ip | 0.0.0.0 | Binding address for the server. |
httpPort | 8080 | Port for HTTP connections (if enabled). |
enableHttp | false | Flag to enable HTTP. Recommended only for local testing. |
httpsPort | 8443 | Port for HTTPS connections. |
enableHttps | true | Flag to enable HTTPS. |
enableHttp2 | true | Flag to enable HTTP/2 (requires HTTPS). |
keystoreName | server.keystore | Name of the server keystore file. |
serviceId | Unique identifier for the service. | |
dynamicPort | false | If true, the server binds to an available port in the [minPort, maxPort] range. |
bufferSize | 16384 | Undertow buffer size. |
ioThreads | (CPU * 2) | Number of IO threads for the XNIO worker. |
workerThreads | 200 | Number of worker threads for blocking tasks. |
shutdownGracefulPeriod | 2000 | Wait period in ms for in-flight requests during shutdown. |
maskConfigProperties | true | If true, sensitive properties are masked in the /server/info response. |
Hooks
The server provides a plugin mechanism via hooks, allowing developers to execute custom logic during the startup and shutdown phases.
Startup Hooks
Used for initialization tasks such as setting up database connection pools, warming up caches, or initializing third-party clients.
Implement com.networknt.server.StartupHookProvider and register via service.yml.
Shutdown Hooks
Used for cleanup tasks such as closing connections, releasing resources, or deregistering from a control plane.
Implement com.networknt.server.ShutdownHookProvider and register via service.yml.
Advanced Features
Dynamic Configuration Loading
Using IConfigLoader (and implementations like DefaultConfigLoader), the server can fetch configurations and secret values from a centralized config server or even a URL on startup.
Performance Tuning
The server exposes low-level Undertow options like backlog, ioThreads, and workerThreads. The light-4j framework is highly optimized for performance and can handle thousands of concurrent requests with minimal memory footprint.
Graceful Shutdown
When a shutdown signal (like SIGTERM) is received, the server:
- Unregisters itself from the service registry.
- Stops accepting new connections.
- Waits for the
shutdownGracefulPeriodto allow in-flight requests to complete. - Executes all registered shutdown hooks.
Server Info Registry
The server automatically registers itself and its configuration (sensitive values masked) into the ModuleRegistry. This information is typically exposed via the /server/info endpoint if the InfoHandler is in the chain.
Registry Integration
When enableRegistry is true, the server uses the serviceId, ip, and the bound port to register its location. If dynamicPort is active, it explores the port range until it finds an available one, then uses that specific port for registration, enabling seamless scaling in container orchestrators.
Light-rest-4j
Access Control
The AccessControlHandler is a business middleware handler designed for the light-rest-4j framework. It provides fine-grained, rule-based authorization at the endpoint level, allowing developers to define complex access policies that go beyond simple scope-based security.
Overview
Unlike standard security handlers that verify tokens and scopes, the Access Control handler interacts with the Rule Engine to evaluate business-specific logic. It typically runs late in the middleware chain, after technical concerns like security and validation are handled, and right before the request reaches the business logic or proxy.
Key Features
- Rule-Based Evaluation: Leverage the Power of the YAML-based Rule Engine.
- Dynamic Configuration: Supports hot-reloading of both configuration and rules.
- Flexible Logic: Choose between
anyoralllogic when multiple rules are applied to an endpoint. - Path Skipping: Easily bypass checks for specific path prefixes.
Configuration (access-control.yml)
The handler is configured via access-control.yml, which is mapped to the AccessControlConfig class.
# Access Control Handler Configuration
---
# Enable or disable the handler
enabled: ${access-control.enabled:true}
# If there are multiple rules for an endpoint, how to combine them.
# any: access is granted if any rule passes.
# all: access is granted only if all rules pass.
accessRuleLogic: ${access-control.accessRuleLogic:any}
# If no rules are defined for an endpoint, should access be denied?
defaultDeny: ${access-control.defaultDeny:true}
# List of path prefixes to skip access control checks.
skipPathPrefixes:
- /health
- /server/info
Configuration Parameters
| Parameter | Default | Description |
|---|---|---|
enabled | true | Globally enables or disables the handler. |
accessRuleLogic | any | Determines evaluation logic for multiple rules (any | all). |
defaultDeny | true | If true, endpoints without defined rules will return an error. |
skipPathPrefixes | [] | Requests to these paths skip authorization checks entirely. |
How it Works
1. Rule Loading
Rules are loaded during server startup via the RuleLoaderStartupHook. This hook caches the rules in memory for high-performance evaluation.
2. Request Context
When a request arrives, the handler extracts context to build a Rule Engine Payload:
- Audit Info: User information, client ID, and the resolved OpenApi endpoint.
- Request Headers: Full map of HTTP headers.
- Parameters: Combined query and path parameters.
- Request Body: If a body handler is present and the method is POST/PUT/PATCH.
3. Evaluation
The handler looks up the rules associated with the current OpenApi endpoint.
- If rules exist, it iterates through them using the configured
accessRuleLogic. - Rules are executed by the
RuleEngine, which returns aresult(true/false) and optional error details.
4. Enforcement
- If the result is Success, the request proceeds to the next handler.
- If the result is Failure, the handler sets an error status (default
ERR10067) and stops the chain.
Hot Reload
The implementation supports hot-reloading through the standardized AccessControlConfig.reload() mechanism.
- When a configuration change is detected at runtime, the singleton
AccessControlConfiginstance is updated. - The
AccessControlHandlerloads the latest configuration at the start of every request, ensuring zero-downtime updates to authorization policies.
OpenAPI Meta
The OpenApiHandler is a core middleware handler in the light-rest-4j framework. It is responsible for parsing the OpenAPI specification, matching the incoming request to a specific operation defined in the spec, and attaching that metadata to the request context.
Overview
The OpenApiHandler acts as the “brain” for RESTful services. By identifying the exact endpoint and operation (e.g., GET /pets/{petId}) at the start of the request chain, it enables subsequent handlers—such as Security, Validator, and Metrics—to perform their tasks efficiently without re-parsing the request or the specification.
Key Features
- Operation Identification: Matches URI and HTTP method to OpenAPI operations.
- Support for Multiple Specs: Can host multiple OpenAPI specifications in a single instance using path-based routing.
- Parameter Deserialization: Correctly parses query, path, header, and cookie parameters according to the OpenAPI 3.0 styles.
- Specification Injection: Supports merging a common “inject” specification (e.g., for administrative endpoints) into the main spec.
- Hot Reload: Automatically detects and applies changes to its configuration without downtime.
Configuration (openapi-handler.yml)
The handler’s behavior is governed by the openapi-handler.yml file, which maps to OpenApiHandlerConfig.
# OpenAPI Handler Configuration
---
# An indicator to allow multiple openapi specifications.
# Default to false which only allow one spec named openapi.yml/yaml/json.
multipleSpec: ${openapi-handler.multipleSpec:false}
# To allow the call to pass through the handler even if the path is not found in the spec.
# Useful for gateways where some APIs might not have specs deployed.
ignoreInvalidPath: ${openapi-handler.ignoreInvalidPath:false}
# Path to spec mapping. Required if multipleSpec is true.
# The key is the base path and the value is the specification name.
pathSpecMapping:
v1: openapi-v1
v2: openapi-v2
Configuration Parameters
| Parameter | Default | Description |
|---|---|---|
multipleSpec | false | When true, the handler uses pathSpecMapping to support multiple APIs. |
ignoreInvalidPath | false | If true, requests with no matching path in the spec proceed to the next handler instead of returning an error. |
pathSpecMapping | {} | A map where keys are URI base paths and values are the names of the corresponding spec files. |
How it Works
1. Specification Loading
At startup, the handler loads the specification(s). If multipleSpec is disabled, it looks for openapi.yml. If enabled, it loads all specs defined in pathSpecMapping. It also checks for openapi-inject.yml to merge common definitions.
2. Request Matching
For every incoming request, the handler:
- Normalizes the request path.
- If
multipleSpecis on, it determines which specification to use based on the path prefix. - Finds the matching template in the OpenAPI paths (e.g., matching
/pets/123to/pets/{petId}). - Resolves the HTTP method to the specific
Operationobject.
3. Parameter Deserialization
The handler uses the ParameterDeserializer to extract values from the request according to the styles defined in the OpenAPI spec (e.g., matrix, label, form). These deserialized values are attached to the exchange using specific attachment keys.
4. Audit Info Integration
The handler attaches the following to the auditInfo object:
endpoint: The resolved endpoint string (e.g.,/pets/{petId}@get).openapi_operation: The fullOpenApiOperationobject, containing the path, method, and operation metadata.
Hot Reload
The OpenApiHandler supports hot-reloading through a thread-safe check in its handleRequest method.
- It leverages
OpenApiHandlerConfig.load()which returns a cached singleton. - If the configuration is updated (e.g., via a config server or manual trigger), the handler detects the change, re-initializes its internal
OpenApiHelperstate, and builds the new mapping logic immediately.
Performance Optimization
For the most common use case (99%) where a service has only one specification, the handler bypasses the mapping logic and uses a high-performance direct reference to the OpenApiHelper.
OpenAPI Security
description: OpenAPI Security Module
OpenAPI Security
The openapi-security module is a fundamental component of the light-rest-4j framework, specifically designed to protect RESTful APIs defined with OpenAPI Specification 3.0. It provides several middleware handlers that integrate with the framework’s security infrastructure to ensure that only authorized requests reach your business logic.
Overview
Modern web services often require robust security mechanisms such as OAuth 2.0. The openapi-security module simplifies the implementation of these standards by providing out-of-the-box handlers for token verification and authorization based on the OpenAPI specification.
Core Handlers
JwtVerifyHandler
The JwtVerifyHandler is the most commonly used handler in this module. It performs the following tasks:
- Token Verification: Validates the signature and expiration of the OAuth 2.0 JWT access token.
- Scope Authorization: Automatically checks the
scopeorscpclaim in the JWT against the required scopes defined for each operation in the OpenAPI specification. - Integration: Works seamlessly with
openapi-metato identify the current operation and its security requirements.
SimpleJwtVerifyHandler
The SimpleJwtVerifyHandler is a lightweight alternative to the standard JwtVerifyHandler. It is used when scope validation is not required. It still verifies the JWT signature and expiration but skips the complex authorization checks against the OpenAPI spec.
SwtVerifyHandler
The SwtVerifyHandler is designed for Simple Web Tokens (SWT). Unlike JWTs, which are self-contained, SWTs often require token introspection against an OAuth 2.0 provider. This handler manages the introspection process and validates the token’s validity and associated scopes.
Configuration
The security handlers are primarily configured via security.yml. Key configuration options include:
- enableVerifyJwt: Toggle for JWT verification.
- enableVerifyScope: Toggle for scope-based authorization.
- jwt: Configuration for JWT verification (JWK URLs, certificates, etc.).
- swt: Configuration for SWT introspection.
- skipPathPrefixes: A list of path prefixes that should bypass security checks (e.g.,
/health,/info). - passThroughClaims: Enables passing specific claims from the token into request headers for downstream use.
Unified Security
For complex scenarios where multiple security methods (Bearer, Basic, ApiKey) need to be supported simultaneously within a single gateway or service, the UnifiedSecurityHandler (from the unified-security module) can be used to coordinate these different handlers based on the request path and headers.
Hot Reload Support
All handlers in the openapi-security module support hot-reloading of their configurations. If the security.yml or related configuration files are updated on the file system, the handlers will automatically detect the changes and re-initialize their verifiers without requiring a server restart.
Integration with OpenAPI Meta
The openapi-security handlers depend on the OpenApiHandler (from the openapi-meta module) being placed earlier in the request chain. The OpenApiHandler identifies the matching operation in the specification and attaches it to the request, which the security handlers then use for validation.
Best Practices
- Enable Scope Verification: Always define required scopes in your OpenAPI specification and ensure
enableVerifyScopeis set totrue. - Use Skip Paths Sparingly: Only skip security for public-facing informational endpoints.
- Secure Configuration: Use the encrypted configuration feature of
light-4jto protect sensitive information like client secrets or certificate passwords.
OpenAPI Validator
description: OpenAPI Validator Module
OpenAPI Validator
The openapi-validator module provides comprehensive request and response validation against an OpenAPI Specification 3.0. It ensures that incoming requests and outgoing responses adhere to the schemas, parameters, and constraints defined in your API specification.
Overview
In a contract-first development approach, the OpenAPI specification serves as the “source of truth.” The openapi-validator middleware automates the enforcement of this contract, reducing the need for manual validation logic in your business handlers and improving API reliability.
Core Components
ValidatorHandler
The main middleware entry point. It identifies whether validation is required for the current request and coordinates the RequestValidator and ResponseValidator.
RequestValidator
Validates all aspects of an incoming HTTP request:
- Path Parameters: Checks if path variables match the spec.
- Query Parameters: Validates presence, type, and constraints of query strings.
- Header Parameters: Validates required headers and their values.
- Cookie Parameters: Validates cookie values if defined.
- Request Body: Validates the JSON payload against the operation’s requestBody schema.
ResponseValidator
Validates the outgoing response from the server. This is typically disabled in production for performance reasons but is invaluable during development and testing to ensure the server respects its own contract.
SchemaValidator
The underlying engine (built on networknt/json-schema-validator) that performs the actual JSON Schema validation for bodies and complex parameters.
Configuration
The module is configured via openapi-validator.yml.
Key Properties
| Property | Default | Description |
|---|---|---|
enabled | true | Globally enables or disables the validator. |
logError | true | If true, validation errors are logged to the console/file. |
legacyPathType | false | If true, uses the legacy dot-separated path format in error messages instead of JSON Pointers. |
skipBodyValidation | false | Useful for gateways or proxies that want to validate headers/parameters but pass the body through without parsing. |
validateResponse | false | Enables validation of outgoing responses. |
handleNullableField | true | If true, treats fields explicitly marked as nullable: true in the spec correctly. |
skipPathPrefixes | [] | A list of path prefixes to skip validation for (e.g., /health, /info). |
Features
Hot Reload Support
The validator supports hot-reloading. If the openapi-validator.yml or the underlying openapi.yml specification is updated on the filesystem, the handler will automatically detect the change and re-initialize the internal validators without a server restart.
Multiple Specification Support
For gateway use cases where a single server might handle multiple APIs, the validator can maintain separate validation contexts for different path prefixes, each associated with its own OpenAPI specification.
Integration with BodyHandler
The RequestValidator automatically retrieves the parsed body from the BodyHandler. To validate the request body, ensure that BodyHandler is placed before ValidatorHandler in your handler chain.
Error Handling
When validation fails, the handler returns a standardized error response with a 400 Bad Request status (for requests) or logs an error (for responses). The error body follows the standard light-4j status format, including a unique error code and a descriptive message pointing to the specific field that failed validation.
Best Practices
- Development vs. Production: Always enable
validateResponseduring development and CI/CD testing, but consider disabling it in production for high-throughput services. - Contract-First: Keep your
openapi.ymlaccurate. The validator is only as good as the specification it follows. - Gateway Optimization: Use
skipBodyValidation: truein gateways if the backend service is also performing validation, to save on CPU cycles spent parsing large JSON payloads twice.
Specification
description: Specification Module
Specification Module
The specification module in light-rest-4j provides a set of handlers to serve and display the API specification (Swagger/OpenAPI) of the service. This is particularly useful for exposing documentation endpoints directly from the running service.
Overview
Exposing the API contract via the service itself ensures that the documentation is always in sync with the deployed version. The specification module provides handlers for:
- Serving the raw specification file (e.g.,
openapi.yaml). - Rendering a Swagger UI instance to interact with the API.
- Serving a favicon for the UI.
Components
SpecDisplayHandler
Serves the raw content of the specification file. It supports different content types (defaulting to text/yaml) and loads the file directly from the filesystem or configuration folder.
SpecSwaggerUIHandler
Renders a simple HTML page that embeds Swagger UI (via CDN). It is pre-configured to point to the /spec.yaml endpoint (served by SpecDisplayHandler) to load the API definition.
FaviconHandler
A utility handler that serves a favicon.ico file, commonly requested by browsers when accessing the Swagger UI.
Configuration
The module is configured via specification.yml.
Properties
| Property | Default | Description |
|---|---|---|
fileName | openapi.yaml | The path and name of the specification file to be served. |
contentType | text/yaml | The MIME type to be used when serving the specification file. |
Features
Hot Reload support
The specification module fully supports standardized hot-reloading. If the specification.yml is updated, the handlers will automatically refresh their internal configuration without requiring a server restart.
Integration with ModuleRegistry
All handlers in this module register themselves with the ModuleRegistry on startup. This allows administrators to verify the loaded configuration via the /server/info endpoint.
Usage
To use these handlers, you need to register them in your handler.yml.
Example handler.yml registration:
handlers:
- com.networknt.specification.SpecDisplayHandler@spec
- com.networknt.specification.SpecSwaggerUIHandler@swagger
- com.networknt.specification.FaviconHandler@favicon
paths:
- path: '/spec.yaml'
method: 'get'
handler:
- spec
- path: '/specui'
method: 'get'
handler:
- swagger
- path: '/favicon.ico'
method: 'get'
handler:
- favicon
Security Note
Since the specification handlers expose internal API details, it is recommended to protect these endpoints using the AccessControlHandler or similar security mechanisms if the documentation should not be publicly accessible.
Light-hybrid-4j
RPC Router
The rpc-router is a core module of the light-hybrid-4j framework. It provides a high-performance routing and validation mechanism that enables a single server instance to host multiple, independent service handlers (RPC-style).
Overview
In the light-hybrid-4j architecture, the rpc-router serves as the primary dispatcher for incoming requests. Unlike traditional RESTful routing based on URL paths and HTTP verbs, the RPC router typically uses a single endpoint (e.g., /api/json) and determines the target logic based on a serviceId (or cmd) specified in the request payload.
Key Responsibilities:
- Service Discovery: Dynamically discovering handlers annotated with
@ServiceHandlerat startup. - Request Dispatching: Mapping incoming JSON or Form payloads to the correct
HybridHandler. - Schema Validation: Validating request payloads against JSON schemas defined in
spec.yamlfiles. - Specification Management: Merging multiple
spec.yamlfiles from various service JARs into a single runtime context. - Configuration Management: Providing a standardized, hot-reloadable configuration via
rpc-router.yml.
Core Components
1. SchemaHandler
The SchemaHandler is a middleware handler that performs the initial processing of RPC requests.
- Spec Loading: At startup, it scans the classpath for all instances of
spec.yamland merges them. - Validation: For every request, it identifies the
serviceId, retrieves the associated schema, and validates thedataportion of the payload. - Hot Reload: Supports refreshing the merged specifications at runtime without a server restart.
2. JsonHandler
The JsonHandler is the final dispatcher in the chain for JSON-based RPC calls.
- Service Execution: It retrieves the pre-parsed
serviceIdanddatafrom the exchange attachments (populated bySchemaHandler) and invokes the correspondingHybridHandler.handle()method.
3. RpcRouterConfig
This class manages the configuration found in rpc-router.yml. It supports:
- Standardized Loading: Singleton-based access via
RpcRouterConfig.load(). - Hot Reload: Thread-safe configuration refreshing via
RpcRouterConfig.reload(). - Module Info: Automatic registration with the
ModuleRegistryfor runtime monitoring.
4. RpcStartupHookProvider
A startup hook that uses ClassGraph to scan configured packages for any class implementing HybridHandler and bearing the @ServiceHandler annotation.
Configuration (rpc-router.yml)
| Property | Default | Description |
|---|---|---|
handlerPackages | [] | List of package prefixes to scan for service handlers. |
jsonPath | /api/json | The endpoint for JSON-based RPC requests. |
formPath | /api/form | The endpoint for Form-based RPC requests. |
registerService | false | If enabled, registers each discovered service ID with the discovery registry (e.g., Consul). |
Request Structure
A typical RPC request to the rpc-router looks as follows:
{
"host": "lightapi.net",
"service": "petstore",
"action": "getPetById",
"version": "1.0.0",
"data": {
"id": 123
}
}
The router constructs the internal serviceId as host/service/action/version (e.g., lightapi.net/petstore/getPetById/1.0.0) to locate the handler.
Implementation Example
1. The Service Handler
@ServiceHandler(id = "lightapi.net/petstore/getPetById/1.0.0")
public class GetPetById implements HybridHandler {
@Override
public ByteBuffer handle(HttpServerExchange exchange, Object data) {
Map<String, Object> params = (Map<String, Object>) data;
// Business logic...
return NioUtils.toByteBuffer("{\"id\": 123, \"name\": \"Fluffy\"}");
}
}
2. The Specification (spec.yaml)
Place this in src/main/resources of your service module:
host: lightapi.net
service: petstore
action:
- name: getPetById
version: 1.0.0
handler: getPetById
request:
schema:
type: object
properties:
id: { type: integer }
required: [id]
Best Practices
- Restrict Scanning: Always specify
handlerPackagesinrpc-router.ymlto minimize startup time. - Contract-First: Define your
spec.yamlrigorously. The router uses these schemas to protect your handlers from invalid data. - Hot Reload: Use the
/server/infoendpoint to verify that your configuration and specifications have been updated correctly after a reload.
RPC Security
The rpc-security module in light-hybrid-4j provides security handlers specifically designed for the hybrid framework’s routing mechanism. It extends the core security capabilities of light-4j to work seamlessly with the rpc-router’s service dispatching model.
Overview
In light-hybrid-4j, requests are routed based on a service ID in the payload (e.g., lightapi.net/petstore/getPetById/1.0.0) rather than URL paths. This difference requires specialized security handlers that can:
- Verify JWT tokens protecting the RPC endpoint.
- Extract required scopes from the target service’s schema (specifically the
spec.yamlloaded by therpc-router). - Authorize the request by comparing the token’s scopes against the service’s required scopes.
Core Components
1. HybridJwtVerifyHandler
This handler extends AbstractJwtVerifyHandler to provide JWT validation for hybrid services.
- Audit Info Integration: It expects the
SchemaHandler(fromrpc-router) to have already parsed the request and populated theauditInfoattachment map with theHYBRID_SERVICE_MAP. - Dynamic Scope Resolution: Instead of hardcoding scopes or using Swagger endpoints, it retrieves the required scopes directly from the
scopeproperty defined in the service’sspec.yaml. - Skip Auth Support: It respects the
skipAuthflag in the service specification, allowing individual handlers to be public while others remain protected.
2. AccessControlHandler
Provides fine-grained access control based on rule definitions.
- Rule-Based Access: Can enforce complex authorization rules (e.g., “deny if IP is X” or “allow if time is Y”) beyond simple RBAC.
- Runtime Configuration: Supports hot-reloading of access control rules and settings via
access-control.yml.
Configuration
This module relies on security.yml (shared with the core framework) and specific service definitions in spec.yaml.
security.yml
Standard configuration for JWT verification:
enableVerifyJwt: true
enableVerifyScope: true
enableJwtCache: true
access-control.yml
Configuration for the AccessControlHandler:
enabled: true
accessRuleLogic: 'any' # or 'all'
defaultDeny: true
Usage Example
1. Register Handlers
In your handler.yml, add the security handlers to your chain after the SchemaHandler but before the JsonHandler. The SchemaHandler is required first to resolve the service definition.
handlers:
- com.networknt.rpc.router.SchemaHandler@schema
- com.networknt.rpc.security.HybridJwtVerifyHandler@jwt
- com.networknt.rpc.router.JsonHandler@json
paths:
- path: '/api/json'
method: 'post'
handler:
- schema
- jwt
- json
2. Define Security in spec.yaml
In your hybrid service’s spec.yaml file, define the scope required to access the action, or set skipAuth to true for public endpoints.
Example: Protected Endpoint
service: petstore
action:
- name: getPetById
version: 1.0.0
handler: getPetById
scope: "petstore.r"
request: ...
- The
HybridJwtVerifyHandlerwill extractpetstore.rand ensure the caller’s JWT has this scope.
Example: Public Endpoint
service: petstore
action:
- name: login
version: 1.0.0
handler: loginHandler
skipAuth: true
request: ...
- The handler will skip JWT verification for this action.
Hot Reload
The handlers in this module support hot-reloading. If security.yml or access-control.yml are updated via the config server, the changes will be applied dynamically without restarting the server.
Light-Graphql-4j
Graphql Common
Graphql Validator
Graphql Security
Graphql Router
Light-Kafka
Kafka Common
The kafka-common module is a core shared library for light-kafka and its related microservices (like the kafka-sidecar). It encapsulates common configuration management, serialization/deserialization utilities, and shared constants.
Key Features
- Centralized Configuration:
KafkaProducerConfig: Manages configuration for Kafka producers (topic defaults, serialization formats, audit settings).- Hot Reload: Supports dynamic configuration updates for
kafka-producer.ymland others viaConfig.reload(). - Module Registry: Automatically registers configuration modules with the server’s
ModuleRegistryfor runtime observability.
- Shared Utilities:
LightSchemaRegistryClient: A lightweight client for interacting with the Confluent Schema Registry.AvroConverter&AvroDeserializer: Helpers for handling Avro data formats.KafkaConfigUtils: Utilities for parsing and mapping configuration properties.
Configuration Classes
KafkaProducerConfig
Responsible for loading kafka-producer.yml. Key properties include:
topic: Default topic name.auditEnabled: Whether to send audit logs.auditTarget: Topic or logfile for audit data.injectOpenTracing: Whether to inject OpenTracing headers.
KafkaConsumerConfig
Responsible for loading kafka-consumer.yml.
maxConsumerThreads: Concurrency settings.topic: List of topics to subscribe to.deadLetterEnabled: DLQ configuration.
KafkaStreamsConfig
Responsible for loading kafka-streams.yml.
cleanUp: State store cleanup settings.applicationId: Streams application ID.
Integration
Include kafka-common in your service to leverage shared Kafka capabilities:
<dependency>
<groupId>com.networknt</groupId>
<artifactId>kafka-common</artifactId>
<version>${version.light-kafka}</version>
</dependency>
Hot Reload
Configurations in this module invoke ModuleRegistry.registerModule upon load and reload. This ensures that any changes pushed from the config server are immediately reflected in the application state and visible via the server’s info endpoints.
Kafka Consumer
The kafka-consumer module provides a RESTful interface for consuming records from Kafka topics. It abstracts the complexity of the native Kafka Consumer API, handling instance management, thread pooling, and record serialization/deserialization.
Core Components
KafkaConsumerManager
Manages the lifecycle of Kafka consumers.
- Instance Management: Creates and caches
KafkaConsumerinstances based on configuration. - Threading: Uses
KafkaConsumerThreadPoolExecutorto handle concurrent read operations. - Task Scheduling: Manages long-polling read tasks using a
DelayQueueandReadTaskSchedulerThreadto efficiently handlepoll()operations without blocking threads unnecessarily. - Auto-Cleanup: A background thread (
ExpirationThread) automatically closes idle consumers to reclaim resources.
LightConsumer
An interface defining the contract for consumer implementations, potentially allowing for different underlying consumer strategies (though KafkaConsumerManager is the primary implementation).
KafkaConsumerReadTask
Encapsulates a single read request. It iterates over the Kafka consumer records, buffering them until the response size criteria (min/max bytes) are met or a timeout occurs.
Configuration
This module relies on kafka-consumer.yml, managed by KafkaConsumerConfig (from the kafka-common module).
Key Settings:
maxConsumerThreads: Controls the thread pool size for consumer operations.server.id: Unique identifier for the server instance, used for consumer naming.consumer.instance.timeout.ms: Idle timeout for consumer instances.
Usage
This module is typically used by the kafka-sidecar or other microservices that need to expose Kafka consumption over HTTP/REST.
The KafkaConsumerManager is usually initialized at application startup:
KafkaConsumerConfig config = KafkaConsumerConfig.load();
KafkaConsumerManager manager = new KafkaConsumerManager(config);
Kafka Producer
description: Kafka Producer Module
Kafka Producer
The kafka-producer module provides an abstraction for key features of the light-kafka ecosystem, including auditing, schema validation, and header injection. It supports publishing to Kafka with both key and value serialization via Confluent Schema Registry (Avro, JSON Schema, Protobuf).
Core Components
SidecarProducer
The primary producer implementation.
- Schema Integration: Integrated with
SchemaRegistryClientto handle serialization of keys and values. Caches schema lookups for performance. - Audit Integration: Automatically generates and sends audit records (success/failure) for each produced message if configured.
- Asynchronous: Returns
CompletableFuture<ProduceResponse>for non-blocking operation. - Headers: Propagates
traceabilityIdandcorrelationIdinto Kafka message headers for end-to-end tracing.
NativeLightProducer
An interface extension which exposes the underlying KafkaProducer instance.
SerializedKeyAndValue
Helper class that holds the serialized bytes for key and value along with target partition and headers.
Configuration
This module relies on kafka-producer.yml, managed by KafkaProducerConfig (from the kafka-common module).
Key Settings:
topic: Default target topic.keyFormat/valueFormat: Serialization format (e.g.,jsonschema,avro,string).auditEnabled: Toggle for audit logging.injectOpenTracing: Optional integration with OpenTracing.
Usage
Initialize SidecarProducer at application startup. It automatically loads configuration and registers itself.
NativeLightProducer producer = new SidecarProducer();
producer.open();
// Usage
ProduceRequest request = ...;
producer.produceWithSchema(topic, serviceId, partition, request, headers, auditList);
Kafka Streams
The kafka-streams module provides a lightweight wrapper around the Kafka Streams API, simplifying common tasks such as configuration loading, audit logging, and Dead Letter Queue (DLQ) integration.
Core Components
LightStreams
An interface that helps bootstrap a Kafka Streams application. It typically includes:
- startStream(): Initializes the
KafkaStreamsinstance with the provided topology and configuration. It automatically adds audit and exception handling sinks to the topology if configured. - getKafkaValueByKey(): A utility to query state stores (interactive queries) with retry logic for handling rebalances.
- getAllKafkaValue(): Queries all values from a state store.
Configuration
This module relies on kafka-streams.yml, managed by KafkaStreamsConfig (from the kafka-common module).
Key Settings:
application.id: The unique identifier for the streams application.bootstrap.servers: Kafka cluster connection string.cleanUp: If set totrue, the application usually performs a local state store cleanup on startup (useful for resetting state).auditEnabled: When true, an “AuditSink” is added to the topology to capture audit events.deadLetterEnabled: When true, automatically configures DLQ sinks for error handling based on provided metadata.
Usage
To use this module, implement LightStreams or call its default methods from your startup logic:
// Load config
KafkaStreamsConfig config = KafkaStreamsConfig.load();
// Build Topology
Topology topology = ...;
// Start Stream
KafkaStreams streams = startStream(ip, port, topology, config, dlqMap, auditParentNames);
The module automatically handles the registration of the configuration module with the server for runtime observability.
Kafka-Sidecar
Kafka Streams Health Check
When operating a Kafka sidecar that runs Kafka Streams applications, it is crucial to monitor the health of these streams. The SidecarHealthHandler provides a health check endpoint that verifies if all registered Kafka Streams instances are in RUNNING or REBALANCING state.
Registering and Unregistering Kafka Streams
To enable health monitoring for your Kafka Streams application, you must verify that your streams instance is registered with the KafkaStreamsRegistry. You should also unregister it when the application shuts down.
Usage
In your streams application startup hook or initialization logic, after starting the KafkaStreams instance, register it:
import com.networknt.kafka.streams.KafkaStreamsRegistry;
import org.apache.kafka.streams.KafkaStreams;
// ... initialize streams ...
streams.start();
// Register the streams instance for health checks
KafkaStreamsRegistry.register("my-streams-app", streams);
The SidecarHealthHandler will automatically discover all registered streams and include them in the health check. If any registered stream is not in a healthy state, the health check endpoint will return ERROR (status 500 equivalent logic, though specifically returning a string).
To prevent the health check from returning an error during a graceful server shutdown, you should unregister the stream instance in your application’s shutdown hook or close() method:
// ... inside shutdown hook or LightStreams close() loop ...
if (streams != null) {
streams.close();
}
// Unregister the streams instance
KafkaStreamsRegistry.unregister("my-streams-app");
Example
Here is an example from WordCountStreams:
@Override
public void start(String ip, int port) {
// ... configuration ...
wordCountStreams = new KafkaStreams(topology.build(), streamsProps);
// ...
wordCountStreams.start();
// Registration
KafkaStreamsRegistry.register("WordCountStreams", wordCountStreams);
}
@Override
public void close() {
if (wordCountStreams != null) {
wordCountStreams.close();
}
// Unregistration
KafkaStreamsRegistry.unregister("WordCountStreams");
}
Example Applications
There are two example applications available in the light-example-4j repository that demonstrate how to implement Kafka Streams with health check registration:
-
Kafka Streams DSL (WordCount)
This example demonstrates a simple word count application using the high-level Kafka Streams DSL.
-
Kafka Streams Processor API (UserQuery)
This example demonstrates a more complex application using the lower-level Processor API for querying user data.
Both examples show how to:
- Configure the Kafka Streams application using
KafkaStreamsConfig. - Start the
KafkaStreamsinstance. - Register the instance with
KafkaStreamsRegistryto enable health monitoring viaSidecarHealthHandler. - Unregister the instance during the application shutdown lifecycle using
KafkaStreamsRegistry.unregister()to cleanly handle server shutdown.
Light-spa-4j
MSAL Exchange Handler
The msal-exchange module in light-spa-4j provides a handler to exchange Microsoft Authentication Library (MSAL) tokens for internal application session cookies. This mechanism effectively serves as a Backend-For-Frontend (BFF) authentication layer for Single Page Applications (SPAs).
Core Components
MsalTokenExchangeHandler
This middleware handler intercepts requests to specific paths (configured via msal-exchange.yml) to perform token exchange or logout operations.
- Token Exchange: Validates the incoming Microsoft Bearer token, performs a token exchange via the OAuth provider, and sets secure, HTTP-only session cookies (
accessToken,refreshToken,csrf, etc.) for subsequent requests. - Logout: Clears all session cookies to securely log the user out.
- Session Management: On subsequent requests, it validates the JWT in the cookie, checks for CSRF token consistency, and handles automatic token renewal if the session is nearing expiration.
MsalExchangeConfig
Configuration class that loads settings from msal-exchange.yml. It supports hot reloading and module registration.
Configuration
The module is configured via msal-exchange.yml.
Key Settings:
enabled: Enable or disable the handler.exchangePath: Partial path for triggering token exchange (default:/auth/ms/exchange).logoutPath: Partial path for triggering logout (default:/auth/ms/logout).cookieDomain/cookiePath: Scope configuration for the session cookies.cookieSecure: Whether to mark cookies as Secure (HTTPS only).sessionTimeout: Max age for the session cookies.
Example Configuration:
enabled: true
exchangePath: /auth/ms/exchange
logoutPath: /auth/ms/logout
cookieDomain: localhost
cookiePath: /
cookieSecure: false
sessionTimeout: 3600
rememberMeTimeout: 604800
Stateless Auth Handler
The stateless-auth module in light-spa-4j provides a robust, stateless authentication mechanism for Single Page Applications (SPAs). It handles the OAuth 2.0 Authorization Code flow and manages the resulting tokens using secure, HTTP-only cookies, eliminating the need for client-side storage (like localStorage).
Core Components
StatelessAuthHandler
This middleware implements the Backend-For-Frontend (BFF) pattern:
- Authorization: Intercepts requests to
/authorization, exchanges the authorization code for access and refresh tokens from the OAuth 2.0 provider. - Cookie Management: Stores tokens in secure, HTTP-only cookies (
accessToken,refreshToken) and exposes non-sensitive user info (id, roles) in JavaScript-readable cookies. - CSRF Protection: Generates and validates Double Submit Cookies (CSRF token in header vs. JWT claim) to prevent Cross-Site Request Forgery.
- Token Renewal: Automatically renews expiring access tokens using the refresh token when the session is nearing timeout (default check at < 1.5 minutes remaining).
- Logout: Handles requests to
/logoutby invalidating all session cookies.
StatelessAuthConfig
Configuration class that loads settings from statelessAuth.yml. Supports hot reloading and module registration.
Configuration
The module is configured via statelessAuth.yml.
Key Settings:
enabled: Enable or disable the handler.authPath: Path to handle the authorization code callback (default:/authorization).cookieDomain: Domain for the session cookies (e.g.,localhostor your domain).cookiePath: Path scope for cookies (default:/).cookieSecure: Set totruefor HTTPS environments.sessionTimeout: Expiration time for session cookies.redirectUri: Where to redirect the SPA after successful login.enableHttp2: Whether to use HTTP/2 for backend token calls.
Social Login Support: The configuration also includes sections for configuring social login providers directly if not federating through a central IdP:
googlePath,googleClientId,googleRedirectUrifacebookPath,facebookClientIdgithubPath,githubClientId
WebSocket Security Design
WebSockets present unique security challenges compared to standard REST APIs, primarily because the browser’s WebSocket API does not support custom HTTP headers (like X-CSRF-TOKEN or Authorization) during the initial connection handshake.
This document outlines the security architecture for WebSockets in the light-spa-4j framework, focusing on authentication and CSRF protection.
Architectual Overview
- Handshake Authentication: The BFF (Backend-for-Frontend), such as
light-gateway, validates the request using secure,HttpOnlycookies (accessToken). - CSRF Protection: To prevent CSRF attacks on the handshake request, the BFF requires a matching CSRF token.
- Backend Proxying: Once authenticated, the BFF establishes a secure server-to-server WebSocket connection to the backend service, propagating claims via standard headers.
The CSRF Challenge
The standard Double-Submit Cookie pattern for CSRF protection requires the client to send a token in a cookie AND the same token in a custom header. The server compares them to ensure the request originated from a trusted source.
Since the browser WebSocket constructor does not allow custom headers, we use the Sec-WebSocket-Protocol (Subprotocols) as a secure side-channel.
Proposed Solution: Subprotocol Side-Channel
1. Frontend Implementation (Chat.tsx)
The frontend retrieves the csrf token from the standard cookie and passes it as a subprotocol string, prefixed with csrf..
const csrfToken = cookies.get('csrf');
const protocols = csrfToken ? [`csrf.${csrfToken}`] : [];
// Initializing WebSocket with the token in subprotocols
const socket = new WebSocket(url.toString(), protocols);
2. BFF Middleware (StatelessAuthHandler)
The BFF middleware (e.g., StatelessAuthHandler or MsalTokenExchangeHandler) extracts the token from the Sec-WebSocket-Protocol header during the handshake.
// StatelessAuthHandler.java
String headerCsrf = exchange.getRequestHeaders().getFirst("Sec-WebSocket-Protocol");
if (headerCsrf != null && headerCsrf.startsWith("csrf.")) {
headerCsrf = headerCsrf.substring(5); // Remove "csrf." prefix
}
// Proceed to compare with token from JWT/Cookie
if (!headerCsrf.equals(jwtCsrf)) {
throw new Exception("CSRF Validation Failed");
}
Security Advantages
- No URL Logging: Unlike query parameters, the
Sec-WebSocket-Protocolheader is not part of the URL and is not recorded in standard web server access logs or browser history. - Double-Submit Security: Maintains the security profile of the existing REST-based CSRF protection.
- TLS Protection: The entire handshake is protected by TLS (WSS).
Backend Propagation
When the BFF proxies the connection to the backend (e.g., llmchat-server), it acts as a standard HTTP client. It can then:
- Attach a standard
Authorization: Bearer <JWT>header. - Propagate User IDs and other claims via custom
X-headers. - Since it is a server-to-server connection, it is not restricted by browser API limitations.
Light-chaos-monkey
Chaos Monkey
description: Chaos Monkey Module
Chaos Monkey
The chaos-monkey module in light-chaos-monkey allows developers and operators to inject various types of failures (assaults) into a running service to test its resilience. It provides API endpoints to query and update assault configurations dynamically at runtime.
Core Components
ChaosMonkeyConfig
Configuration class that loads settings from chaos-monkey.yml. It defines whether the chaos monkey capability is enabled globally.
ChaosMonkeyGetHandler
A LightHttpHandler that retrieves the current configuration of all registered assault handlers.
- Endpoint:
GET /chaosmonkey(typically configured viaopenapi.yamlorhandler.yml) - Response: A JSON object containing the current configurations for Exception, KillApp, Latency, and Memory assaults.
ChaosMonkeyPostHandler
A LightHttpHandler that allows updating a specific assault configuration on the fly.
- Endpoint:
POST /chaosmonkey?assault={handlerClassName} - Request:
assaultquery parameter specifying the target handler class (e.g.,com.networknt.chaos.LatencyAssaultHandler), and a JSON body matching that handler’s configuration structure. - Behavior: Updates the static configuration of the specified assault handler and triggers a re-registration of the module config.
Assault Types
- ExceptionAssault: Injects exceptions into request handling.
- KillappAssault: Terminates the application instance (use with caution!).
- LatencyAssault: Injects artificial delays (latency) into requests.
- MemoryAssault: Consumes heaps memory to simulate memory pressure/leaks.
Configuration
The module itself is configured via chaos-monkey.yml.
Key Settings:
enabled: Global switch to enable or disable the chaos monkey endpoints (default:false).
Example Configuration:
enabled: true
Each assault type has its own specific configuration (e.g., latency-assault.yml, exception-assault.yml) which controls the probability and specifics of that attack.
Exception Assault
description: Exception Assault Handler
Exception Assault
The exception-assault module in light-chaos-monkey allows you to inject random exceptions into your application’s request processing pipeline. This helps verify that your application and its consumers gracefully handle unexpected failures.
Core Components
ExceptionAssaultHandler
The middleware handler responsible for injecting exceptions.
- Behavior: When enabled and triggered (based on the
levelconfiguration), it throws anAssaultException. This exception disrupts the normal request flow, simulating an internal server error or unexpected crash. - Bypass: Can be configured to bypass the assault logic (e.g., for specific requests or globally until ready).
ExceptionAssaultConfig
Configuration class that loads settings from exception-assault.yml.
Configuration
The module is configured via exception-assault.yml.
Key Settings:
enabled: Enable or disable the handler (default:false).bypass: Iftrue, the assault is skipped even if enabled (default:true). Use this to deploy the handler but keep it inactive until needed.level: The probability of an attack, defined as “1 out of N requests”.level: 5means approximately 1 in 5 requests (20%) will be attacked.level: 1means every request is attacked.
Example Configuration:
enabled: true
bypass: false
level: 5
Killapp Assault
The killapp-assault module in light-chaos-monkey allows you to inject a termination assault into your application. When triggered, it gracefully shuts down the server and then terminates the JVM process. This is the most destructive type of assault and should be used with extreme caution.
Core Components
KillappAssaultHandler
The middleware handler responsible for killing the application.
- Behavior: When enabled and triggered (based on the
levelconfiguration), it callsServer.shutdown()to stop the light-4j server and thenSystem.exit(0)to terminate the process. - Safety: Ensure that your deployment environment (e.g., Kubernetes, Docker Swarm) is configured to automatically restart the application after it terminates, otherwise the service will remain down.
KillappAssaultConfig
Configuration class that loads settings from killapp-assault.yml.
Configuration
The module is configured via killapp-assault.yml.
Key Settings:
enabled: Enable or disable the handler (default:false).bypass: Iftrue, the assault is skipped even if enabled (default:true).level: The probability of an attack, defined as “1 out of N requests”.level: 10means approximately 1 in 10 requests (10%) will trigger a shutdown.level: 1means the first request will terminate the app.
Example Configuration:
enabled: true
bypass: false
level: 100
Latency Assault
The latency-assault module in light-chaos-monkey allows you to inject artificial delays (latency) into your application’s request processing. This is useful for testing how your application and its downstream consumers handle slow responses and potential timeouts.
Core Components
LatencyAssaultHandler
The middleware handler responsible for injecting latency.
- Behavior: When enabled and triggered (based on the
levelconfiguration), it calculates a random sleep duration within the configured range and puts the current thread to sleep usingThread.sleep(). - Trigger: The assault is triggered based on a probability defined by the
level.
LatencyAssaultConfig
Configuration class that loads settings from latency-assault.yml.
Configuration
The module is configured via latency-assault.yml.
Key Settings:
enabled: Enable or disable the handler (default:false).bypass: Iftrue, the assault is skipped even if enabled (default:true).level: The probability of an attack, defined as “1 out of N requests”.level: 10means approximately 1 in 10 requests (10%) will be attacked.level: 1means every request is attacked.
latencyRangeStart: The minimum delay in milliseconds (default:1000).latencyRangeEnd: The maximum delay in milliseconds (default:3000).
Example Configuration:
enabled: true
bypass: false
level: 5
latencyRangeStart: 500
latencyRangeEnd: 2000
Memory Assault
The memory-assault module in light-chaos-monkey allows you to inject memory pressure into your application. When triggered, it allocates memory in increments until a target threshold is reached, holds that memory for a specified duration, and then releases it. This is useful for testing how your application behaves under low-memory conditions and identifying potential memory-related issues.
Core Components
MemoryAssaultHandler
The middleware handler responsible for consuming memory.
- Behavior: When enabled and triggered (based on the
levelconfiguration), it starts an asynchronous process to “eat” free memory. It incrementally allocates byte arrays until the total memory usage reaches thememoryFillTargetFractionof the maximum heap size. - Safety: The handler includes logic to prevent immediate OutOfMemoryErrors by controlling the increment size and respecting the maximum target fraction. It also performs a
System.gc()after releasing the allocated memory to encourage the JVM to reclaim the space.
MemoryAssaultConfig
Configuration class that loads settings from memory-assault.yml.
Configuration
The module is configured via memory-assault.yml.
Key Settings:
enabled: Enable or disable the handler (default:false).bypass: Iftrue, the assault is skipped even if enabled (default:true).level: The probability of an attack, defined as “1 out of N requests”.level: 10means approximately 1 in 10 requests (10%) will trigger the memory assault.level: 1means every request can trigger it (though typically it runs until finished once started).
memoryMillisecondsHoldFilledMemory: Duration (in ms) to hold the allocated memory once the target fraction is reached (default:90000).memoryMillisecondsWaitNextIncrease: Time (in ms) between allocation increments (default:1000).memoryFillIncrementFraction: Fraction of available free memory to allocate in each increment (default:0.15).memoryFillTargetFraction: The target fraction of maximum heap memory to occupy (default:0.25).
Example Configuration:
enabled: true
bypass: false
level: 10
memoryFillTargetFraction: 0.5
memoryMillisecondsHoldFilledMemory: 60000
Light-sws-lambda
Lambda Invoker
The lambda-invoker module provides a way to invoke AWS Lambda functions from a light-4j application. It includes a configuration class and an HTTP handler that can be used to proxy requests to Lambda functions.
Core Components
LambdaInvokerConfig
The configuration class for the Lambda invoker. It loads settings from lambda-invoker.yml.
- region: The AWS region where the Lambda functions are deployed.
- endpointOverride: Optional URL to override the default AWS Lambda endpoint.
- apiCallTimeout: Timeout for the entire API call in milliseconds.
- apiCallAttemptTimeout: Timeout for each individual API call attempt in milliseconds.
- maxRetries: Maximum number of retries for the invocation.
- maxConcurrency: Maximum number of concurrent requests to Lambda.
- functions: A map of endpoints to Lambda function names or ARNs.
- metricsInjection: Whether to inject Lambda response time metrics into the metrics handler.
LambdaFunctionHandler
An HTTP handler that proxies requests to AWS Lambda functions based on the configured mapping.
- Behavior: It converts the incoming
HttpServerExchangeinto anAPIGatewayProxyRequestEvent, invokes the configured Lambda function asynchronously using theLambdaAsyncClient, and then converts theAPIGatewayProxyResponseEventback into the HTTP response. - Metrics: If enabled, it records the total time spent in the Lambda invocation and injects it into the metrics handler.
Configuration
Example lambda-invoker.yml:
region: us-east-1
apiCallTimeout: 60000
apiCallAttemptTimeout: 20000
maxRetries: 2
maxConcurrency: 50
functions:
/v1/pets: petstore-function
/v1/users: user-service-function
metricsInjection: true
metricsName: lambda-response
Usage
To use the LambdaFunctionHandler, add it to your handler.yml chain:
- com.networknt.aws.lambda.LambdaFunctionHandler@lambda
And configure the paths in handler.yml:
paths:
- path: '/v1/pets'
method: 'GET'
handler:
- lambda
STS Support
The lambda-invoker module supports AWS Security Token Service (STS) to obtain temporary, limited-privilege assumed-role credentials for invoking Lambda functions. This is an alternative to directly using long-lived static IAM access keys and and it is a fundamental component of AWS Identity and Access Management (IAM) used to enhance security by following the principle of least privilege.
Key Features
- Temporary Credentials: Provides short-lived credentials (access key, secret key, and token) that expire, reducing risks from compromised keys.
- AssumeRole: Obtains temporary credentials for cross-account access or delegated permissions.
- Automatic Managed Refresh: The
LambdaFunctionHandlerleverages the AWS SDK’sStsAssumeRoleCredentialsProviderto handle token refresh automatically and asynchronously.
Configuration
To enable STS support, you need to add the following configuration to your lambda-invoker.yml:
- stsEnabled: Set to
trueto enable STS support. Default isfalse. - roleArn: The ARN of the IAM role to assume.
- roleSessionName: An identifier for the assumed role session. Default is
light-gateway-session. - durationSeconds: The duration, in seconds, of the role session. Default is
3600(1 hour).
Example lambda-invoker.yml
region: us-east-1
# other configuration properties...
stsEnabled: true
roleArn: arn:aws:iam::123456789012:role/LambdaInvokerRole
roleSessionName: gateway-session
durationSeconds: 3600
How it Works
When stsEnabled is set to true, the LambdaFunctionHandler initializes an StsAssumeRoleCredentialsProvider.
This provider uses the AWS Default Credential Chain (e.g., EC2 instance profile, ECS task role, environment variables, or local profile) as the source credentials to call the AssumeRole operation.
The returned temporary credentials (access key, secret key, and session token) are then used by the LambdaAsyncClient to sign invocation requests.
Automatic Refreshment
The StsAssumeRoleCredentialsProvider automatically manages the lifecycle of the temporary credentials. It preemptively and asynchronously refreshes the session before it expires, ensuring zero downtime and omitting the need for manual refresh logic in the application code.
IAM Policy Requirements
- Source Credentials Permission: The IAM entity (e.g., EC2 instance profile) that the light-4j application is running as must have the
sts:AssumeRolepermission for the targetroleArn. - Target Role Trust Relationship: The target role (
roleArn) must have a trust relationship (Principal) that allows the application’s source IAM entity to assume it.
Example Source IAM Policy
{
"Version": "2012-10-17",
"Statement": [
{
"Effect": "Allow",
"Action": "sts:AssumeRole",
"Resource": "arn:aws:iam::123456789012:role/LambdaInvokerRole"
}
]
}
Light-websocket-4j
Websocket Client
WebSocket Router
The WebSocketRouterHandler is a middleware handler designed to route WebSocket connections to downstream services in a microservices architecture. It sits in the request chain and identifies WebSocket handshake requests either by a specific header (service_id) or by matching the request path against configured prefixes.
When a request is identified as a WebSocket request targeted for routing, this handler performs the WebSocket handshake (upgrading the connection) and establishes a proxy connection to the appropriate downstream service. It manages the bi-directional traffic between the client and the downstream service.
Configuration
The configuration for the WebSocket Router Handler is located in websocket-router.yml.
# Light websocket router configuration
# Enable WebSocket Router Handler
enabled: ${websocket-router.enabled:true}
# Map of path prefix to serviceId for routing purposes when service_id header is missing.
pathPrefixService: ${websocket-router.pathPrefixService:}
Example Configuration
# websocket-router.yml
enabled: true
pathPrefixService:
/ws/chat: chat-service
/ws/notification: notification-service
Usage
To use the WebSocketRouterHandler, you need to register it in your handler.yml configuration file. It should be placed in the middleware chain where you want to intercept and route WebSocket requests.
1. Register the Handler
Add the fully qualified class name to the handlers list in handler.yml:
handlers:
- com.networknt.websocket.router.WebSocketRouterHandler@router
# ... other handlers
2. Configure the Chain
Add the handler alias router or a custom alias if defined to the default chain or specific path chains.
chains:
default:
- exception
- metrics
- traceability
- correlation
- header
- router
How it Works
- Request Interception: The handler checks each incoming request.
- Identification:
- Header-based: Checks for the presence of a
service_idheader. - Path-based: Checks if the request path matches any entry in the
pathPrefixServicemap.
- Header-based: Checks for the presence of a
- Handshake & Upgrade: If matched, the handler delegates to Undertow’s
WebSocketProtocolHandshakeHandlerto perform the upgrade. - Routing: Upon successful connection (
onConnect), it looks up the downstream service URL using theClusterandServicediscovery mechanism based on theservice_id. - Proxying: It establishes a WebSocket connection to the downstream service and pipes messages between the client and the backend.
Channel Management
The WebSocket Router uses a concept of “Channels” to manage client sessions.
-
Channel Group ID:
- The router expects a unique identifier for each client connection, typically passed in the
x-group-idheader (internallyWsAttributes.CHANNEL_GROUP_ID). - If this header is missing (e.g., standard browser connections), the router automatically generates a unique UUID for the session.
- The router expects a unique identifier for each client connection, typically passed in the
-
Connection Mapping:
- Each unique Channel Group ID corresponds to a distinct WebSocket connection to the downstream service.
- If a client connects with a generated UUID, a new connection is established to the backend service for that specific session.
- Messages are proxied exclusively between the client’s channel and its corresponding downstream connection.
This ensures that multiple browser tabs or distinct clients are isolated, each communicating with the backend over its own dedicated WebSocket link.
Architecture: Router vs. Proxy
You might observe that the WebSocketRouterHandler functions primarily as a Reverse Proxy: it terminates the client connection and establishes a separate connection to the backend service.
It is named a “Router” because of its role in the system architecture:
- Multiplexing: It can route different paths (e.g.,
/chat,/notification) to different backend services on the same gateway port. - Service Discovery: It dynamically resolves the backend URL using the
service_idand the configured Registry/Cluster (e.g., Consul, Kubernetes), rather than proxying to a static IP address.
Thus, while the mechanism is proxying, the function is dynamic routing and load balancing of WebSocket traffic.
WebSocket Handler
The WebSocketHandler is a middleware handler designed to process WebSocket messages on the server side (Light Gateway or Light 4J Service), rather than proxying them to downstream services. It enables the implementation of custom logic, such as Chat bots, GenAI integration, or real-time notifications, directly within the application.
Configuration
The configuration is located in websocket-handler.yml.
| Field | Type | Description | Default |
|---|---|---|---|
| enabled | boolean | Enable or disable the WebSocket Handler. | true |
| pathPrefixHandlers | Map<String, String> | A map where keys are path prefixes (e.g., /chat) and values are the fully qualified class names of the handler implementation which must implement com.networknt.websocket.handler.WebSocketApplicationHandler. | empty |
Example Configuration
# websocket-handler.yml
enabled: true
pathPrefixHandlers:
/chat: com.networknt.chat.ChatHandler
/notifications: com.networknt.notify.NotificationHandler
Implementing a Handler
To handle WebSocket connections, you must implement the com.networknt.websocket.handler.WebSocketApplicationHandler interface used in the configuration above.
package com.networknt.chat;
import com.networknt.websocket.handler.WebSocketApplicationHandler;
import io.undertow.websockets.core.*;
import io.undertow.websockets.spi.WebSocketHttpExchange;
public class ChatHandler implements WebSocketApplicationHandler {
@Override
public void onConnect(WebSocketHttpExchange exchange, WebSocketChannel channel) {
channel.getReceiveSetter().set(new AbstractReceiveListener() {
@Override
protected void onFullTextMessage(WebSocketChannel channel, BufferedTextMessage message) {
String data = message.getData();
// Process message (e.g., send to GenAI, broadcast to other users)
WebSockets.sendText("Echo: " + data, channel, null);
}
});
channel.resumeReceives();
}
}
Usage
To use the WebSocketHandler, you need to register it in your handler.yml configuration file.
1. Register the Handler
Add the WebSocketHandler to your handler.yml configuration:
handlers:
- com.networknt.websocket.handler.WebSocketHandler
2. Add to Chain
Place it in the middleware chain. It should be placed after security if authentication is required.
chains:
default:
- exception
- metrics
- traceability
- correlation
- WebSocketHandler
# ... other handlers
How It Works
- Matching: The handler checks if the request path starts with one of the configured
pathPrefixHandlers. - Instantiation: It loads and instantiates the configured handler class singleton at startup.
- Upgrade: If a request matches,
WebSocketHandlerperforms the WebSocket handshake (upgrading HTTP to WebSocket). - Delegation: Upon successful connection (
onConnect), it delegates control to the matched implementation ofWebSocketApplicationHandler.
If the request does not match any configured prefix, it is passed to the next handler in the chain.
Maven Dependency
Ensure you have the module dependency in your pom.xml:
<dependency>
<groupId>com.networknt</groupId>
<artifactId>websocket-handler</artifactId>
<version>${version.light-websocket-4j}</version>
</dependency>
WebSocket Rendezvous
The websocket-rendezvous module provides a specialized WebSocket handler for the “Rendezvous” pattern. This pattern is useful when the Gateway needs to bridge a connection between an external client (e.g., a browser or mobile app) and a backend service that is behind a firewall or NAT and cannot accept incoming connections directly.
In this pattern, both the Client and the Backend service initiate outbound WebSocket connections to the Gateway. The Gateway then “pairs” these two connections based on a shared identifier (channelId) and relays messages between them transparently.
Dependencies
To use this module, add the following dependency to your pom.xml:
<dependency>
<groupId>com.networknt</groupId>
<artifactId>websocket-rendezvous</artifactId>
<version>${version.light-4j}</version>
</dependency>
Configuration
The module is configured via websocket-rendezvous.yml (or values.yml overrides).
The configuration key is websocket-rendezvous.
| Config Path | Default | Description |
|---|---|---|
enabled | true | Enable or disable the handler. |
backendPath | /connect | The URI path suffix (or segment) used to identify the Backend connection. |
Example values.yml configuration:
websocket-rendezvous:
enabled: true
backendPath: /connect
Handler Configuration
To use the handler in a Light-Gateway or Light-4j service, register it in your handler.yml or values.yml under handler.handlers and map it to the desired paths.
handler.handlers:
- com.networknt.websocket.rendezvous.WebSocketRendezvousHandler@rendezvous
# ... other handlers
handler.paths:
- path: '/chat'
method: 'GET'
exec:
- rendezvous
- path: '/connect'
method: 'GET'
exec:
- rendezvous
How It Works
-
Channel Identification: Both the Client and the Backend must provide a
channelIdto identify the session. This is typically done via the HTTP headerchannel-group-idor a query parameterchannelIdin the WebSocket upgrade request. -
Role Detection: The handler determines if an incoming connection is a Client or a Backend based on the request URI.
- If the request URI contains the configured
backendPath(default/connect), it is treated as the Backend. - Otherwise, it is treated as the Client.
- If the request URI contains the configured
-
Pairing Logic:
- When the Client connects, the Gateway creates a new
WsProxyClientPairand waits for the Backend. - When the Backend connects (providing the same
channelId), the Gateway locates the existing session and pairs the Backend connection with the waiting Client connection. - Once paired, any message received from the Client is forwarded to the Backend, and vice-versa.
- When the Client connects, the Gateway creates a new
-
Message Relaying: The module uses a dedicated
WebSocketRendezvousReceiveListenerto bridge the traffic efficiently.
Connection Model
The Rendezvous mode uses a 1:1 connection mapping model:
- For every active Client session (identified by a unique
channelId), the Backend must establish a separate WebSocket connection to the Gateway with the samechannelId. - There is no multiplexing of multiple user sessions over a single Backend connection.
- If you have N users connected to the Gateway, the Backend needs N corresponding connections to the Gateway to serve them.
Usage Example
Client Request:
GET /chat?channelId=12345 HTTP/1.1
Host: gateway.example.com
Upgrade: websocket
Connection: Upgrade
Backend Request:
GET /chat/connect?channelId=12345 HTTP/1.1
Host: gateway.example.com
Upgrade: websocket
Connection: Upgrade
Note: The Backend connects to a path containing /connect (e.g., /chat/connect). We recommend using /chat/connect (or similar) to differentiate it from the Frontend endpoint /chat. Using the same endpoint for both would cause the Gateway to misidentify the Backend as a second Client.
Why not just /connect?
In many setups, /connect is reserved as the HTTP trigger endpoint that the UI calls to instruct the Backend to establish the WebSocket connection. Therefore, the Backend should use a distinct WebSocket path like /chat/connect.
Sequence Diagram
sequenceDiagram
participant User as User (Browser)
participant Gateway
participant Backend as Backend Service
User->>Gateway: WebSocket Connect (/chat?channelId=123)
Note over Gateway: Created Client Session (Waiting)
User->>Gateway: HTTP GET /connect?channelId=123
Gateway->>Backend: HTTP Proxy request to Backend
Note over Backend: Received Trigger
Backend->>Gateway: WebSocket Connect (/chat/connect?channelId=123)
Note over Gateway: Identified as Backend (via /connect path)
Note over Gateway: Paired with Client Session
User->>Gateway: Hello Backend
Gateway->>Backend: Forward: Hello Backend
Backend->>Gateway: Hello User
Gateway->>User: Forward: Hello User
Light-genai-4j
light-genai-4j is a library that provides integration with various Generative AI models (LLMs) such as Gemini, OpenAI, Bedrock, and Ollama for the light-4j framework.
Design Decisions
GenAI WebSocket Handler
The genai-websocket-handler module is located in this repository (light-genai-4j) rather than light-websocket-4j.
Reasoning:
- Dependency Direction: This handler implements specific business logic (managing chat history, session context, and invoking LLM clients) that depends on the core GenAI capabilities provided by
light-genai-4j. - Separation of Concerns:
light-websocket-4jis an infrastructure library responsible for the WebSocket transport layer (connection management, routing, hygiene).light-genai-4jis the domain library responsible for AI interactions. - Implementation: This module implements
com.networknt.websocket.handler.WebSocketApplicationHandlerfromlight-websocket-4j, effectively bridging the transport layer with the AI domain layer.
Ollama Client
The ollama-client module provides a non-blocking, asynchronous client for interacting with the Ollama API. It is part of the light-genai-4j library and leverages the Undertow HTTP client for efficient communication.
Features
- Non-blocking I/O: Uses Undertow’s asynchronous HTTP client for high throughput.
- Streaming Support: Supports streaming responses (NDJSON) from Ollama for chat completions.
- Configuration: externalizable configuration via
ollama.yml. - Token Management: N/A (Ollama usually runs locally without auth, but can be proxied).
Configuration
The client is configured via ollama.yml in the src/main/resources/config directory (or externalized config folder).
Properties
| Property | Description | Default |
|---|---|---|
ollamaUrl | The base URL of the Ollama server. | http://localhost:11434 (example) |
model | The default model to use for requests. | llama3.2 (example) |
Example ollama.yml
ollamaUrl: http://localhost:11434
model: llama3.2
Usage
Sync Chat (Non-Streaming)
GenAiClient client = new OllamaClient();
List<ChatMessage> messages = new ArrayList<>();
messages.add(new ChatMessage("user", "Hello, who are you?"));
// Blocking call (not recommended for high concurrency)
String response = client.chat(messages);
System.out.println(response);
Async Chat (Streaming)
GenAiClient client = new OllamaClient();
List<ChatMessage> messages = new ArrayList<>();
messages.add(new ChatMessage("user", "Tell me a story."));
client.chatStream(messages, new StreamCallback() {
@Override
public void onEvent(String content) {
System.out.print(content); // Process token chunk
}
@Override
public void onComplete() {
System.out.println("\nDone.");
}
@Override
public void onError(Throwable throwable) {
throwable.printStackTrace();
}
});
Dependencies
light-4jcore (client, config)genai-core
OpenAI Client
The OpenAiClient is an implementation of GenAiClient that interacts with the OpenAI API (GPT models). It supports both synchronous chat and asynchronous streaming chat.
Features
- Synchronous Chat: Sends a prompt to the model and waits for the full response.
- Streaming Chat: streams the response from the model token by token, suitable for real-time applications.
- Non-Blocking I/O: Uses XNIO and Undertow’s asynchronous client to prevent blocking threads during I/O operations.
Configuration
The client is configured via openai.yml.
Properties
| Property | Description | Default |
|---|---|---|
url | The OpenAI API URL for chat completions. | https://api.openai.com/v1/chat/completions |
model | The model to use (e.g., gpt-3.5-turbo, gpt-4). | null |
apiKey | Your OpenAI API key. | null |
Example openai.yml
url: https://api.openai.com/v1/chat/completions
model: gpt-3.5-turbo
apiKey: your-openai-api-key
Usage
Injection
You can inject the OpenAiClient as a GenAiClient implementation.
GenAiClient client = new OpenAiClient();
Synchronous Chat
List<ChatMessage> messages = new ArrayList<>();
messages.add(new ChatMessage("user", "Hello, OpenAI!"));
String response = client.chat(messages);
System.out.println(response);
Streaming Chat
List<ChatMessage> messages = new ArrayList<>();
messages.add(new ChatMessage("user", "Write a long story."));
client.chatStream(messages, new StreamCallback() {
@Override
public void onEvent(String content) {
System.out.print(content);
}
@Override
public void onComplete() {
System.out.println("\nDone.");
}
@Override
public void onError(Throwable throwable) {
throwable.printStackTrace();
}
});
Gemini Client
The GeminiClient is an implementation of GenAiClient that interacts with Google’s Gemini API. It supports both synchronous chat and asynchronous streaming chat.
Features
- Synchronous Chat: Sends a prompt to the model and waits for the full response.
- Streaming Chat: streams the response from the model chunk by chunk, suitable for real-time applications.
- Non-Blocking I/O: Uses XNIO and Undertow’s asynchronous client to prevent blocking threads during I/O operations.
Configuration
The client is configured via gemini.yml.
Properties
| Property | Description | Default |
|---|---|---|
url | The Gemini API URL base format. | https://generativelanguage.googleapis.com/v1beta/models/%s:generateContent |
model | The model to use (e.g., gemini-pro). | null |
apiKey | Your Google Cloud API key. | null |
Example gemini.yml
url: https://generativelanguage.googleapis.com/v1beta/models/%s:generateContent
model: gemini-pro
apiKey: your-google-api-key
Usage
Injection
You can inject the GeminiClient as a GenAiClient implementation.
GenAiClient client = new GeminiClient();
Synchronous Chat
List<ChatMessage> messages = new ArrayList<>();
messages.add(new ChatMessage("user", "Hello, Gemini!"));
String response = client.chat(messages);
System.out.println(response);
Streaming Chat
List<ChatMessage> messages = new ArrayList<>();
messages.add(new ChatMessage("user", "Write a poem."));
client.chatStream(messages, new StreamCallback() {
@Override
public void onEvent(String content) {
System.out.print(content);
}
@Override
public void onComplete() {
System.out.println("\nDone.");
}
@Override
public void onError(Throwable throwable) {
throwable.printStackTrace();
}
});
Bedrock Client
The BedrockClient is an implementation of GenAiClient that interacts with AWS Bedrock. It supports both synchronous chat and asynchronous streaming chat via the AWS SDK for Java 2.x.
Features
- Synchronous Chat: Sends a prompt to the model and waits for the full response.
- Streaming Chat: streams the response from the model chunk by chunk, suitable for real-time applications.
- Non-Blocking I/O: Leverages
BedrockRuntimeAsyncClientand JDKCompletableFuturefor non-blocking operations.
Configuration
The client is configured via bedrock.yml.
Properties
| Property | Description | Default |
|---|---|---|
region | The AWS region where Bedrock is enabled (e.g., us-east-1). | null |
modelId | The Bedrock model ID to use (e.g., anthropic.claude-v2, amazon.titan-text-express-v1). | null |
Example bedrock.yml
region: us-east-1
modelId: anthropic.claude-v2
Usage
Injection
You can inject the BedrockClient as a GenAiClient implementation.
GenAiClient client = new BedrockClient();
Synchronous Chat
List<ChatMessage> messages = new ArrayList<>();
messages.add(new ChatMessage("user", "Hello, Bedrock!"));
String response = client.chat(messages);
System.out.println(response);
Streaming Chat
List<ChatMessage> messages = new ArrayList<>();
messages.add(new ChatMessage("user", "Tell me a joke."));
client.chatStream(messages, new StreamCallback() {
@Override
public void onEvent(String content) {
System.out.print(content);
}
@Override
public void onComplete() {
System.out.println("\nDone.");
}
@Override
public void onError(Throwable throwable) {
throwable.printStackTrace();
}
});
AWS Credentials
The BedrockClient uses the DefaultCredentialsProvider chain from the AWS SDK. Prior to using the client, ensure your environment is configured with valid AWS credentials (e.g., via environment variables, ~/.aws/credentials, or IAM roles).
GenAI WebSocket Handler
The genai-websocket-handler module provides a WebSocket-based interface for interacting with Generative AI models via the light-genai-4j library. It manages user sessions, maintains chat history context, and handles the bi-directional stream of messages between the user and the LLM.
Architecture
This module is designed as an implementation of the WebSocketApplicationHandler interface defined in light-websocket-4j. It plugs into the websocket-handler infrastructure to receive upgraded WebSocket connections.
Core Components
- GenAiWebSocketHandler: The main entry point. It handles
onConnect, manages the WebSocket channel life-cycle, and coordinates message processing. - SessionManager: Responsible for creating, retrieving, and validating user chat sessions.
- HistoryManager: Responsible for persisting and retrieving the conversation history required for LLM context.
- ModelClient: Wraps the
light-genai-4jclients (Gemini, OpenAI, etc.) to invoke the model.
Data Models
ChatMessage
Represents a single message in the conversation.
public class ChatMessage {
String role; // "user", "model", "system"
String content; // The text content
long timestamp; // Epoch timestamp
}
ChatSession
Represents the state of a conversation.
public class ChatSession {
String sessionId;
String userId;
String model; // The generic model name (e.g., "gemini-pro")
Map<String, Object> parameters; // Model parameters (temperature, etc.)
}
Storage Interfaces
To support scaling from a single instance to a clustered environment, session and history management are abstracted behind repository interfaces.
ChatSessionRepository
public interface ChatSessionRepository {
ChatSession createSession(String userId, String model);
ChatSession getSession(String sessionId);
void deleteSession(String sessionId);
}
ChatHistoryRepository
public interface ChatHistoryRepository {
void addMessage(String sessionId, ChatMessage message);
List<ChatMessage> getHistory(String sessionId);
void clearHistory(String sessionId);
}
Implementations
In-Memory (Default)
The initial implementation provides in-memory storage using concurrent maps. This is suitable for single-instance deployments or testing.
InMemoryChatSessionRepository: UsesConcurrentHashMap<String, ChatSession>.InMemoryChatHistoryRepository: UsesConcurrentHashMap<String, Deque<ChatMessage>>(or List).
Future Implementations
The design allows for future implementations without changing the core handler logic:
- JDBC/RDBMS: Persistent storage for long-term history.
- Redis: Shared cache for clustered deployments (session affinity not required).
- Hazelcast: In-memory data grid for distributed caching.
Configuration
The implementation to use can be configured via service.yml (using Light-4J’s Service/Module loading) or dedicated config files.
Example service.yml for In-Memory:
- com.networknt.genai.handler.ChatHistoryRepository:
- com.networknt.genai.handler.InMemoryChatHistoryRepository
Streaming Behavior
The handler implements a buffering mechanism for the streaming response from the LLM to improve client-side rendering.
Response Buffering
LLM providers usually stream tokens (words or partial words) as they are generated. If these tokens are sent to the client immediately as individual WebSocket frames, simplistic clients that print each frame on a new line will display a fragmented “word-per-line” output.
To resolve this, the GenAiWebSocketHandler buffers incoming tokens and only flushes them to the client when:
- A newline character (
\n) is detected in the buffer. - The stream from the LLM completes.
This ensures that the client receives complete lines or paragraphs, resulting in a cleaner user experience.
Code Executor Module
The code-executor module in light-genai-4j provides a robust environment for executing code snippets generated by LLMs. It leverages GraalVM Polyglot to execute code in various languages (JavaScript, Python, Ruby, R, etc.) securely within the Java application.
Overview
This module is designed to integrate seamlessly with langchain4j agents that require tool execution capabilities. By using GraalVM, it avoids the need for external execution environments or heavy Docker containers for many use cases, while still providing a degree of isolation and high performance.
Dependencies
To use the code executor, add the following dependency to your pom.xml:
<dependency>
<groupId>com.networknt</groupId>
<artifactId>code-executor</artifactId>
<version>${version.light-genai-4j}</version>
</dependency>
You also need to ensure you have the necessary GraalVM dependencies. The module by default includes support for JavaScript.
<dependency>
<groupId>org.graalvm.polyglot</groupId>
<artifactId>js</artifactId>
<version>${version.graalvm}</version>
<type>pom</type>
</dependency>
If you need to execute other languages (e.g., Python), you must add the corresponding GraalVM language dependency:
<!-- For Python support -->
<dependency>
<groupId>org.graalvm.polyglot</groupId>
<artifactId>python</artifactId>
<version>${version.graalvm}</version>
<type>pom</type>
</dependency>
Usage
The core component is the CodeExecutionEngine. You can instantiate a GraalVmJavaScriptExecutionEngine (or other language-specific engines provided by LangChain4j) to execute code.
Example: Executing JavaScript
import dev.langchain4j.code.CodeExecutionEngine;
import dev.langchain4j.code.graalvm.GraalVmJavaScriptExecutionEngine;
public class CodeExecutorExample {
public static void main(String[] args) {
CodeExecutionEngine engine = new GraalVmJavaScriptExecutionEngine();
String code = "var x = 10; var y = 20; x + y;";
String result = engine.execute(code);
System.out.println("Result: " + result); // Output: 30
}
}
Integration with LangChain4j Agents
This module effectively provides the implementation for LangChain4j’s CodeExecutionTool. You can register this tool with your agent to allow it to write and execute code to solve complex problems.
// Example setup with an agent (conceptual)
CodeExecutionEngine engine = new GraalVmJavaScriptExecutionEngine();
ToolSpecification codeExecutionTool = ToolSpecification.builder()
.name("execute_javascript")
.description("Executes JavaScript code and returns the result")
.addArgument("code", JsonSchemaProperty.STRING, "The JavaScript code to execute")
.build();
// ... register tool with your ChatModel or Agent ...
Configuration
The GraalVM execution engine can be configured to restrict access to host resources (file system, network, etc.) for security. By default, LangChain4j’s implementation provides a reasonable level of sandboxing, but you should review the GraalVM Security Guide for production deployments, especially if executing untrusted code.
Light-controller
Rest vs WebSocket
1. Executive Summary
This document outlines the architectural decision to transition the light-controller from a scheduled REST-polling model to a persistent, event-driven WebSocket model. This shift fundamentally changes how the controller monitors microservice health and issues administrative commands, moving towards a highly efficient Control Plane / Data Plane architecture.
2. Background
Historically, the light-controller utilized Kafka Streams to schedule and execute health checks against registered microservices. An alternative proposed architecture involved replacing Kafka with a PostgreSQL-backed scheduler that would poll microservice REST endpoints every 3 seconds.
While a PostgreSQL scheduler with REST is viable, polling at such an aggressive interval introduces significant CPU, network, and database I/O overhead. To achieve real-time monitoring and better resource utilization, the architecture is moving entirely to WebSockets.
3. Core Architecture: The Control Plane Model
Instead of the light-controller acting as a client that schedules outbound requests to microservices, the relationship is inverted:
- Microservices (Clients) initiate a persistent WebSocket connection to the
light-controller(Server) upon startup. - The WebSocket connection acts as a bidirectional, full-duplex tunnel.
- This single connection handles both continuous health monitoring and asynchronous administrative commands.
4. Health Checks: REST Polling vs. WebSocket Keep-Alive
4.1 The Overhead of REST Polling (Every 3 Seconds)
- Network/CPU Waste: Every 3 seconds, a REST poll requires HTTP header generation, potential TCP/TLS handshakes (if connections drop), and payload parsing.
- Database IOPS: Relying on a PostgreSQL scheduler to track and trigger intervals for thousands of microservices every 3 seconds generates immense and unnecessary database load.
- Delayed Detection: If a service crashes immediately after a health check, the controller remains unaware for up to 3 seconds.
4.2 The WebSocket Advantage
- Zero-Overhead Monitoring: The TCP/TLS handshake occurs exactly once during startup. Health is verified using native WebSocket binary
Ping/Pongframes, which consume near-zero CPU and network bandwidth. - Instantaneous Failure Detection: Because the connection is kept alive at the TCP layer, any microservice crash or network drop results in an immediate
EOForConnection Resetexception. The controller detects failures in milliseconds. - Event-Driven Database Updates: The database is only queried/updated on two events: when a service connects (Registration/Healthy) or disconnects (Deregistration/Unhealthy). The scheduler is entirely eliminated.
Capacity: A single light-controller instance (e.g., allocated 2GB of RAM utilizing non-blocking I/O like Undertow/Netty) can easily handle 100,000+ concurrent idle WebSocket connections, provided OS file descriptors are tuned appropriately.
5. Centralizing Admin Commands over WebSocket
Administrative endpoints (e.g., reload-config, get-server-info, set-debug-level) will be migrated from inbound REST endpoints on the microservices to the established WebSocket tunnel.
5.1 Architectural Benefits
- Bypassing NAT & Firewalls (Reverse Control): Many microservices reside behind strict firewalls or in private Kubernetes networks that cannot be accessed directly by the external controller. Because the microservice initiates the outbound WebSocket connection to the controller, the controller can push admin commands down this established tunnel, completely bypassing ingress restrictions.
- Reduced Attack Surface: Moving admin features to WebSocket means these sensitive endpoints are completely removed from the microservice’s REST HTTP server. Malicious actors scanning the microservice directly cannot access
/adminor/healthroutes.
5.2 Implementation Protocol (Multiplexed Messaging)
Because WebSocket is a raw message pipe, a multiplexed protocol (such as JSON-RPC) will be implemented to route commands and map responses. Every payload requires a Correlation ID.
Example Controller Request:
{
"id": "req-98765",
"action": "reload_config",
"payload": { "module": "security" }
}
WebSocket Connection Recovery Strategy
1. Overview
In the light-controller WebSocket-based architecture, a continuous and healthy WebSocket connection serves as the definitive proof of a microservice’s “liveliness.” If the connection drops, the controller instantly assumes the microservice is dead or unreachable.
Therefore, a robust, autonomous connection recovery mechanism is critical. This document outlines the standard operating procedure for detecting connection drops and executing successful reconnections without overwhelming the controller.
2. Client-Side Responsibility
In this Control Plane / Data Plane model, the microservice (Client) is 100% responsible for maintaining and recovering the connection.
The light-controller (Server) simply listens for connections and updates its database (or in-memory state) when a socket opens or closes. The controller will never attempt to initiate an outbound connection to a microservice.
3. Detecting Disconnections
A connection can be severed in two ways. The microservice must be equipped to handle both:
3.1 Clean Disconnects
When a connection is explicitly closed by the OS, a proxy, or the light-controller gracefully shutting down, the underlying TCP stack sends a FIN or RST packet.
- Detection: The WebSocket client framework in the microservice will fire an
onCloseoronErrorevent. - Action: Immediately transition the internal state to “Disconnected” and initiate the Reconnection Strategy (Section 4).
3.2 Zombie Connections (Half-Open Sockets)
Often, a router, NAT gateway, or firewall will silently drop a connection due to a timeout or hardware failure. Neither the microservice’s OS nor the controller’s OS receives a termination packet. The socket remains “open” in memory, but no data can flow.
- Detection: The microservice must rely on Ping/Pong frames.
- The microservice sends a native WebSocket
Pingframe at a regular interval (e.g., every 10 seconds). - It starts a timer expecting a
Pongresponse from the controller. - If the
Pongis not received within the timeout threshold (e.g., 5 seconds), the connection is considered a “Zombie”.
- The microservice sends a native WebSocket
- Action: The microservice must forcefully close its own local socket to trigger an
onCloseevent and initiate the Reconnection Strategy.
4. Reconnection Strategy: Exponential Backoff with Jitter
When a disconnect is detected, the microservice must not attempt to reconnect immediately or in a tight loop.
4.1 The “Thundering Herd” Problem
If the light-controller experiences a brief outage or a network blip occurs, thousands of managed microservices will lose their connections simultaneously. If they all attempt to reconnect at the exact same millisecond, the resulting surge of TCP handshakes and TLS negotiations will overwhelm the controller’s CPU, effectively causing a self-inflicted Distributed Denial of Service (DDoS) attack.
4.2 The Algorithm
To safely stagger reconnections, microservices must implement Exponential Backoff with Jitter.
- Base Delay: Start with a baseline delay (e.g., 1 second).
- Exponential Multiplier: Double the wait time after each failed attempt.
- Jitter: Add a randomized number of milliseconds to the delay. This ensures that even if 1,000 services drop at the exact same time, their retry timers will naturally spread out.
- Maximum Cap: Set a ceiling on the maximum wait time so services don’t wait hours to reconnect.
Example Implementation Flow:
- Attempt 1: Wait 1s + random(0 to 1000ms)
- Attempt 2: Wait 2s + random(0 to 1000ms)
- Attempt 3: Wait 4s + random(0 to 1000ms)
- Attempt 4: Wait 8s + random(0 to 1000ms)
- Attempt N: Wait 30s + random(0 to 1000ms) (Capped at 30 seconds)
Once the connection is successfully established, the backoff multiplier resets to zero.
5. Post-Recovery: The Re-Registration Payload
Establishing the TCP/WebSocket connection is only step one of recovery.
When a microservice disconnects, the light-controller treats that service as “Dead”, deregisters it from active routing/monitoring, and flushes any associated state in the database.
Therefore, a re-established connection must be treated exactly like a brand-new application startup.
5.1 The Re-Registration Step
Immediately upon the onOpen event firing for the new WebSocket, the microservice must push a Registration Message to the controller.
Example Payload:
{
"id": "req-startup-001",
"action": "register",
"payload": {
"serviceId": "user-management-service",
"instanceId": "pod-a2b4-xyz",
"ip": "10.0.5.12",
"port": 8443,
"environment": "production",
"version": "1.2.4"
}
}
light-4j Two-Stage Startup Architecture
1. Executive Summary
The light-4j framework utilizes a two-stage startup process to ensure services are fully configured before initializing their main application contexts and network listeners. With the transition of the light-controller to a WebSocket-based Control Plane, a critical architectural decision is how to handle initial configuration loading.
This document outlines the Hybrid Approach: maintaining REST for the synchronous Bootstrap Stage (Stage 1) and utilizing WebSocket exclusively for the asynchronous Runtime Stage (Stage 2).
2. Why Not WebSocket for Bootstrapping?
While it is tempting to unify all external communication under a single WebSocket connection, using WebSockets for the initial configuration pull introduces significant anti-patterns during server boot:
2.1 The “Chicken and Egg” Problem
To establish a secure and robust WebSocket connection to the light-controller, the light-4j instance requires configuration data, including:
- TLS/SSL Certificates (Keystores and Truststores)
- OAuth2 Client Credentials (to authenticate the connection)
- Network configurations (connection timeouts, proxies, retry limits)
If a WebSocket is used to fetch the configuration, the system lacks the configuration required to configure the WebSocket client itself. A simple REST call using a basic bootstrap token (defined in a local startup.yml or environment variables) safely breaks this circular dependency.
2.2 Synchronous vs. Asynchronous Paradigms
Bootstrapping is fundamentally a synchronous blocking operation. The server cannot bind to its ports, initialize database connection pools, or start business logic until the configuration is fully downloaded and parsed.
- REST (HTTP GET) is naturally synchronous, perfectly fitting the blocking boot sequence.
- WebSocket is inherently asynchronous and event-driven. Using it for bootstrapping requires artificially pausing the main startup thread (e.g., using
CountDownLatchorCompletableFuture.get()) while waiting for theonMessageevent to fire, adding unnecessary complexity and fragility to the startup sequence.
2.3 Separation of Concerns
In the light-portal ecosystem, the Config Server and the Controller serve distinct architectural purposes:
- Config Server: A stateless data plane that serves configuration files on demand.
- Controller: A stateful control plane that tracks live instances, monitors health, and routes administrative commands.
Forcing the initial config pull through the Controller’s WebSocket tightly couples these two components, forcing the Controller to act as an unnecessary proxy for the Config Server.
3. The Recommended Startup Lifecycle
By adopting a hybrid model, light-4j leverages the strengths of both protocols. The lifecycle operates as follows:
Stage 1: Bootstrap (REST)
- The
light-4jinstance starts and reads its localstartup.yml(or environment variables) to locate thelight-portalConfig Server URL and initial authentication tokens. - The framework makes a synchronous REST GET request to the Config Server.
- The main thread blocks until the configuration payload (e.g.,
values.yml) is completely downloaded, parsed, and merged into the application’s configuration cache.
Stage 2: Main Server Initialization (WebSocket)
- Now fully configured with proper TLS settings, database credentials, and OAuth2 tokens, the main
light-4jserver modules initialize. - The service’s internal WebSocket Client establishes a persistent, secure connection to the
light-controller. - Upon connection (
onOpen), the service immediately sends a Registration payload over the WebSocket to announce it is alive, healthy, and ready for routing. - The WebSocket remains open, handling native
Ping/Pongkeep-alives and listening for incoming administrative commands.
4. Runtime: Dynamic Configuration Reloading
What happens if configuration properties change in the light-portal after the service has started? This is where the hybrid approach excels, combining WebSocket’s push capabilities with REST’s data-fetching simplicity.
- The Trigger (WebSocket): An administrator updates a configuration property in the
light-portal. Thelight-controllerpushes an asynchronous JSON command down the established WebSocket tunnel to the specificlight-4jmicroservice.
{
"id": "cmd-reload-001",
"action": "config_updated"
}
WebSocket Network Topology: Direct Connection vs. Gateway Proxy
1. Executive Summary
As part of the light-portal architecture, microservices must establish a persistent WebSocket connection to the light-controller for real-time health monitoring and administrative commands.
A critical networking decision is whether to route these internal WebSocket connections through the light-gateway (BFF) or allow microservices to connect directly to the light-controller. This document outlines the architectural reasoning for choosing a Direct Connection model, keeping the gateway out of internal management traffic.
2. Control Plane vs. Data Plane Separation
In robust microservice architectures, network traffic is strictly divided into two categories:
- Data Plane (Business Traffic): The actual user requests and business logic payload. The
light-gatewayis explicitly designed to handle this, providing routing, rate-limiting, OAuth token validation, and payload transformations. - Control Plane (Management Traffic): The internal infrastructure communication required to maintain system health, configuration, and routing rules. The
light-controlleris a core component of the Control Plane.
Architectural Principle: Control Plane traffic should never be routed through Data Plane infrastructure if it can be avoided. If a malicious user executes a DDoS attack on the light-gateway, or if the gateway experiences a resource exhaustion event, the Data Plane will degrade. If health checks are routed through that same gateway, the Control Plane will also fail, blinding the light-controller to the actual state of the network.
3. The Drawbacks of Gateway Proxying
Routing WebSocket connections through the light-gateway introduces several severe anti-patterns:
3.1 The Chained Connection Problem (Resource Doubling)
Putting the gateway in the middle forces it to act as a Stateful WebSocket Proxy:
[Microservice] <—— WebSocket A ——> [Gateway] <—— WebSocket B ——> [Controller]
If there are 10,000 microservices, the controller holds 10,000 connections. However, the gateway must hold 20,000 connections (10,000 inbound from services, 10,000 outbound to the controller). This wastes massive amounts of memory, CPU, and file descriptors on the gateway, which should be reserved for high-throughput business APIs.
3.2 Timeout Masking and Health Inaccuracy
The primary purpose of this WebSocket connection is to verify microservice liveliness via Ping/Pong frames. If the gateway sits in the middle, a microservice might crash silently (leaving a zombie connection). The controller remains unaware because the Gateway-to-Controller socket (WebSocket B) is still perfectly healthy. The gateway would need complex, custom logic to intercept, translate, and bridge Ping/Pong timeouts across two separate TCP sockets.
3.3 The Blast Radius of Gateway Redeployments
Gateways are frequently scaled, redeployed, or restarted as API routes change or traffic spikes occur.
If all internal health-check WebSockets are routed through the light-gateway, a simple redeployment of the gateway will forcefully sever the connections for every single microservice simultaneously.
This triggers a massive “Thundering Herd” reconnection event and causes the light-controller to falsely alert that the entire microservice ecosystem has crashed.
4. Recommended Architecture: Direct Internal Routing
Because the microservices and the light-controller reside within the same internal network (e.g., the same Kubernetes cluster, VPC, or private subnet), they must communicate directly.
Implementation Details:
- The
light-controlleris exposed via an internal DNS record or Kubernetes Service (e.g.,light-controller.internal.svc.cluster.local). - Upon startup (Stage 2), microservices resolve this internal address.
- The microservice opens a direct TCP/WebSocket connection to the
light-controller. - The
light-gatewayis entirely bypassed for this internal infrastructure communication.
5. When SHOULD the Gateway be Used?
The light-gateway (BFF) should still be utilized for the light-controller, but only for external clients.
If human administrators are using a web-based Admin UI (SPA) running in a browser over the public internet to view the health of the network, that browser must connect to the light-gateway. The gateway will authenticate the external user, validate their OAuth tokens, and then proxy the REST or WebSocket request to the light-controller.
6. Conclusion
By mandating direct internal connections between microservices and the light-controller, the architecture drastically reduces resource consumption, eliminates complex proxying logic, prevents false-positive health alerts during gateway deployments, and strictly enforces the separation of Control Plane and Data Plane traffic.
Model Context Protocol (MCP) Architecture for light-controller
1. Executive Summary
As the light-controller transitions to a fully event-driven WebSocket architecture for internal microservice management, its external-facing administrative APIs are also being overhauled.
Instead of exposing traditional REST endpoints for the light-portal UI to poll, the controller will expose a single, real-time WebSocket connection to the Portal (routed through the light-gateway BFF). Furthermore, all administrative capabilities (e.g., reload_config, set_log_level, get_server_info) will be implemented as Model Context Protocol (MCP) Tools.
This document outlines how leveraging MCP over JSON-RPC 2.0 creates a unified, AI-native Control Plane that serves both human administrators and autonomous AI agents.
2. The Shift: REST to Real-Time WebSockets
Historically, the Portal UI relied on REST APIs to fetch the status of registered microservices.
- The Problem: The UI had to constantly poll the controller to detect if a service went offline or if an administrative command (like reloading a configuration) completed successfully.
- The Solution: By moving the UI-to-Controller communication to WebSockets, the
light-controllercan actively push state changes. If a microservice’s internal WebSocket drops, the controller instantly pushes an event to the UI’s WebSocket, updating the dashboard in milliseconds without polling.
3. Why MCP (Model Context Protocol)?
While standard JSON-RPC 2.0 is highly effective for bidirectional WebSocket communication, MCP is an open standard built strictly on top of JSON-RPC 2.0. It defines a specific vocabulary designed to allow AI models to securely discover and execute tools on external systems.
By building the controller’s APIs as MCP Tools, we achieve AIOps (AI for IT Operations) natively.
3.1 Unified Interface for Humans and AI
In a traditional setup, the UI uses a JSON API, and a separate integration layer is built to teach an AI chatbot how to trigger those same APIs.
With MCP, the light-controller acts as an MCP Server. Both the human-driven Portal UI and the AI Chatbot act as MCP Clients using the exact same WebSocket connection and protocol.
- The Portal UI: When an administrator clicks the “Reload Config” button, the UI constructs a standard MCP
tools/callmessage. - The AI Chatbot: When an administrator types, “The user service is throwing debug errors, please reset its log level to INFO”, the AI agent autonomously constructs the exact same MCP
tools/callmessage.
4. Dynamic UI and Tool Discovery
One of the most powerful features of MCP is Tool Discovery.
Instead of hardcoding every available administrative action into the Portal UI’s frontend code, the UI (and the Chatbot) can query the light-controller upon connection to ask what commands are currently supported.
4.1 Step 1: Tool Discovery (tools/list)
When the Portal UI connects to the controller via the BFF, it sends a discovery request:
{
"jsonrpc": "2.0",
"id": 1,
"method": "tools/list"
}
Controller Response:
```json
{
"jsonrpc": "2.0",
"id": 1,
"result": {
"tools":[
{
"name": "reload_config",
"description": "Instructs a specific microservice to fetch the latest configuration from the config server.",
"inputSchema": {
"type": "object",
"properties": {
"serviceId": { "type": "string" },
"module": { "type": "string" }
},
"required": ["serviceId"]
}
},
{
"name": "set_log_level",
"description": "Dynamically changes the logging level of a registered microservice.",
"inputSchema": {
"type": "object",
"properties": {
"serviceId": { "type": "string" },
"level": { "type": "string", "enum": ["DEBUG", "INFO", "WARN", "ERROR"] }
},
"required": ["serviceId", "level"]
}
}
]
}
}
Result: The UI can dynamically render buttons and forms based on the inputSchema, and the AI agent instantly knows exactly how to format its requests.
4.1 Step 2: Tool Execution (tools/call)
When an action is triggered (by a human click or an AI decision), the client sends:
{
"jsonrpc": "2.0",
"id": 2,
"method": "tools/call",
"params": {
"name": "set_log_level",
"arguments": {
"serviceId": "user-management-service",
"level": "INFO"
}
}
}
5. Network Topology for Admin APIs
To maintain the strict separation of Data Plane and Control Plane:
-
Internal Traffic (Microservices): Microservices connect directly to the light-controller via raw multiplexed WebSockets (bypassing the gateway).
-
External Traffic (Portal UI & Chatbot): The React/Vue web application and AI Chatbot run in the user’s browser. They connect to the light-gateway (BFF) over WSS (WebSocket Secure). The gateway validates the user’s OAuth2 session token and proxies the MCP WebSocket connection to the light-controller.
6. Conclusion
Implementing the light-controller’s administrative APIs as MCP Tools over WebSockets represents a generational leap in system design. It entirely removes polling latency for human operators while instantly transforming the light-portal ecosystem into an AI-manageable, autonomous infrastructure. New administrative features added to the controller are immediately discoverable and usable by both the UI and the built-in Chatbot without requiring frontend code changes.
Unified Microservice Channel
1. Overview
This document defines the target contract between light-4j/portal-registry and the controller backend.
The main goals are:
- use a single registration payload for both
light-controllerandcontroller-rs - allow a service to use one WebSocket channel for both registration and discovery
- use the client-supplied service address instead of deriving the service address from the remote socket IP
- enforce tenant isolation with a controller-configured
hostIdand the JWThostclaim - align runtime instance persistence with existing
RuntimeInstanceCreatedEvent,RuntimeInstanceUpdatedEvent, andRuntimeInstanceDeletedEvent
2. Core Decisions
2.1 Single Service Channel
For microservices, the controller should expose one WebSocket channel:
/ws/microservice
This channel is used for:
service/registerservice/update_metadatadiscovery/lookupdiscovery/subscribediscovery/unsubscribe- controller-to-service commands and service responses
For client applications that do not register as services, the controller should expose:
/ws/discovery
This channel is discovery-only.
2.2 Client-Supplied Address
The service address advertised to discovery must come from the registration payload.
The controller must not use the remote socket IP as the canonical service address because real deployments can involve:
- NAT
- reverse proxies
- ingress controllers
- sidecars
- container overlays
The remote socket IP can still be recorded for logging and audit, but it must not be used for routing or discovery.
2.3 Unified Control Plane Channel
For administrative operations, AI agents, and the Portal UI, the controller should expose a dedicated MCP-compliant channel:
/ctrl/mcp
This channel is used for:
- Administrative Tools: MCP
tools/callfor server info, log level updates, configuration reloads, etc. - Real-time Notifications: Controller-to-client notifications for runtime instance lifecycle changes (
instance_connected,instance_disconnected). - AI-Native Operations: Discovery and execution of controller capabilities via the Model Context Protocol.
2.4 One Controller per Tenant
Each controller instance serves exactly one tenant.
The controller configuration contains the authoritative internal tenant identifier, hostId. Services do not send hostId in the registration payload.
The service JWT carries the tenant in the host claim. The controller validates jwt.host == configured hostId.
This avoids cross-tenant routing mistakes and keeps the controller state, discovery subscriptions, and event streams tenant-scoped by construction.
3. Unified Registration Contract
The service/register request should have the same payload for both controller implementations.
Example:
{
"jsonrpc": "2.0",
"id": "register-1",
"method": "service/register",
"params": {
"jwt": "<service-jwt>",
"serviceId": "com.networknt.user-1.0.0",
"envTag": "prod",
"version": "1.0.0",
"protocol": "https",
"address": "10.0.5.12",
"port": 8443,
"tags": {}
}
}
Required behavior:
addressis the canonical advertised service addressportis the advertised service portjwtauthenticates the service sessionserviceIdmust match the service identity in the JWTenvTagis the only environment field in the unified registration contractenvTagshould match the JWTenvclaim when that claim is present
portal-registry should build one registration payload for all controller backends. There should be no separate toControllerRsRegisterParams() path.
4. Authentication and Tenant Isolation
4.1 /ws/microservice
Authentication for /ws/microservice is performed with the JWT inside service/register.
The service JWT must be validated for:
- signature
- issuer and audience when configured
- service identity
- tenant identity
The controller configuration contains a single internal tenant identifier, hostId. The service JWT must contain the same tenant identifier in the host claim.
Recommended claim handling:
- read
host
If the JWT host claim does not match the controller-configured hostId, the controller must reject the registration. In other words, the JWT tenant claim host is validated against the controller’s internal tenant key hostId. This prevents a service from connecting to the wrong tenant controller instance.
4.2 /ws/discovery
Client applications that use /ws/discovery must authenticate on the WebSocket upgrade request with:
Authorization: Bearer <jwt>
The discovery JWT should also be checked using the host claim against the controller-configured hostId so discovery clients cannot attach to the wrong tenant controller.
4.3 No Extra Discovery Token for Services
Once a service is connected on /ws/microservice, no separate discovery token is needed for service-owned discovery requests on that same socket.
The separate discovery bearer token remains relevant only for discovery-only clients using /ws/discovery.
4.4 /ctrl/mcp
Authentication and authorization for the control plane channel are performed at the gateway (BFF) level or directly on the controller via the WebSocket upgrade request:
Authorization: Bearer <user-jwt>
Requirements:
- User must have administrative or operator roles.
- The JWT
hostclaim must match the controller-configuredhostIdto ensure tenant isolation. - Connections should be restricted to known administrative origins (e.g., the Portal UI).
5. Runtime Instance Identity
5.1 Business Key
Before emitting RuntimeInstanceCreatedEvent, the controller must query the database using this business key:
hostIdfrom controller configuration, validated from the JWThostclaimserviceIdenvTagaddressport
If a matching runtime instance already exists, the controller must reuse its runtimeInstanceId.
If no matching runtime instance exists, the controller must create a new UUID for runtimeInstanceId.
5.2 Aggregate Identity
The event aggregate identity is:
hostId|runtimeInstanceId
This matches the existing Light Portal aggregate-id derivation for runtime instance events. Event payloads and persistence continue to use hostId, even though JWT validation reads the tenant from the host claim.
6. Event Persistence
6.1 Event Types
The controller should align to the existing event types:
RuntimeInstanceCreatedEventRuntimeInstanceUpdatedEventRuntimeInstanceDeletedEvent
At present, the primary lifecycle use cases are:
- create on successful registration
- delete on disconnect or explicit removal
RuntimeInstanceUpdatedEvent should remain supported by the contract, but it does not need to be emitted until there is a concrete mutable metadata use case.
6.2 Create Flow
After a successful service/register:
- resolve
hostIdfrom controller configuration after validating the JWThostclaim - query by
hostId + serviceId + envTag + address + port - reuse existing
runtimeInstanceIdif found, otherwise create a new UUID - determine the next aggregate version for
hostId|runtimeInstanceId - persist
RuntimeInstanceCreatedEventtoevent_store_t - persist the matching integration message to
outbox_message_t
The downstream processing of RuntimeInstanceCreatedEvent should perform an upsert into runtime_instance_t.
6.3 Delete Flow
When the /ws/microservice socket closes:
- locate the current runtime instance within the controller’s configured
hostId - determine the next aggregate version for
hostId|runtimeInstanceId - persist
RuntimeInstanceDeletedEventtoevent_store_t - persist the matching integration message to
outbox_message_t
The downstream projection should mark the runtime instance as disconnected or inactive in runtime_instance_t.
6.4 Update Flow
RuntimeInstanceUpdatedEvent is reserved for future use.
It should only be emitted if there is a real business need to update mutable runtime metadata after registration.
If the service address or port changes, that should normally be treated as a different runtime identity rather than an in-place update.
7. Discovery Semantics
Discovery requests on /ws/microservice and /ws/discovery use the same runtime registry state.
Discovery operations:
- do not create runtime instance lifecycle events
- do not affect runtime identity
- are session-level behavior, not aggregate lifecycle changes
On disconnect:
- a
/ws/microservicedisconnect removes the service session and emitsRuntimeInstanceDeletedEvent - a
/ws/discoverydisconnect only clears that discovery client’s subscriptions
8. Migration Impact
8.1 controller-rs
controller-rs should be updated to:
- accept
addressinservice/register - use request
addressas the canonical advertised address - keep remote socket IP for logging and audit only
- validate JWT
hostclaim against controller configuration - allow discovery requests on
/ws/microservice - keep
/ws/discoveryfor discovery-only clients - move runtime instance persistence toward the Light Portal aggregate and tenant model
8.2 light-controller
light-controller already accepts request address with remote-address fallback. It should move to the same stricter tenant model:
- controller-configured internal tenant key
hostId - JWT
hostclaim match required - one tenant per controller instance
8.3 portal-registry
portal-registry should be simplified to:
- send one
service/registerpayload shape to both backends - use
/ws/microserviceas the only channel for service registration and service-owned discovery - stop relying on a separate service-side discovery token for normal service use
8.4 Control Plane Consolidation
Transition the Portal UI from separate REST polling and event sockets to the unified /ctrl/mcp channel. Real-time hydration and updates should be delivered via MCP notifications.
9. Summary
The target model is:
- one controller instance per tenant
- one service socket on
/ws/microservice - one discovery-only socket on
/ws/discoveryfor non-service clients - one unified control plane socket on
/ctrl/mcpfor the Portal UI and AI agents - one shared registration payload for all controller backends
- client-supplied
addressas the canonical service address - controller-configured
hostIdenforced by validating it against the JWThostclaim - runtime instance lifecycle persisted with existing runtime instance events and aggregate versioning
- administrative actions and real-time dashboard updates consolidated into MCP tools and notifications
Product
MCP Gateway
Features
- Unified Access Point: Aggregates multiple backend MCP servers into a single endpoint, allowing AI agents to connect to one URL instead of managing separate connections for every tool.
- Authentication & Authorization: Centralizes security by enforcing OAuth 2.1, SAML, or OIDC flows. It manages identity propagation, ensuring an agent only has the permissions of the specific user it is acting for.
- Granular Access Control (RBAC/ABAC): Restricts which teams, users, or agents can see and use specific tools. For example, a marketing agent might see social media tools but not database administration tools.
- Observability & Audit Logging: Records every tool call, parameter, and response. These logs are essential for security auditing, compliance (like SOC 2 or HIPAA), and debugging agent behavior.
- Privacy & Data Masking: Automatically detects and redacts PII (Personally Identifiable Information), secrets, or sensitive data before it reaches the AI model or the backend server.
- Protocol & Transport Translation: Converts between different MCP communication methods, such as bridging local stdio servers (running in containers) to remote HTTP/SSE clients.
- Intelligent Routing & Load Balancing: Directs requests to the appropriate server based on the tool name or semantic intent. It also handles retries, circuit breaking, and failovers to keep the system reliable.
- Session Management: Maintains “sticky” sessions so that multi-step agent workflows stay connected to the same server context, preventing state loss.
- Tool Filtering & Throttling: Limits the number of tools exposed to an agent to prevent “context bloat” and applies rate limits to prevent agents from overloading backend systems.
Intelligent Routing
Implementing Intelligent Routing & Load Balancing in an MCP (Model Context Protocol) Gateway is a fascinating architectural challenge. Because MCP requests are typically sent to a single endpoint (e.g., via JSON-RPC or a single SSE connection) rather than standard RESTful URLs, traditional URL-based API gateway routing will not work.
To implement this feature, you need to break it down into three distinct architectural pillars. Since you are working in the NetworkNT (Light-4j) ecosystem—which is built for high-throughput Java API gateways—here is exactly how you should approach this.
Pillar 1: Routing by Tool Name (Content-Based Routing)
In standard HTTP routing, the gateway looks at the URL path (e.g., /api/weather). In MCP, the gateway must look inside the JSON payload.
An MCP tool call looks like this:
{
"method": "tools/call",
"params": {
"name": "get_customer_data",
"arguments": { "customerId": "123" }
}
}
Implementation Strategy:
- Payload Interception: Create a middleware handler that parses the incoming request body (using Jackson
JsonNode). - Tool Registry Lookup: Extract the
params.name(“get_customer_data”). You need an in-memory map or a distributed registry (like Consul, which NetworkNT uses heavily) that maps tool names to backend service IDs.get_customer_data->service-id: customer-serviceexecute_sql->service-id: db-agent
- Dynamic Upstream Routing: Once the service ID is identified, mutate the request context so the gateway’s HTTP client forwards the request to the correct downstream server.
Pillar 2: Routing by Semantic Intent (AI-Driven Routing)
This is the “Intelligent” part. Sometimes the AI model (or user) doesn’t specify an exact tool name, but sends a raw prompt, and the gateway must decide which backend tool server is best equipped to handle it.
Implementation Strategy (Two Approaches):
-
Approach A: Fast LLM Classifier (Recommended for Accuracy) Intercept the request and send it to a very fast, cheap LLM (like Claude 3 Haiku or GPT-4o-mini). Provide the LLM with a list of available downstream services and ask it to output ONLY the service name based on the user’s intent. Then, route the request.
-
Approach B: Embeddings & Vector Search (Recommended for Latency/Cost)
- Pre-computation: Create a text description for every backend server/tool you have, generate vector embeddings for those descriptions, and store them in memory.
- Runtime: When a semantic request comes in, generate an embedding for the user’s intent.
- Cosine Similarity Search: Calculate the distance between the user’s request vector and your tool vectors. Route the request to the tool server with the highest similarity score.
Note: Semantic routing adds latency. You should only trigger this flow if the request does NOT contain a strict tool name.
Pillar 3: Reliability (Load Balancing, Retries, Circuit Breaking)
Because AI tool calls often hit legacy backends, databases, or third-party APIs, failure rates are higher than standard web traffic. You need robust resilience patterns.
Implementation Strategy:
-
Client-Side Load Balancing: Instead of hardcoding IPs, the Gateway should resolve the
service-id(from Pillar 1) to a list of available nodes via a discovery service (Consul/Zookeeper). Use algorithms like Round Robin or Consistent Hashing (useful if you want the same user/context to hit the same tool server to utilize caching). NetworkNT provides built-in client-side load balancing via theclustermodule. -
Retries: AI tool calls can fail due to rate limits (HTTP 429) or transient timeouts.
- Implement an exponential backoff retry mechanism.
- Caution: Only retry if the MCP tool is idempotent (e.g.,
get_weather). Do not blindly retry tools that mutate state (e.g.,process_refund) unless you have idempotency keys in place.
-
Circuit Breaking: If your
database-tool-servergoes down, requests will queue up and exhaust gateway threads.- Implement a circuit breaker (e.g., using Resilience4j in Java, or NetworkNT’s native circuit breaker).
- If a specific tool server fails 50% of the time over a 10-second window, open the circuit.
- When the circuit is open, immediately return a fast-failure to the AI model: “System error: The database tool is currently unavailable.” The AI model can then decide to apologize to the user or try an alternative tool.
-
Failover (Fallback Routing): If the primary tool server is down, the Gateway can attempt to route to a secondary cluster in a different region, or fall back to an “echo/mock” service that returns graceful degradation messages.
Summary: The Gateway Request Flow
If you build this module, the lifecycle of a request passing through the gateway would look like this:
- Ingress: Request enters the MCP Gateway.
- Intent Evaluation:
- Is
params.namepresent? -> Proceed to Step 3. - If semantic intent only -> Run Vector Search to guess the tool -> Set
params.name.
- Is
- Service Discovery: Lookup the Tool Name -> Get
Service-ID. - Load Balancing: Get healthy IPs for
Service-IDfrom Consul. Pick one node. - Execution: HTTP Client calls the target node.
- If Timeout/429: Trigger Retry logic.
- If Node Down: Mark node unhealthy, trigger Failover to another node.
- If Systemic Failure: Circuit Breaker trips, returns graceful error to the LLM.
- Egress: Result is returned back to the LLM/User.
Mcp Execution via Code
There is one of the most significant architectural shifts happening in the AI agent space right now.
Historically, orchestrators injected every single MCP tool schema into the LLM’s system prompt. If you had 50 tools, the prompt became massive, leading to high token costs, degraded reasoning (“lost in the middle” syndrome), and latency.
To solve this, coding agents (like Devin, OpenHands, Aider, etc.) are shifting to dynamic discovery and execution via code.
Here is exactly how this works and what you need to do on your MCP Gateway to support it.
How “Calling MCP via Code” Works
Instead of relying on the LLM’s native JSON tool-calling capabilities ({"name": "my_tool", "args": {...}}), the agent is given access to a secure sandbox (like a Python REPL or bash shell) and instructed to write standard code to interact with tools.
The workflow looks like this:
- The Prompt: The LLM is given a very lightweight instruction: “You have access to an MCP Gateway at
https://mcp-gateway.internal. Use themcp-clientlibrary in Python to discover and interact with tools.” - Dynamic Discovery (Script 1): The agent writes a Python script to call the gateway’s
tools/listendpoint. It prints the names of the tools to standard output (stdout). - Reading the Output: The LLM reads the stdout, identifies the tool it needs (e.g.,
execute_sql), and asks the gateway for the specific schema of just that one tool. - Execution (Script 2): The agent writes a second Python script that connects to the gateway, invokes the specific tool with the correct arguments, and prints the result.
Why this is brilliant: The LLM only consumes context for the exact tool it decides to use, right when it needs it. The context window stays tiny and focused.
Do you need to change the MCP Gateway to support this?
From a pure protocol perspective, the Gateway doesn’t care if the client is a rigid UI framework, an orchestration engine, or a Python script written by an AI 5 seconds ago. Standard MCP requests look the same.
However, because coding agents behave differently than standard orchestrators, your Gateway needs four specific features to support this pattern safely and efficiently:
1. Robust SSE (Server-Sent Events) HTTP Support
Many local MCP setups rely on stdio (standard input/output streams) to communicate. A script running in an agent’s cloud sandbox cannot use stdio to talk to your centralized enterprise Gateway.
- Gateway Requirement: Your Gateway must expose the MCP SSE transport over HTTP/HTTPS. The agent’s generated code will use HTTP libraries to connect to your gateway’s SSE endpoint to send JSON-RPC messages.
2. Advanced Search / Filtering for tools/list
If your gateway has 500 backend tools, and the agent writes a script to call tools/list, the gateway will return all 500 descriptions. If the agent prints this to stdout, it immediately bloats the context window anyway.
- Gateway Requirement: You should extend the gateway to support query-based or semantic filtering on tool discovery.
- Instead of just
tools/list, support parameters like:tools/list?query=databaseortools/list?intent=create_user. - This allows the agent to write code like:
client.search_tools("database")and only get back 3 relevant tool schemas instead of 500.
- Instead of just
3. Ephemeral Tokens & Environment Variable Injection
When an agent writes a script to call your gateway, that script needs to authenticate. Hardcoding API keys in generated scripts is a severe security risk.
- Gateway Requirement: The Gateway must validate standard OAuth/JWT tokens. You must configure the agent’s runtime environment (the docker container or REPL) to have the token injected as an environment variable (e.g.,
GATEWAY_TOKEN). - The agent’s prompt tells it: “Use
os.environ.get('GATEWAY_TOKEN')to authenticate your MCP client.” The Gateway simply validates this Bearer token as usual.
4. Aggressive Rate Limiting and Infinite Loop Protection
Human developers get tired; AI agents writing code do not. A common failure mode for coding agents is writing a while True: loop that repeatedly calls an MCP tool because of a parsing bug.
- Gateway Requirement: Since you are using NetworkNT, you must heavily utilize the
limit(Rate Limiting) module. - Implement strict API rate limiting by
client_idortoken. - If an agent script hits the gateway 50 times in 2 seconds, the gateway must return a HTTP 429 (Too Many Requests). The agent’s code will catch the exception, read the 429 error, and usually realize it needs to slow down or fix its logic.
Summary
You do not need to invent a new protocol. To support agents coding their own tool calls, you just need to ensure your Gateway operates beautifully over HTTP/SSE, provides filtered/paginated tool discovery, and is fortified with strict rate limits to protect against runaway AI loops.
Observability & Audit Logging
Privacy & Data Masking
JSONPath vs JSON Pointer
Other Masking Method
Reversible Data Tokenization
The MCP Gateway provides robust Data Tokenization to safely invoke external MCP tools and LLMs without exposing sensitive Personally Identifiable Information (PII) like SSNs, credit card numbers, or proprietary business identities.
While the standard mask module is destructive (replacing data with asterisks), Tokenization replaces sensitive data with format-preserving proxy tokens (e.g., TK-1234). This allows the LLM to still reason about identity relations semantically, while permitting authorized parties to later reverse the token to the original value using the tokenization.lightapi.net service.
Dual-Layer Protection Strategy
The MCP Gateway employs tokenization and masking directly inside the McpHandler execution layer before it ever reaches external network boundaries.
1. Request Tokenization (Protecting External Tools / LLMs)
If the backend or external MCP tool does not inherently require the real PII to function, the Gateway intercepts the incoming tools/call JSON payload and evaluates it against the Tool’s Schema. If a field is explicitly marked for tokenization ("x-tokenize": <schemeId>), the Gateway calls the Tokenization Service to exchange the real value for a proxy token before invoking the tool adapter.
2. Response Masking (Global Rules)
For data exiting a backend that could unintentionally contain PII, the Gateway utilizes predefined paths inside mask.yml to automatically scrub or tokenize the specific fields inside the result JSON payload before returning it to the context window of the LLM.
Schema Configuration
To enable Tokenization for an external tool, append the "x-tokenize": <schemeId> attribute to the properties in the inputSchema configuration of your MCP Tool Registry.
Note: The schemeId directly correlates to the token generation algorithms mapped inside your tokenization.lightapi.net API (for instance, schemeId: 1 might be LNT4).
{
"name": "lookup_user",
"description": "Searches for a user by their identity.",
"inputSchema": {
"type": "object",
"properties": {
"ssn": {
"type": "string",
"x-tokenize": 2
},
"query": {
"type": "string",
"description": "Standard unstructured prompt. This will fallback to global regex regex redaction if bad data is typed."
},
"credit_card": {
"type": "string",
"x-mask": true
}
}
}
}
In this example, the ssn is fully tokenized so it can be reversely searched later, whereas the credit_card is permanently masked using the Gateway’s destructive regex scrubbing.
Architecture & Transport
The MCP Gateway handles these exchanges using an ultra-low latency TokenizationService built natively using light-4j’s Http2Client SimplePool architecture.
sequenceDiagram
participant LLM Client
participant Router as MCP Gateway (McpHandler)
participant Token as Tokenization Service (tokenization.lightapi.net)
participant Tool as Target Backend
LLM Client->>Router: tools/call { "ssn": "987-65-4321" }
Router->>Router: Parse Schema for `x-tokenize`
Router->>Token: POST /token { "value": "987-65-4321", "schemeId": 2 }
Token-->>Router: "TK-987654321"
Router->>Tool: tool.execute( { "ssn": "TK-987654321" } )
Tool-->>Router: Result OK for TK-987654321
Router-->>LLM Client: Result OK for TK-987654321
Detokenization Ownership
The MCP Gateway does not perform detokenization (GET /token/{token}) on final streaming responses from the LLM back to the user. This reverse-lookup process must be securely executed at the outer-most architectural edge—typically by the employee-facing Frontend Application or a dedicated Egress chat router configured with explicit token.r OAuth client-credential scopes.
Protocol & Transport Translation
Session Management
Tool Filtering & Throttling
Light Gateway
SSE Passthrough
SSE passthrough is used when a client sends a normal HTTP request to Light
Gateway and the downstream service, such as a chatbot agent, returns a
text/event-stream response. The gateway keeps the response channel open and
streams downstream events back to the client.
For the design background, see SSE Support.
This is different from the SseHandler. The SseHandler owns a local SSE
endpoint in the light-4j service. SSE passthrough is proxy behavior: the gateway
does not generate the events, it forwards the downstream agent response.
chatbot client -> light-gateway -> agent service
<- text/event-stream response
When to Use It
Use SSE passthrough for APIs where:
- The client sends a normal HTTP request, often
POST /chatorPOST /agent. - The downstream service responds with
Content-Type: text/event-stream. - The response is long-lived and must not be buffered by the gateway.
- The same connection carries incremental tokens, status events, or completion events back to the client.
Do not use this feature for a gateway-owned SSE endpoint. For that case, use
SseHandler.
Configuration Fields
The same streaming fields are available in both proxy.yml and router.yml.
Use the proxy. property prefix for LightProxyHandler and the router.
property prefix for RouterHandler.
| Field | Default | Description |
|---|---|---|
streamResponseContentTypes | ["text/event-stream"] | Downstream response content types treated as streaming responses. |
streamRequestAcceptTypes | ["text/event-stream"] | Client Accept media types that mark the request as expecting a stream before downstream headers arrive. |
streamPathPrefixes | empty | Request path prefixes that should use streaming timeout behavior before downstream headers arrive. |
streamMaxRequestTime | 0 | Whole-exchange timeout for requests classified as streaming before response headers arrive. 0 disables the normal request timeout for streams. |
streamIdleTimeout | 0 | Maximum silent period between downstream streaming bytes in milliseconds. 0 disables idle timeout enforcement. |
streamResponseHeaderOverwrite | ["Content-Type","Cache-Control","Connection","Transfer-Encoding","Content-Encoding","Content-Length"] | Headers removed before copying downstream streaming response headers. |
The global maxRequestTime still applies to normal, non-streaming requests.
Variant 1: Direct Proxy
Use this variant when Light Gateway or a sidecar forwards all matched requests
to configured downstream hosts through LightProxyHandler.
proxy.yml:
enabled: true
hosts: http://agent-service:8080
maxRequestTime: 1000
streamResponseContentTypes:
- text/event-stream
streamRequestAcceptTypes:
- text/event-stream
streamPathPrefixes:
- /chat
- /agent
streamMaxRequestTime: 0
streamIdleTimeout: 0
streamResponseHeaderOverwrite:
- Content-Type
- Cache-Control
- Connection
- Transfer-Encoding
- Content-Encoding
- Content-Length
metricsInjection: false
This configuration disables the whole-exchange request timeout for /chat and
/agent streams while keeping maxRequestTime at 1000 ms for normal proxy
requests.
Variant 2: Router
Use this variant when the gateway uses RouterHandler for service discovery,
URL rewriting, method rewriting, or multiple downstream services.
router.yml:
maxRequestTime: 1000
pathPrefixMaxRequestTime:
/v1/report: 30000
streamResponseContentTypes:
- text/event-stream
streamRequestAcceptTypes:
- text/event-stream
streamPathPrefixes:
- /v1/chat
- /v1/agent
streamMaxRequestTime: 0
streamIdleTimeout: 0
streamResponseHeaderOverwrite:
- Content-Type
- Cache-Control
- Connection
- Transfer-Encoding
- Content-Encoding
- Content-Length
metricsInjection: false
pathPrefixMaxRequestTime is still useful for non-streaming long-running APIs.
For SSE endpoints, prefer streamPathPrefixes so the request uses streaming
timeout behavior from the beginning of the exchange.
Variant 3: Response Header Detection Only
If the downstream agent returns response headers quickly, the default response content-type detection may be enough.
streamResponseContentTypes:
- text/event-stream
streamPathPrefixes:
streamMaxRequestTime: 0
With this configuration, the request starts with the normal maxRequestTime.
When the downstream response arrives with Content-Type: text/event-stream, the
gateway switches to streaming response handling and preserves the downstream SSE
headers.
Use this only when the agent sends SSE response headers before the normal request timeout expires.
Variant 4: Client Accept Header Detection
Most browser EventSource clients and many chatbot clients can send:
Accept: text/event-stream
The default streamRequestAcceptTypes value detects this and applies
streamMaxRequestTime before the downstream response headers arrive.
streamRequestAcceptTypes:
- text/event-stream
streamMaxRequestTime: 0
This is useful when the same path can return different response types and the client explicitly asks for SSE.
Variant 5: Path Prefix Detection
Some clients do not send an Accept: text/event-stream header. For chatbot
POST APIs, path-prefix detection is usually the safest configuration.
streamPathPrefixes:
- /chat
- /v1/chat
- /v1/agents/
streamMaxRequestTime: 0
Any request whose path starts with one of these prefixes is treated as a stream candidate before downstream response headers arrive. If the downstream service returns a JSON error response instead of SSE, the response body is still proxied normally; the prefix only changes the timeout behavior before response headers exist.
Variant 6: Bounded Stream Lifetime
Use streamMaxRequestTime when streams must have a hard maximum lifetime.
streamPathPrefixes:
- /chat
streamMaxRequestTime: 300000
streamIdleTimeout: 0
This allows up to five minutes for requests classified as streaming before response headers arrive. After the timeout expires, the gateway closes the exchange. This is useful for short chatbot completions where indefinite streams are not allowed.
Variant 7: Idle Timeout
Use streamIdleTimeout when a stream may stay open for a long time but should
be closed if the downstream service stops sending bytes.
streamPathPrefixes:
- /chat
streamMaxRequestTime: 0
streamIdleTimeout: 60000
This allows an unlimited stream lifetime but closes the stream after 60 seconds with no downstream bytes. Set this value higher than the downstream agent’s expected keep-alive or heartbeat interval.
Header Handling
For streaming responses, the gateway removes the configured
streamResponseHeaderOverwrite headers before copying headers from the
downstream response. This allows the downstream Content-Type: text/event-stream header to replace any earlier default such as
application/json.
Keep the default overwrite list unless there is a specific reason to preserve a header.
Content-Length should not be used for SSE because the response length is not
known in advance. Compression is also not recommended for the SSE chain unless
it has been tested with the target clients.
Handler Chain
SSE routes should use a narrow handler chain. Do not place body-consuming, response-buffering, response-transforming, or response-compressing handlers in the SSE chain.
Recommended handlers:
CorrelationHandlerTraceabilityHandler, if used by the deploymentAuditHandler, if it does not read or buffer the response bodySecurityHandlerorUnifiedSecurityHandlerCorsHttpHandler, if browser clients call the endpoint directlyHeaderHandler, for request/response headers that do not conflict with SSERouterHandlerorLightProxyHandleras the terminal handler
Avoid these handlers for SSE routes:
BodyHandlerDumpHandlerwith response dumpingResponseInterceptorInjectionHandler- Response transformers
- Response cache handlers
ResponseEncodeHandler- Metrics injection for the SSE chain
Example handler.yml chain:
chains:
sse:
- correlation
- traceability
- security
- cors
- router
For direct proxy deployments, replace router with proxy.
Environment Property Examples
For container deployments, the list values can be supplied as JSON-style strings.
Direct proxy:
proxy.streamPathPrefixes: '["/chat","/agent"]'
proxy.streamMaxRequestTime: 0
proxy.streamIdleTimeout: 60000
proxy.metricsInjection: false
Router:
router.streamPathPrefixes: '["/v1/chat","/v1/agent"]'
router.streamMaxRequestTime: 0
router.streamIdleTimeout: 60000
router.metricsInjection: false
Verification
A quick manual verification can be done with curl:
curl -N \
-H 'Accept: text/event-stream' \
-H 'Content-Type: application/json' \
-d '{"message":"hello"}' \
http://localhost:8080/chat
The response should include Content-Type: text/event-stream and events should
arrive incrementally without waiting for the downstream agent to finish the
entire response.
Example
Light-websocket-4j
LLM Chat Server
The llmchat-server is an example application demonstrating how to build a real-time Generative AI chat server using light-genai-4j and light-websocket-4j.
It uses the genai-websocket-handler to manage WebSocket connections and orchestrate interactions with an LLM backend (configured for Ollama by default).
Prerequisites
- jdk 11 or above
- maven 3.6.0 or above
- Ollama running locally (for the default configuration) with a model pulled (e.g.,
qwen3:14borllama3).
Configuration
The server configuration is consolidated in src/main/resources/config/values.yml.
Server & Handler
The server runs on HTTP port 8080 and defines two main paths:
/: Serves static web resources (the chat UI)./chat: The WebSocket endpoint for chat sessions.
handler.paths:
- path: '/'
method: 'GET'
exec:
- resource
- path: '/chat'
method: 'GET'
exec:
- websocket
GenAI Client
Dependencies are injected via service.yml configuration (in values.yml). By default, it uses OllamaClient.
service.singletons:
- com.networknt.genai.GenAiClient:
- com.networknt.genai.ollama.OllamaClient
Ollama Configuration
Configures the connection to the Ollama instance.
ollama.ollamaUrl: http://localhost:11434
ollama.model: qwen3:14b
WebSocket Handler
Maps the /chat path to the GenAiWebSocketHandler.
websocket-handler.pathPrefixHandlers:
/chat: com.networknt.genai.handler.GenAiWebSocketHandler
Running the Server
-
Start Ollama: Ensure Ollama is running and the model configured in
values.ymlis available.ollama run qwen3:14b -
Build and Start:
cd light-example-4j/websocket/llmchat-server mvn clean install exec:java
Usage
Web UI
Open your browser and navigate to http://localhost:8080. You should see a simple chat interface where you can type messages and receive streaming responses from the LLM.
WebSocket Client
You can also connect using any WebSocket client (like wscat):
wscat -c ws://localhost:8080/chat?userId=user1&model=qwen3:14b
Send a message:
> Hello
< Assistant: Hi
< Assistant: there!
...
The server streams the response token by token (buffered by line/sentence for better display).
LLM Chat Gateway
The llmchat-gateway is an example application that demonstrates how to usage websocket-router to create a gateway for the LLM Chat Server.
It acts as a secure entry point (HTTPS) that proxies WebSocket traffic to the backend chat server.
Architecture
- Gateway: Listens on HTTPS port 8443. Serves the static UI and routes
/chatWebSocket connections to the backend. - Backend:
llmchat-serverrunning on HTTP port 8080. - Routing: Uses
WebSocketRouterHandlerto forward messages based on path or serviceId. Also usesDirectRegistryfor service discovery.
Configuration
The configuration is located in src/main/resources/config/values.yml.
Server & Handler
Configured for HTTPS on port 8443.
server.httpsPort: 8443
server.enableHttp: false
server.enableHttps: true
handler.paths:
- path: '/'
method: 'GET'
exec:
- resource
- path: '/chat'
method: 'GET'
exec:
- router
WebSocket Router
Maps requests to the backend service.
websocket-router.pathPrefixService:
/chat: com.networknt.llmchat-1.0.0
Service Registry
Uses DirectRegistry to locate the backend server (llmchat-server) at http://localhost:8080.
service.singletons:
- com.networknt.registry.Registry:
- com.networknt.registry.support.DirectRegistry
direct-registry:
com.networknt.llmchat-1.0.0:
- http://localhost:8080
Running the Example
- Start Ollama: Ensure Ollama is running.
- Start Backend:
From
light-example-4j/websocket/llmchat-server:mvn exec:java - Start Gateway:
From
light-example-4j/websocket/llmchat-gateway:
(Note: ensure you have built it first withmvn exec:javamvn clean install)
Usage
Open your browser and navigate to https://localhost:8443.
- You might see a security warning because the
server.keystoreuses a self-signed certificate. Accept it to proceed. - The chat interface is served from the gateway.
- When you click “Connect”, it opens a secure WebSocket (
wss://) to the gateway. - The gateway routes frames to
llmchat-server, which invokes the LLM and streams the response back.
Tutorial
common
Docker Remote Debugging
Light-4j applications are standalone Java applications without any JEE container and can be debugged inside IntelliJ or Eclipse directly. Most of the time, we are going to debug the application before dockerizing it to ensure it is functioning. Sometimes, an application works when starting with java -jar xxx.jar but when running with a docker container, it stops working. Most cases, this is due to the docker network issue.
In case this happens, it would be great if we can debug the application running inside the Docker container remotely from your favorite IDE. In this tutorial, we are going to walk through the steps with IntelliJ IDEA. For developers who are using Eclipse, the process should be very similar.
Create Dockerfile-Debug
First, we need to create a Dockerfile with debug agent in the java command line.
Here is the original Dockerfile for light-router.
FROM openjdk:11.0.3-slim
ADD /target/light-router.jar server.jar
CMD ["/bin/sh","-c","java -Dlight-4j-config-dir=/config -Dlogback.configurationFile=/config/logback.xml -jar /server.jar"]
Let’s create a Dockerfile-Debug with the following modifications. If necessary, we are going to create this Dockerfile-Debug from light-codegen for all generated projects.
FROM openjdk:11.0.3-slim
ADD /target/light-router.jar server.jar
CMD ["/bin/sh","-c","java -agentlib:jdwp=transport=dt_socket,server=y,suspend=y,address=*:5005 -Dlight-4j-config-dir=/config -Dlogback.configurationFile=/config/logback.xml -jar /server.jar"]
Build Debug Image
Once the Dockerfile-Debug is created, let’s build an alternative image with it locally without publishing it to Docker Hub.
docker build -t networknt/light-router:latest -f ./docker/Dockerfile-Debug .
Prepare Environment
Before running the docker-compose, we need to make sure that Consul docker-compose is running (if your service depends on it).
cd ~/networknt/light-docker
docker-compose -f docker-compose-consul.yml up -d
Now, the local image for the light-router is the debug image. Let’s take a look at the docker-compose file that started two instances of light-codegen and light-router. This file can be found in the light-config-test along with all configurations.
version: "2"
services:
2_0_x:
image: networknt/codegen-server-1.0.0
volumes:
- ./2_0_x/config:/config
- ./2_0_x/service:/service
ports:
- 8440:8440
environment:
- STATUS_HOST_IP=${DOCKER_HOST_IP}
network_mode: host
1_6_x:
image: networknt/codegen-server-1.0.0
volumes:
- ./1_6_x/config:/config
- ./1_6_x/service:/service
ports:
- 8439:8439
environment:
- STATUS_HOST_IP=${DOCKER_HOST_IP}
network_mode: host
light-router:
image: networknt/light-router:latest
environment:
- STATUS_HOST_IP=${DOCKER_HOST_IP}
network_mode: host
ports:
- 443:8443
volumes:
- ./router/config:/config
- ./codegen-web/build:/codegen-web/build
Start Debugging
Before starting the docker-compose, we might need to run docker-compose rm to remove the reference to the old image.
cd ~/networknt/light-config-test/light-codegen
docker-compose up
You will notice that the light-router application within the container is not up and running but outputs the following line:
light-router_1 | Listening for transport dt_socket at address: 5005
This line indicates that the application inside the container is waiting for IDE debug connection on port number 5005. Let’s open the light-router project in IDEA. To set up the remote debug, follow the steps below.
-
Click
Runtab andDebug Configurationmenu. -
Click
+to add a remote application calledremote. -
Setup the parameters as below:
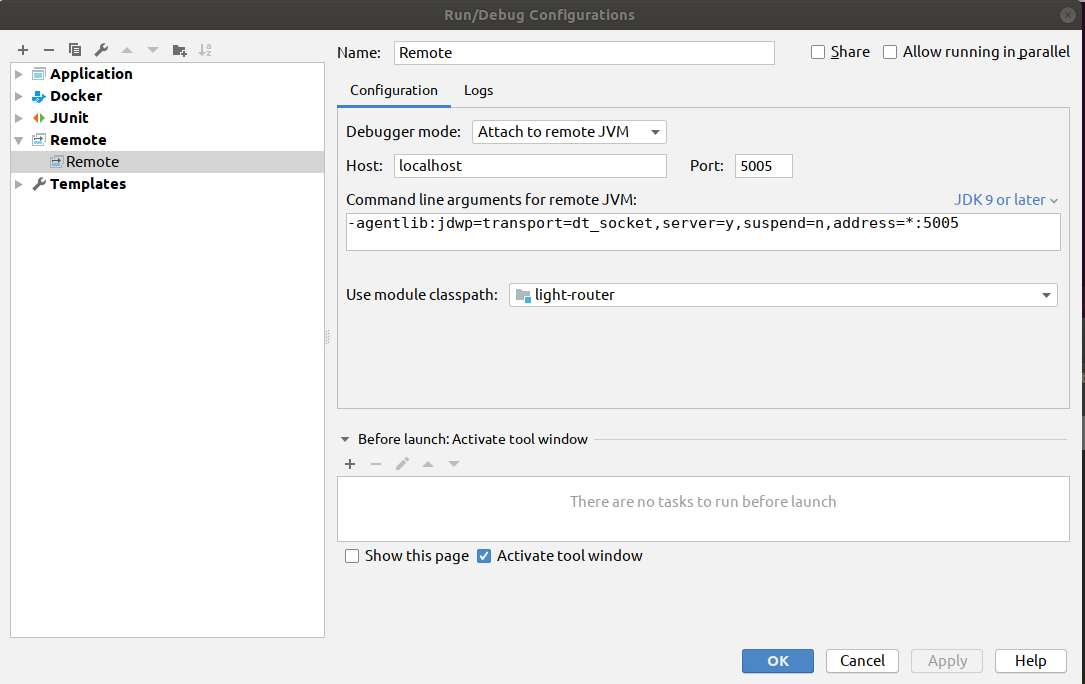
-
Click
ApplyandOKto close the popup window. -
Click
Runtab andDebugmenu and selectremotein the popup dropdown to start the debug session.
You can set the breakpoints in the initialization code if you want to debug the logic during the server startup. Once the debug session is started, the light-router application inside the container will be started and running as usual. The rest of the debug is the same as you are debugging a standalone application.
Support
GitHub
Light Bot
Handling Internal Tools in Mirrored Repositories
When open-source repositories hosted on GitHub are replicated to internal customer environments (e.g., Bitbucket), customers often need to add internal directories for commercial scanning tools (code coverage, security vulnerabilities, etc.).
This document outlines strategies to keep internal tooling isolated from the upstream public GitHub repository to avoid accidental leaks or merge conflicts.
Strategies for Isolation
1. The “Wrapper Repository” (Git Submodules) — Highly Recommended
Instead of adding the internal commercial tooling directly into the mirrored GitHub repository, the customer can create a brand-new internal Bitbucket repository that acts as a “wrapper.”
- How it works: The customer creates a new Bitbucket repo. They commit their commercial tooling configurations, scan scripts, and extra directories to this repository. Then, they add your GitHub open-source repository as a Git Submodule inside it.
- The pipeline: When their CI/CD pipeline runs, it checks out the wrapper repository, pulls down the submodule (your open-source code), and runs the scanning tools against the submodule directory.
- Why it’s great: Your GitHub repository remains a 100% exact mirror. The customer never has to worry about accidentally pushing internal files back to your GitHub repo, and you never have to worry about merge conflicts during updates.
2. The Upstream/Downstream Branching Strategy
If the customer insists on having the internal files and the open-source code tracked in the exact same repository, they must use a branch isolation strategy.
- How it works:
- The customer maintains a
mainbranch that is a strict mirror of your GitHub repository. Nothing internal is ever committed here. - They create an
internal-mainbranch branched offmain. - They commit their internal scanning directories and files to
internal-main.
- The customer maintains a
- Syncing updates: When you release new code on GitHub, the customer pulls those changes into their
mainbranch, and then runsgit merge maininto theirinternal-mainbranch. - Contributing back: If the customer finds a bug and wants to push a fix back to your GitHub, they branch off
main(notinternal-main), commit the fix, and push that feature branch back to GitHub. - Why it’s great: It utilizes standard Git workflows. The internal directories literally do not exist in the history of the
mainbranch, so they can never be synced back to GitHub.
3. Externalize the Configuration in CI/CD
Often, security and code-coverage tools require a configuration file (like a .sonar folder, Fortify configs, or pipeline YAMLs). Instead of committing these directly to the source code repository, the customer can inject them at runtime.
- How it works: The customer keeps their Bitbucket mirrored repository completely identical to your GitHub repo. They place the scanning tool directories into a second, completely separate Bitbucket repository.
- The pipeline: During their CI/CD build process, the pipeline clones the mirrored open-source repo, then immediately clones the “tooling” repo, copies the required directories into the workspace, and runs the scan.
- Why it’s great: It entirely decouples the source code from the infrastructure/tooling, avoiding any Git history modifications.
4. Gitignore (Only if the directories are generated, not committed)
If the commercial tools simply generate directories (like an out/, coverage/, or reports/ folder) and those folders do not actually need to be tracked in Bitbucket’s version control:
- How it works: Ensure the customer does not run
git addon those directories. - They can add the directories to a global
.gitignoreon their CI/CD build servers, or add.git/info/excludelocally in their Bitbucket repo environment. - Note: You could add these commercial directory names to the
.gitignorefile hosted on your public GitHub. It doesn’t hurt your open-source repo to ignore standard commercial tool outputs (e.g., adding.sonar/to your public.gitignore), and it prevents the customer from accidentally committing them.
Recommendation for Customers
“To ensure seamless updates from our upstream GitHub repository without merge conflicts or accidentally leaking your internal configurations, we recommend not committing your tooling directories directly to the mirrored source code branch. Instead, either keep your tooling in a parent wrapper repository using Git Submodules, or maintain a distinct internal branch that merges updates from our main branch but is never pushed back upstream.”
Security
NetworkNT publishes general security information at networknt.com/security.html.
This section contains security notes that need more project-specific context than a generic vulnerability scanner result can provide. The goal is to explain whether a reported issue is applicable to NetworkNT components, what deployment conditions are required for exploitation, and what technical controls can mitigate the issue.
Known Vulnerabilities
This page tracks known vulnerability reports that can appear in dependency scans and require NetworkNT-specific applicability analysis.
Undertow Request Smuggling CVEs
The following CVEs are all Undertow HTTP request smuggling issues in the HTTP/1.1 request parsing layer. They are relevant to light-4j because light-4j uses io.undertow:undertow-core as its embedded HTTP server. As of June 10, 2026, light-4j manages undertow-core at 2.4.1.Final, and Maven Central still lists 2.4.1.Final as the latest release.
| CVE | Vulnerability pattern | NetworkNT assessment |
|---|---|---|
| CVE-2026-28367 | Non-standard header block terminator forwarded by certain proxies | Conditionally applicable; mitigated by strict edge proxy validation or by not placing Undertow behind an affected HTTP/1.1 proxy path. |
| CVE-2026-28368 | Header names interpreted differently by an upstream proxy and Undertow | Conditionally applicable; requires a proxy/backend parser mismatch. |
| CVE-2026-28369 | First header line with leading spaces interpreted differently | Conditionally applicable; requires malformed HTTP/1.1 traffic to reach Undertow through a permissive upstream proxy. |
General Applicability to light-4j
These issues should not be treated as directly exploitable in every light-4j deployment only because undertow-core appears in the dependency tree. Request smuggling requires at least two HTTP processors that disagree on where a request starts, ends, or which headers are present. A normal light-4j service that terminates client traffic itself does not have a front-end/back-end parser disagreement in the same request path.
The risk becomes relevant when a light-4j service is deployed as an Undertow origin behind an upstream HTTP/1.1 proxy, load balancer, gateway, or WAF that accepts malformed requests and forwards them to Undertow in a form Undertow interprets differently. The same inbound condition applies when a light-4j router or proxy service is placed behind another upstream proxy. The light-4j proxy modules operate on Undertow’s parsed HeaderMap and create a new outbound Undertow client request; they do not intentionally forward the original raw HTTP header block.
Standard Mitigations
Use the following controls for customer environments where scanner findings identify these CVEs:
- Prefer the default
light-4jposture:enableHttps: true,enableHttp: false,enableHttp2: true, andallowUnescapedCharactersInUrl: false. - Do not expose a
light-4jHTTP/1.1 listener directly to untrusted networks unless there is a strict edge control in front of it. - Configure upstream proxies, load balancers, gateways, and WAFs to reject malformed HTTP/1.1 requests instead of forwarding or normalizing ambiguous header syntax.
- Avoid older proxy products or legacy load balancer modes known to forward malformed HTTP/1.1 traffic to Undertow. For CVE-2026-28367, Red Hat specifically calls out older Apache Traffic Server and Google Cloud Classic Application Load Balancer configurations as examples.
- Prefer TLS and HTTP/2 between the client-facing edge and
light-4jwhere possible. If the edge terminates HTTP/2 and forwards HTTP/1.1 tolight-4j, the edge-to-origin HTTP/1.1 hop must still enforce strict request validation. - Keep
light-4jand deployment images current. At the time of this review, Maven Central did not provide a newerundertow-corerelease than2.4.1.Final, so deployment controls are still required.
Red Hat Status Context
Red Hat rates all three CVEs as Important with CNA CVSS 3.1 score 8.7 and high attack complexity. NVD lists a separate 9.1 Critical score, but the Red Hat CNA scoring is more specific to the proxy-dependent request smuggling condition.
Red Hat’s product status is not uniform across all products. Red Hat Security Data marks some undertow-core product streams, including Red Hat Data Grid 8, Red Hat Fuse 7, and Red Hat JBoss Enterprise Application Platform 7, as Will not fix, while other product streams are marked Affected or Not affected. That status supports treating these as deployment-specific findings rather than assuming every scanner match requires an immediate library replacement.
References
- Maven Central undertow-core metadata
- Red Hat Security Data JSON: CVE-2026-28367
- Red Hat Security Data JSON: CVE-2026-28368
- Red Hat Security Data JSON: CVE-2026-28369
CVE-2026-28367
Summary
CVE-2026-28367 is an Undertow request smuggling vulnerability involving a non-standard HTTP header block terminator. Red Hat describes the condition as a remote attacker sending a malformed header terminator that can be interpreted differently by certain upstream proxies and Undertow.
Red Hat rates the issue as Important with CVSS 3.1 score 8.7, using high attack complexity because exploitation depends on a compatible proxy/backend parsing mismatch. NVD also lists a 9.1 Critical score, but the Red Hat CNA score better reflects the deployment prerequisite.
light-4j Applicability
light-4j uses Undertow through io.undertow:undertow-core, so dependency scanners can report this CVE for light-4j applications.
The issue is not directly exploitable in every light-4j deployment. It requires an HTTP/1.1 request path where an upstream proxy accepts and forwards a malformed header block terminator, and Undertow interprets the forwarded bytes differently. Red Hat specifically names older Apache Traffic Server versions and Google Cloud Classic Application Load Balancer configurations as examples of proxy environments where this class of issue can matter.
The finding is not applicable, or is not exploitable, when:
- The
light-4jservice is not behind an affected HTTP/1.1 proxy or load balancer. - The client-facing edge rejects malformed HTTP/1.1 requests before they reach Undertow.
- The deployment uses HTTPS and HTTP/2 end to end, without translating malformed HTTP/1.1 traffic into the Undertow origin hop.
- The
light-4jservice is reachable only through trusted internal traffic controls that enforce strict HTTP request validation.
Mitigation
For exposed services, configure the upstream proxy, load balancer, gateway, or WAF to reject non-standard HTTP header block terminators before forwarding to light-4j. This matches Red Hat’s stated mitigation for this CVE.
For light-4j configuration, keep the default production posture:
enableHttps: trueenableHttp: falseenableHttp2: trueallowUnescapedCharactersInUrl: false
If a customer must run light-4j behind an HTTP/1.1 proxy, validate the exact proxy product and mode. The proxy must reject malformed request framing, not normalize and forward it.
Customer Response
This CVE is a deployment-dependent Undertow request smuggling issue. NetworkNT has confirmed that light-4j embeds Undertow, but exploitability requires a vulnerable upstream HTTP/1.1 proxy path that forwards malformed header termination to Undertow. In recommended light-4j deployments, HTTPS/HTTP2 is enabled, clear HTTP is disabled, and edge proxies must enforce strict HTTP request validation. When those controls are in place, the issue is not exploitable in the light-4j service.
References
- NVD: CVE-2026-28367
- Red Hat CVE page: CVE-2026-28367
- Red Hat Security Data JSON: CVE-2026-28367
- CVE Program API: CVE-2026-28367
CVE-2026-28368
Summary
CVE-2026-28368 is an Undertow request smuggling vulnerability involving inconsistent HTTP header name parsing. Red Hat describes the condition as specially crafted requests whose header names are interpreted differently by Undertow and an upstream proxy, allowing request smuggling when the two components disagree.
Red Hat rates the issue as Important with CVSS 3.1 score 8.7, using high attack complexity because exploitation depends on an upstream proxy/backend parser mismatch. NVD also lists a 9.1 Critical score, but the Red Hat CNA score better reflects the deployment prerequisite.
light-4j Applicability
light-4j uses Undertow through io.undertow:undertow-core, so dependency scanners can report this CVE for light-4j applications.
The issue is conditionally applicable only when malformed HTTP/1.1 requests pass through an upstream proxy, load balancer, gateway, or WAF that interprets header names differently from Undertow and forwards the ambiguous request to the light-4j origin. A direct client-to-Undertow path does not create the front-end/back-end desynchronization required for request smuggling.
The finding is not applicable, or is not exploitable, when:
- The
light-4jservice is not deployed behind a permissive HTTP/1.1 proxy or load balancer. - The upstream proxy rejects malformed or ambiguous header names.
- The edge-to-origin hop uses strict request validation and does not forward non-compliant header syntax.
- The deployment uses HTTPS and HTTP/2 end to end, without translating malformed HTTP/1.1 traffic into the Undertow origin hop.
Mitigation
Red Hat’s public mitigation text says a broadly applicable mitigation is not available under its Product Security criteria. For light-4j deployments, the practical technical mitigation is still to remove the parser mismatch condition:
- Use a fronting proxy, load balancer, gateway, or WAF that rejects malformed HTTP/1.1 header names.
- Avoid forwarding raw, ambiguous, or normalized-but-non-compliant HTTP/1.1 requests to Undertow.
- Prefer the default
light-4jproduction posture: HTTPS enabled, clear HTTP disabled, HTTP/2 enabled, and unescaped URL characters disabled. - If the deployment requires an HTTP/1.1 hop from edge to
light-4j, test the exact edge product and configuration for strict header-name validation.
Customer Response
This CVE is not a standalone application logic issue in light-4j; it is a proxy/backend HTTP parsing ambiguity in Undertow. A scanner can flag the Undertow dependency, but exploitability requires a permissive upstream HTTP/1.1 proxy path that forwards ambiguous header names to Undertow. In deployments where the edge rejects malformed headers or uses strict HTTPS/HTTP2 request handling to the service, the issue is not exploitable in light-4j.
References
- NVD: CVE-2026-28368
- Red Hat CVE page: CVE-2026-28368
- Red Hat Security Data JSON: CVE-2026-28368
- CVE Program API: CVE-2026-28368
CVE-2026-28369
Summary
CVE-2026-28369 is an Undertow request smuggling vulnerability involving malformed HTTP request headers. Red Hat describes the condition as an HTTP request where the first header line starts with one or more spaces. Undertow strips the leading spaces, which can cause it to interpret the request differently from an upstream proxy.
Red Hat rates the issue as Important with CVSS 3.1 score 8.7, using high attack complexity because exploitation depends on an upstream proxy/backend parser mismatch. NVD also lists a 9.1 Critical score, but the Red Hat CNA score better reflects the deployment prerequisite.
light-4j Applicability
light-4j uses Undertow through io.undertow:undertow-core, so dependency scanners can report this CVE for light-4j applications.
The issue is conditionally applicable only when a malformed HTTP/1.1 request is accepted by an upstream proxy and forwarded to Undertow in a way that causes the proxy and Undertow to disagree about request boundaries or headers. If the upstream component rejects the malformed header line, the request does not reach Undertow and the smuggling condition is removed.
The finding is not applicable, or is not exploitable, when:
- The
light-4jservice is not behind an upstream HTTP/1.1 proxy that forwards malformed first-header-line syntax. - The edge proxy, load balancer, gateway, or WAF rejects header lines with leading whitespace.
- HTTPS and HTTP/2 are used end to end, without translating malformed HTTP/1.1 traffic into the Undertow origin hop.
- The
light-4jlistener is protected by network controls and only accepts traffic from trusted components that enforce strict HTTP syntax.
Mitigation
For light-4j deployments, mitigation should focus on strict request validation at the edge and conservative server configuration:
- Configure upstream proxies, load balancers, gateways, and WAFs to reject header lines that begin with whitespace.
- Do not allow a permissive edge component to normalize and forward malformed HTTP/1.1 requests to Undertow.
- Prefer the default
light-4jproduction posture: HTTPS enabled, clear HTTP disabled, HTTP/2 enabled, and unescaped URL characters disabled. - If a customer uses a legacy HTTP/1.1 proxy in front of
light-4j, verify that it rejects malformed header syntax before forwarding.
Customer Response
This CVE is a conditional Undertow request smuggling issue. light-4j may be flagged because it embeds Undertow, but the issue requires a vulnerable upstream HTTP/1.1 proxy path that forwards malformed header-line syntax to Undertow. With strict edge validation, HTTPS/HTTP2-oriented deployment, and clear HTTP disabled for untrusted access, the issue is not exploitable in light-4j.